Going Green Blog Background

Wednesday 31 October 2018

Pumpkins

Sorry I have been awol from blogging for those that follow regularly - sometimes life gets in the way.   As it is Halloween today, I thought I would share the pumpkins my grandchildren made.  All their own design and work - I am not a pumpkin carver - not in my remit - lol

Fortunately for them I do have the necessary tools to do the carving - also if they do it at my house, I get the job of clearing up!

The 6 year old had help from her eldest sister, but she did all the cleaning out herself - she wanted a puking pumpkin - so I helped her make a tongue.   When I asked what colour she wanted the tongue - I was thinking green or something - the reply was "white Nanny - he is dead"  - well that told me!


12 year old's pumpkin

9 year old's pumpkin

6 year old's puking pumpkin.
As haven't done anything with a pumpkin this year - I thought I would re-share my pumpkin from last year though.


Monday 22 October 2018

An Afternoon of Crafting

canvas elements for my apron

I had an inproptu visit from my daughter yesterday to raid some of my craft stash - namely powertex varnish and pigments and acrylic paints so that she could finish off her fairy and fairy house (created from an old coffee jar she had been given).   So we sat in the Den in the gorgeous sunshine, and whilst she painted, I made a start on painting the elements for my painting apron.

My daughter's fairy sitting ona garden torch next to my fairy house

Upcycled coffee jar as fairy house (which will contain a
battery operated tealight

A bit of fun - fairyh residing in the hanging basket!

Sunday 21 October 2018

Out Of My Comfort Zone


I was playing with my new India Inks.    Watching a demo - Lou Withers just said splodge them on and see what happens - so I did ....

I dropped the inks on to my art journal, which I had previously dampened with water.  I then sprayed with more water and also added some isopropanol and let the inks do their own thing.

When it was dry I could see faces in the painting, so I highlighted them with white pen or black pen.


To be truthful, I thought it was rubbish, but gave myself a brownie point for effort - lol!

An arty friend loved it and encouraged me to post it on my FB page, as she said it was the sort of stuff she learned to do in art college.  I also posted on a group I belong to - and member of the group (a complete stranger to me) said she loved it so much she wanted to buy it!   - well knock me down with a feather!  I couldn't believe what I was reading.

So apparently to some it is rather good - but I am still not sure.  Mind you the more I look at it, the more images I can see - so perhaps it is work in progress.  (Picasso eat your heart out - lol!_

Saturday 20 October 2018

Another Anniversary Card


This was an experiment after I watched a demo by Maria from Clarity Stamps on Hochanda, where she used a die on double sided sticky paper and adhered it to a glass jar, and then sprinkled glitter over it.

I decided I would try the idea on a card ........ perhaps I should have tried a less complicated and intricate die, as it was a time consuming and interesting task to get the backing papers off the cutout.  Not helped by the fact that I couldn't find my proper Clarity double-sided sheets, so had to use my roll of double-sided adhesive, which only has backing on one side - so I used baking parchment on the other side to run it through the gemini.  (As I type this in hindsight I realise I should have used waxed paper - not to self try that if you have to do it again).  Even so it was still tricky to get the sheets from the centre fine parts.

I persevered however, and managed to get it stuck on to the card and glittered with the blue pergamano glitter.  (Although I think there were a couple of little bits where the backing paper didn't come off completely, so a smidgen of glue was used to encourage those to stick.)

Being basically white on white and a rectangular shape on a square card, I decided it needed something else, so added some die-cut flowers out of mhy Clarity Shenandoah parchment pad, and added some pearl Nuvo drops to the centres.

The card is for my daughter and her husband, and she knows I often practice new techniques on cards for the family!

Friday 19 October 2018

Anniversary Card


A simple card using one of the Clarity aperture dies, and back with a Clarity designer paper, and a sentiment created in Craft Artist.

Thursday 18 October 2018

Owl Plaque

Picture taken with a flash to show the shine of the bacground

I had great fun building and painting this  plaque from Olifantjie.    The back had black gesso applied, and then was painted with my favourite Pebeo Blue/Black DYNA paint, and oversprayed with Montan effect in white.

The owl, branch and flowers were painted with various Amsterdam paints and for the claws I mixed some Cosmic Shimmer Fluffy Stuff with yellow acrylic to create texture on the claws.    The yes were painted with a mixture of Pebeo Vitrail and Fantasy paints to give that glassy-eyed look.  The centre of the flowers had some Nuvo drops added.     The rim was sponged with a mixture of Jade, Aqua and Clotted Cream Starlights paint.  Finally a coat of spray and shine was applied.

Another view:

Photo taken without flash which shows the marble effect spray

Tuesday 16 October 2018

Grandchildren's Cakes


My three youngest grandchildren decided they wanted to make cakes with their Dad at the weekend, and I would share their efforts.     They went out with him and bought all the ingredients, and "toppings".  On Sunday they all descended on me so that I could supervise the icing   (or was it more that they could mess my kitchen up and I could do all the washing up  - lol!)  I wasn't really needed apart from initially showing them how to use a spatula to apply the icing.   The rest was up; to them.
Here are some close ups of the cakes.   

Lemon sponge with poppy seeds
(I think this would make a good Christmas cake idea)

You can't see the buttercream underneath, but she did a pattern on it with a fork
and a knife drawn through it to created a "feathered" look

The six yer old needed a little hand operating the nozzle on the chocolate icing as
it was a little hard for her - so I pressed and she guided - at least she managed some leaves. 

Even my son made a cake for a friend's birthday.


Now do you think I can get them to make and ice the family Christmas Cakes this year ?

Monday 15 October 2018

Robbie Robot


At least he can kneel!
Well I have finished painting the robot, albeit things didn't quite go to plan.  I got interrupted when painting him, and although I had freed up all his joints as I went - I seemed to have overlooked his hip joints.    When I went to pose him and take his photo I managed to break his hip joints.

I tried to remove his hip pin, but it was beyond repair, and knowing how difficult it was to assemble his legs, I abandoned the idea, and just took the hacksaw to the spindle and stuck his hips on.   As you can see  he can kneel, (and he can stand up straight - he just can't sit any more!)


A picture of what he looked like standing before I had finished painting him


a posed picture of him sitting before  I operated on his hips
(they aren't actually attached in this photo!)
Such a shame I messed it up.  I was a tad disappointed as he had been clear gessoed before painting to prevent paint leaking into his joints (and they all moved at this stage).     Hey ho worse things happen at sea as they say - and I did manage to remedy the situation, although not as perfectly as I would have liked.

For info he was painted with Indigoblu translucent paints (I wanted some of the detail on the MDF to show through, particularly on his body).  I then overpainted with Starlights paints - sort of dry brushing the colour on, and then added some Pebeo gilding wax on the elements that appear metallic.
His eyes were painted with Pebeo Ceramic and Fantasy paints.  (Really pleased with the effect).

Sunday 14 October 2018

Male Birthday Card


It's one of my nephew's birthdays, and oh how I struggle with mens cards.   However, I know he loves to go to Vegas, so a quick search on the net I found this one - hopefully it will give him a giggle.

Created in that great standby Craft Artist using a plaid backing paper from the programme, and adding the wording using the cinema gothic font.

Saturday 13 October 2018

A Beautiful October Day


I was lucky enough to be able to go to the coast last Wednesday.  It was a glorious warm October day, and my son was on leave from work, so I suggested a trip to the coast.   This was the first time I have been to the beach this year!

Look at that gorgeous blue sky and sea - you can understand why I needed to share with you.


Although we have often drive down to this part of the coast, we have never really gone for a stroll - well not for a number of years anyway.


There is a lovely cafe with a good reputation, and we decided to have a cuppa and a cake there - wow the choice of cakes was amazing.


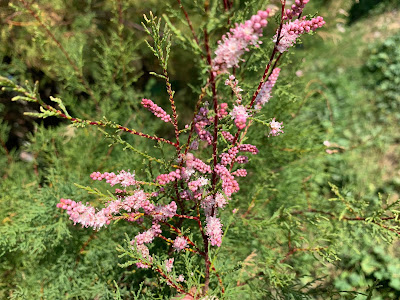
On our walk along the beach, we came across these plants - I wish I knew what they were - they are so pretty.   Part of the path actually goes through a tunnel of them.


If anybody knows what they are called - please feel free to leave a comment to tell me.

Friday 12 October 2018

MDF Robot


sitting down

At last I got around to building my Clevercut Robot.    I will confess that I did struggle with this one - he is quite complex, and I did struggle with the instructions sometimes.  However, it was worth it and he is quite cute.    Now to decide how I will paint him.


standing up, and poised to show all his swivel joints.

Thursday 11 October 2018

MDF Tea Light covers


Another little Halloween project.  Very simple and easy to put together.  Painted with acrylic paints.


Monday 8 October 2018

Dead of the Dead Mask


I attempted to paint a Day of the Dead Mask.  Hopefully it isn't too bad, bearing in mind that I can't draw for toffee, and currently can't see where a pen meets paper (or in this case mdf),  and this was done freehand using some inspiration from the internet.  I used Posca pens, Starlight paints and Indigo blue paint.   I also added a little "grey" shading with distress oxides.  The teeth were overpainted with phosphorescent gel.    Finally a thin coat of multipurpose gel medium was sponged on and a little diamond frost sprinkled over the surface whilst wet.


Reverse side


The other side in case you missed it yesterday - and I have actually done a bit more to it since then - though you probably can't see that! - I gave it a thin coat of multipurpose gel medium again with a little of the sparkle added and then over-painted all the white parts with phosphorescent gel medium.
Hopefully when "charged" the paint should glow nicely in the dark.   I may be scaring the trick and treaters this year!

Sunday 7 October 2018

A little play in the Den - Gesso rules!


I managed to get up to the Den this afternoon in the sunshine, after a couple of days of sorting out eyes - check up at hospital on Friday  (got the all clear to have eye test for new specs) and also got told that they were going to do the other eye in the next few months - that was a surprise as everything I had read said the local authority were only paying for one eye!

I managed to get a cancelled appointment at the optician yesterday, so am now on countdown to getting new specs .... can't wait!   Couldn't do any crafting as such miserable weather and so dark!

Anyway back to the Den ..... I made a start on my challenge project.  First picture shows the box.  I applied some texture past to the "pages" and the painted on some gold gesso.  I also did the inside, but that may not stay like that.  the rest of the book box got an application of black gesso.


White gesso on  3 of the 6 ATC greyboards

I mentioned that I had the idea of doing double-sided ATC cards.  So I applied white gesso to one side and black to the other.

I also had a play with one of the MDF skills I have. I was going to paint it with flowers etc in The Day of the Dead vain, but decided to play with the side with the markings on first to see how it would turn out,  which was a bit of a challenge as eyes are still a bit iffy until I get the new specs, as cannot see detail that easily - or more to the point I can't see the end of the paintbrush!  Here is the result, just painted with white acrylic and a little black gesso.  I didn't like the black initially as it was to blak, but a little blending with some of the white, water, and in some cases that good old tool called a finger, I was pretty happy with the result.

I have painted white acrylic on the reverse side - so that will have the Day of the Dead flowers etc painted on it.


Friday 5 October 2018

Happy Post

The Book Box

Another parcel I received yesterday was marked "Happy Post" and was a  present from the lovely Lou Withers.  It contained this lovely MDF Book Box containing 6 ATC sized grey boards.   This little present came with the proviso that I decorate it and post pictures on the Junk Journals and Mindful Art Facebook page.

Obviously I am accepting the challenge, and my mind is in overdrive as to how I will decorate them.  I did sit and make up the box this morning ... so have made a start.


The inside showing the ATC cards
For those that follow my blog and do not know what ATC stands for; it stands for Artists Trading Cards.   These are normally playing card size, made of card, tand show off the artist's work.  They are quite often made in a group of related designs.   A sticker is put on the back denoting details of the artist, and the name of the design etc and whether is is part of a series.

Obviously being grey board these are a bit thicker - and I don't think I will put details on the back, but decorate both sides.   My initial instinct is to coat one side with white gesso and the other with black gesso, and do similar techniques, but on the different basecoats..  Watch this space as they say!

Thursday 4 October 2018

Mini MDFhouses


How cute are these little houses frin Samantha K Crafts.    They arrived this morning, and I just had to make them up.   If you look closely you will see that som of them have little holes in the top, so they could be hung on a Christmas Tree.   Also apart from the one that looks like a pagoda, the roof lifts up so you could put a little sweet inside them.    They would also look good inside baubles or bell jars with some imitation trees, moss etc. (This may well be the route I go down).

I also have to decide whether to leave them as they are or do some colouring on them, and make them look like little "gingerbread" houses.

Wednesday 3 October 2018

A sad and happy day

Today's blog is not craft related exactly.  It is sad but also a little special.  It is my wedding anniversary, and sad because I lost my husband a few days after our anniversary three years ago,and I miss my soulmate so much;  but happy because one of my bridesmaids is coming over to visit and taking me out for lunch.   

Every Christmas we both say in our cards that we must catch up, but somehow never seem to make it.  Life gets in the way.   She was coming over last week, but Granny duties called, but the new arrangement makes it really special.    We haven't seen each other for over nearly 40 years, probably about the time I gave up work to have my son!

So I am really excited.

all those years ago! (the tallest one is the one coming to visit)
By the way I made all the dresses in the photo ... mine and the bridesmaids.

I have also made a copy of  our wedding video as a present for her, as she was saying that she had no photos of herself when younger ( I am not sure of the whole story behind that)., and was telling her granddaughter about her bridesmaid dress.     

I also did a bit of crafting  by creating a collage of photos for the label for the DVD .- I hope she likes it.

I have also lost contact with the other "grown up" bridesmaid.  She moved to Canada although we did keep in contact for a while.  The two little ones, I am in contact with regularly on FB, one was my goddaughter, and the other my niece.

Tuesday 2 October 2018

Canal Boat Card


Back to using Craft Artist for this card - one of those difficult ones for a man!   As I know he recently had a holiday with his family on a canal  boat, this seemed the obvious choice this year.

I used one of the layouts provided but then added some extra elements.  I normally add a name and a sentiment on the front, but for once I didn't.

Monday 1 October 2018

Butterfly Card and experimenting


I seemed to have lost my moo yesterday.  The weather was very grey, and at this time of year I tend to be a bit down as my Wedding Anniversary is in a few days, and I miss my husband most then.  However I knew I had a card to make ..... but I had a little play anyway.

This DaliART butterfly stamps were in the front of my stamp box , so I thought I would use that.   I also have some John Next Door Media Plates (sort of gelli plates), which I had only played with in my art journal - so one of those  came out as well.
I placed the media plate on my stamping platform and inked it with a brayer and Izink Sky blue pigment ink.  I then took one of the little butterflies from the collection and stamped it into the ink on the media plate to remove the colour.  The result was a border with butterflies.  I then applied clear embossing powder and heated this up.

I then stamped the large butterfly with black Nuvo ink (again using the stamping platform - where would we be without this - it makes life so much easier).

As I was watching a demo on Spectrum Noir Metallic Pens, I decided to get mine out and colour the butterfly with them.  I can see from the photo that my colouring is not what it used to be.   I do struggle to see to do this nowadays (roll on the new glasses next month).   Tiz a shame as I love colouring.  However, although the colouring looks dodgy in the photo, it looks ok on the card - or at least I think so!
I did a few highlights with a fine white Gelly Roll pen, and then when the image was dry I damped it with a wet paintbrush and applied some more clear embossing powder.  (This was a bit of an experiment as although I have done this before on MDF with Ultra Thick Embossing powder, I had never done it with fine detail powder - Thankfully it worked!)

I still wasn't quite happy with the effect so I edged around the blue frame with a little Nuvo glue and sprinkled on some Cosmic Shimmer Glitter Jewels - yes I liked that.  However, as you can see from the picture of the card (below) before I got to colouring it - I hadn't quite got the frame centred on the card.   Undaunted I got out my picot edge dies from Clarity Stamp, and cut the whole thing out, and edged the pico with more of the Sky Blue Ink.

Happy at last I then mounted it on a new card - and there you have it - the finished card (above)..


The start of the card, and the dodgy alignment of the square boarder!
(you can just abo9ut see the reflection of the embossing)

I created an insert in Craft Artist - with just a simple message in it saying "Fluttering by to wish you a very Happy Birthday.