Going Green Blog Background

Friday, 29 September 2017

Trying to draw a Bubble

First attempt on right, second attempt on left.


I don't profess to be an artist by any means, but I watched a demonstration recently of how to draw a bubble.   Well I didn't have the pencils she was using, and just used the ones I had.  They didn't seem to work that well on the black card, so I then added my metallic pencils - still wasn't happy with my first attempt (the one on the right).

Undeterred I thought I would try again just using my Spectrum Noir Metallic pencils.   (One on the left)   Happier with this effort - not perfect by any means, but I think it looks like a bubble.   Practise will no doubt make perfect and also buying the proper Derwent Procolour pencils (but they can go on the wish list!)   In the meantime a fairly happy bunny here for somebody that can only draw water from a tap!

Tuesday, 26 September 2017

Owl Fairy Door

I normally just post pictures of a finished project, but I remembered to take some work in progress photos.

Preparation of the Door

The worst part if removing all the hinges etc (and putting them back on!)  The door is painted with decoart paints, and then sprinkled with thick embossing powder and heated to give the worn, blistered look.


The surround had texture paste applied and when dry painted with white gesso and various shades of grey, cream and green pebeo decocreme paints sponged on.

The next decision was which owl to use:
Fat Owl or ........

..... Thin Owl ?

Nearly finished
I liked both, so as the door was for a friend of my daughter's I put it to the vote and fat owl won!  Fat owl was painted in a similar fashion to the door,  His "tummy" then had some cream paint wiped over it with my finger to bring out the texture of the embossing powder.  His eyes and beak were painted with Pebeo DYNA iridescent paints, and then had glossy accents applied.  (Full details on painting the owl on an earlier post)

The flowers and leave were die-cut from card, and painted with Pebeo acrylics and distress inks.  I added a little unicorn sparkles and some puffy paint for snow.

Finished
So I still have another door to use that was painted at the same time as this one - so the thin owl will probably be used for that.  I have already started to prepare the door - so below is a little teaser.   I just need to decide what flowers etc I will put on it.   Shall I do another Christmas one - or should I go with something like primroses and make a spring one?   Decisions, decisions.


Thursday, 21 September 2017

Water Colour Birthday Card


Following on from my attempt at some water colouring - I decided to have another go on a smaller scale, and turned it into a birthday card for my sister in law.

I kept to a similar design, as I knew that worked.   I must try and get a bit more adventurous now.

Wednesday, 20 September 2017

MDF Owl


I a working on a new Fairy Door for a friend of my daughter.  She liked one I had done with an owl on it, so I set to and painted the owl.

I used Decoart paints for him (Paines Grey, Burnt Umber and Quinacridone Gold)  Quin Gold is actually a lovely rusty red sort of colour, as you can see.  I used the Burnt Umber and Paines Grey for around the edges, to try and give him the impression of contour. Whilst wet I sprinkled Ultra thick embossing powder over him, and heated it up.  Love the effect for his chest feathers - which I then applied cream acrylic to with my finger.

His feet, beak and eyes were then painted with a DYNA iridescnt gold.  They eyes also having the green/gold and blue/black DYNA paints added.  I think I might add some glossy accents to his eyes to give them a more 3D effect,  (Have just thought of that!) and possible his beak too. 

Tuesday, 19 September 2017

A bit of water colour painting


I have always said I can't paint, well I can't draw that's a fact.   I have tried to water colour, but with not a lot of luck.   However, having watched a programme using Koh-i-noor wax pencils, I thought I would try the technique shown with my Lyra Aquacolour crayons, that I have had for years.

Oh WOW, what fun, and how simple - you scribble a rough design and then brush it with water, as you can see it worked and actually looks like something!  I decided I was a bit heavy handed with the water initially, so went around my scribbled outline of the flowers again, and worked a bit more water into it.

Even my son said it was good - heck that is praise!  Can't wait to have another play.

Friday, 15 September 2017

I need more practice!

stamped image

I decided to have a little practice with some Inktense pencils and do some water colouring - the demonstrator made it looks so easy!

I have an Alphabet colouring book, and had the idea of colouring some of the pages and framing them for my grandchildren for Christmas.


I was good and tried out the technique on a couple of stamped images first (one shown above) and it seemed to go fairly well, so I attempted one of the pages  (good job there is more than copy of each letter).  All was going fairly well, until I managed to get some "paint" on my hand and smudged a bit in the white area - OK, I do have a special water colour eraser, and got rid of most of it - but I know it is there!   I am also not happy with the black on the Toucan; it really did not go right (Perhaps the special eraser will come to my rescue)- so looks as though it is back to the drawing board as they say.  I shall play safe and photocopy the remaining image (you are allowed to do that - and can reduce the size etc if you require)  - at least I shall still have a good image to copy again if I mess the next attempt up!

Alphabet Page
Well if I mess the next water colour attempt up - I may have to swap to alcohol marker pens!   At least I am brave enough to share my "failures" with you!

Wednesday, 13 September 2017

Paint Storage Part 2


Today I painted a little brother/sister to yesterday's storage unit.    This time I experimented using Pebeo Deco-creme paints, which are more like a matt chalk paint, although I used some of the pearl black as well.  I also varnished it afterwards, so it lost the matt look.   This unit was a lot easier to put together than the first one, as it is only a single sided rack.    My Pebeo Vitrail paints will sit in this.

another view
Here we have the two units together, with their different finishes.   You can now see the white detail I added with a white Pebeo marker and the gilded wax edges on both units.   Silver on the large unit and gold on the smaller one.


Tuesday, 12 September 2017

Paint Storage Part 1


I need some storage for some of my Pebeo paints - and this was perfect.  I couldn't wait to start painting it when it dropped through the letterbox.

I decided to use my favourite paints - the Pebeo DYNA iridescent paints.   A coating of black gesso was applied first and then I just randomly sponged on the colours.

another view
 It was a bit interesting putting the little unit together!   I was all going very well until I came to putting on the second side!  I nearly gave up at this point.  I spent a couple of hours trying to do it, then decided to leave it and come back to it when I was less frustrated.  Obviously you know that I did manage to do it!

The frustration nearly overwhelmed me at this stage!

and finally here it is with my bottles of Pebeo Fantasy paints in it - stored upside down so that not only can I see the colours, but also as the paint settles in the bottom, storing them upside down helps a lot.  (another 12 to go in the other side! - so it is Fantasy Moon on one side and Fantasy Prismé on the other).
one side filled.

I did do a little more to it - adding a bit of gilding wax on the edges of the shelves and sides, and some detail, but you will see that in the next posting

Friday, 8 September 2017

Christmas Tealight holders


A couple more of the little tealight holders today (or should I say tealight covers).  


I painted the insides with white gesso so that the little light reflected better.

Monday, 4 September 2017

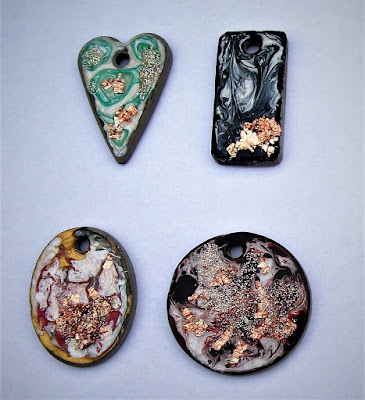
OK I confess, I am hooked on making these!


Greengold Vitrail, emerald prismé and eggshell white prisme
(and a happy accident - the gem landed the wrong way up!)

Yes I admit it - I am hooked on making this cement jewellery.  Again work in progress as you can see from the first picture I need to finish the edges and the backs.  (I am waiting for my liquid gold leaf to arrive).

With apologies that the colours aren't as good as they should be - blame it on the grotty English weather today!

Turquoise vitrail and turquoise prisme and gold leaf
(attempted a sort of spider's web drawing through prisme with a cocktail stick)

Parma voiloet vitrail and violet prismé and gold leaf
(yes it is violet although doesn't look like it in this image)

Gold Vitrail with English Red and Eggshell White Prismé
and a start gem

White vitrail and onyx prismé
(paler in real life)

The complete selection

Sunday, 3 September 2017

More Cement Jewellery


Think I am hooked on making these.    Work in progress, as I need to finish the backs and edges, when the fronts are completely dry.