Going Green Blog Background

Showing posts with label Embroidery. Show all posts

Friday, 1 April 2022

Embroidery - Poppies


Having had success with my daisies and foxgloves kit at the weekend, I progressed to the other kit that cam with it.   This time poppies.   Oh wow, another fun one to do.   This one has 3D poppies on it against a background of green chiffon,   The poppies are made from red silk and red chiffon..   The effect in real life is fantastic - the red silk really shines.  I will admit the eyes did have a few problems getting the stitches straight.  My five petal daisies were difficult to space properly, but the six petal ones were ok.   (Note to self next time do 6 petals ones!)  Maybe my ferns are a bit wonky (fly stitch) too, but natures isn't perfect is it?

I am now eager to try some more, maybe a larger one that will take me a little longer to finish.    I am also thinking of finding some of my material stash, and using some stamps to create an image/scene to embroider, as there is still chiffon and lots of threads and beads left over from both kits.   Rowandean certainly don't stint on what they supply.   If you like a bit of slightly different embroidery do treat yourself to a kit.

Thursday, 31 March 2022

Embroidery - Cosmos and Foxgloves


I have often watched the Rowndean embroidery shows, and really loved the effects achieved.   The fact that you can be as random as you like and alter the kit design if you so wish appealed to me.   I also like the rustic nature of the designs, and the used of pieces of chiffon, sequins and beads and different thicknesses of threads used.

I wasn't sure if my eyes would cope, but decided to try a couple of small kits, on the premise of if I couldn't get on with them, I could pass them on to somebody else in the family to complete.   Well I amazed myself/   I manged to cope ok, and really enjoyed doing them.  I liked the fact that I didn't have to be precise, and didn't have to worry about the neatness of the back!  (As I would have it had been something like a tablecloth - you may recall a few years ago I actually finished a tablecloth that my Nan or mother had started some years back!)   This only took me a couple of evenings to do - and yes I actually managed to do in the evening with the aid of my little desk lamp, rather than having to tackle it in daylight!

The embroider for this kit is done on tweed material.   When finished I added some wadding behind it and put it in a proper display frame.


Saturday, 15 May 2021

Missing Mojo

As you will have noticed, I have been very lax over the past month in posing anything creative.   My mojo has completely deserted me.    I have lots of projects to tackle, but no enthusiasm.     OK, when the weather has been kind I have tackled the garden, but the rest of the time when it has been too cold or too dark for my dodgy eyes to cope,  reading a book has been the answer. when normally I would be dabbling in some "messy" crafting.   I do have one particular project on the go - but am waiting for a replacement piece for it, before I can start the painting.

However, I did attempt a bit of "clean" crafting the other week, mainly to see if my eyes could cope.  I started a little sampler of chain stitch embroidery - it's a while since I have done any of that.   It's not brilliant, but I improved as I went on.  So here it is :   (It does need a bit of a press).   The lavender was stitched with 6 threads, as I wanted some dimension, but the words were done with less.


Tuesday, 22 January 2019

Embroidered Butterfly ... or is it a Moth on Wood?


Whenever you buy a Pink Ink design, you get one of these butterflies as a freebie to play with.  I decided to play with one of mine.  I painted the butterfly a couple of weeks ago, and confess I made a booboo - I put it on the radiator to dry, and of course it made the canvas that touched the ridges of the radiator dry much darker as it set the colour!   duh  I thought.

A couple of days ago I decided what the heck,  I will try some embroidery stitches on it that I had seen demonstrated.   The outline was done with a running stitch and then I wove another colour through the stitches..  I then embroidered the body, with a mixture of satin stitch and chain stitch, alternating the way the threads went in the different sections.  I then embroidered part of the head with button stitch and stuck a clear gem in the centre.  The antennae were done with back stitch and then a stretched french knot.  I added a couple more gems on the wings, and coloured all the gems with alcohol pens.

Finally what to do to get rid of the lines across the middle ?  Inspiration struck make it look like wood - phew think I have got away with it and I am now calling it a Moth on Wood rather than a butterfly!

Thursday, 17 January 2019

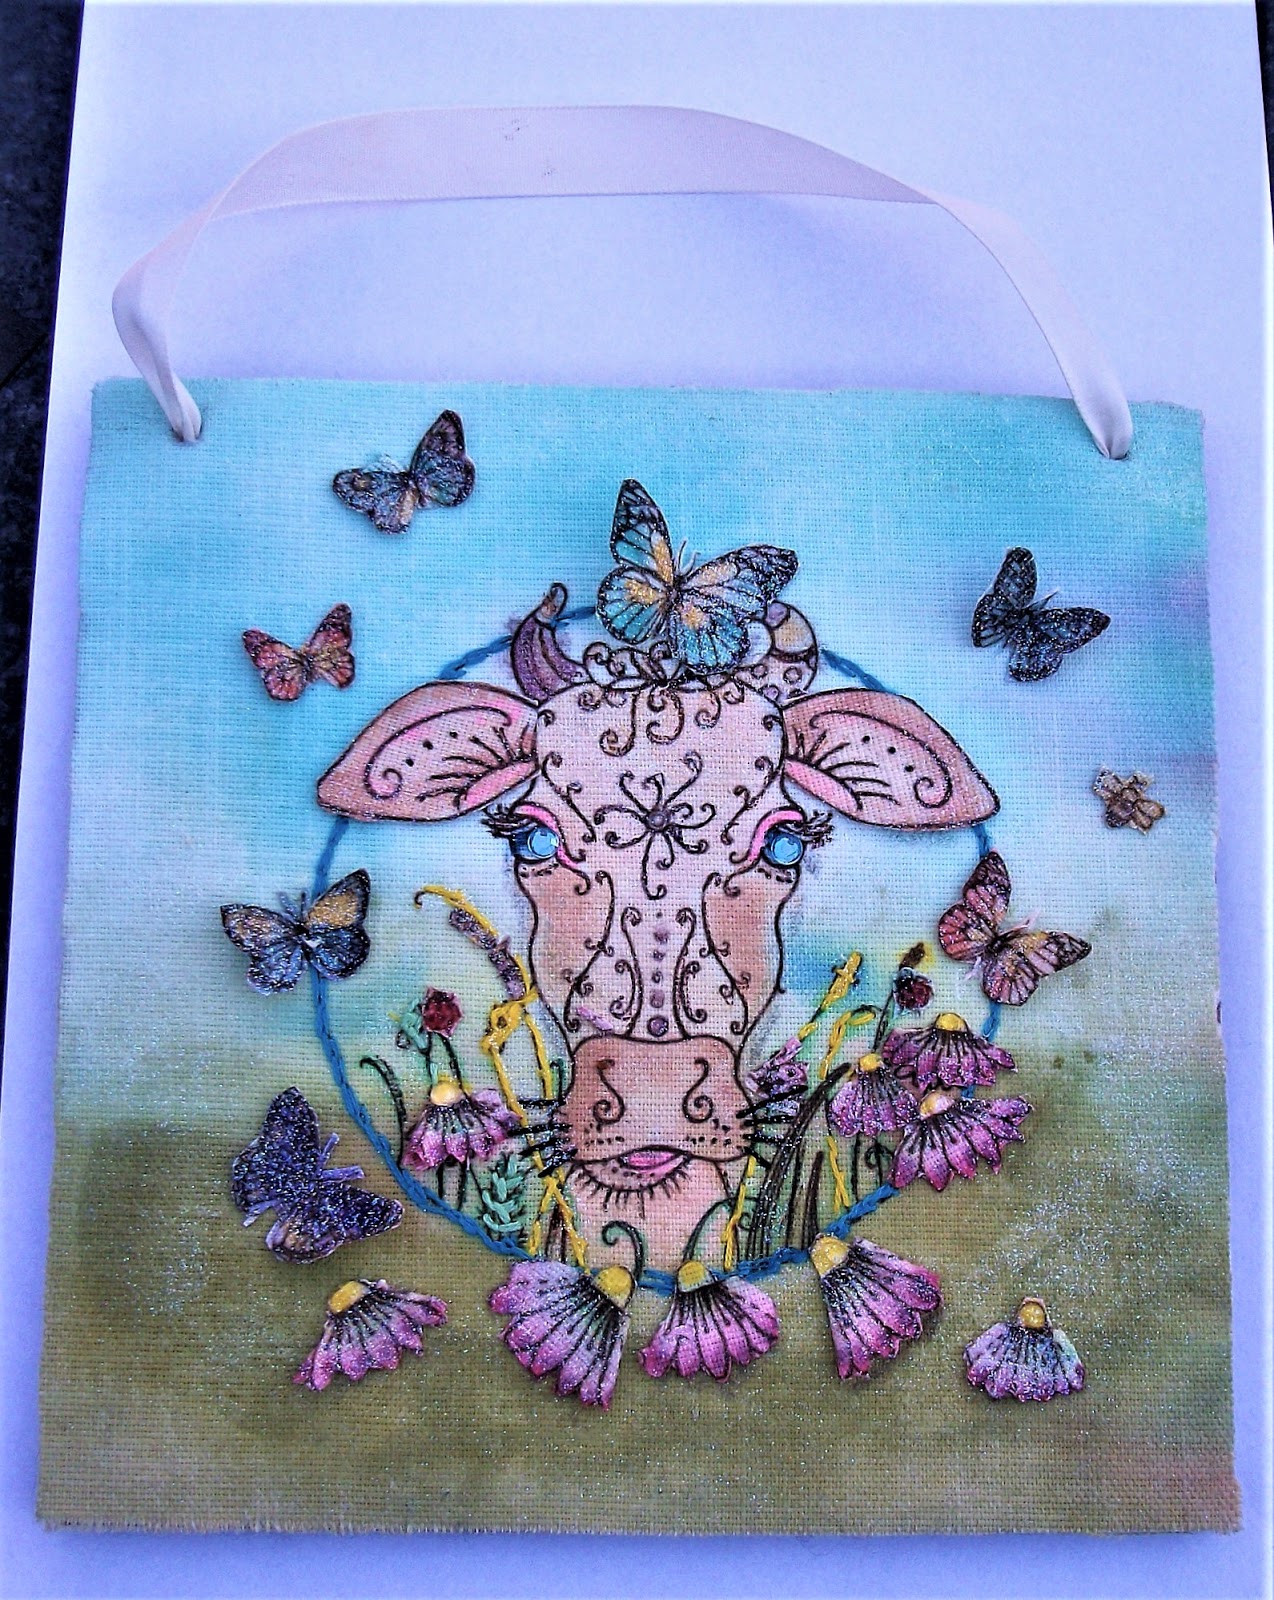
Moo Cow Canvas


Finished plaque


Another Pink Ink Design.  I must admit I am enjoying doing these.   I painted the canvas and the elements (see picture below),  I used various paints - some translucent ones from IndoBlu and some from Cosmic Shimmer, with a few elements highlighted using Posca pens.

I then did some embroidery on the main canvas - outlining the circle with chain stitch and then picking out some of the grasses etc.

The elements and the canvas were ironed to set the colours and then had IndigoBlu Slap it On (Fabric) applied to seal it.

I couldn't decide how I wanted to display the canvas - pondering on whether to use another embroidery hoop, but then I decided to use a square MDF plaque.  I used some  lining material from The Mill Shop online, which was adhered to the canvas with their special bonding material.  (Confess I have forgotten its proper name).I then glued the padded canvas on to the MDF board, and created holes in the canvas with a screw punch to align with the holes on the MDF, and added some ribbon to create a hanger.

I then glued on the various elements - I found heavy gel medium excellent for this.


Thursday, 10 January 2019

Mixed Media: Decoupaged, Painted and Embroidered Panel


Really pleased with how this turned out.  I have watched the PinkImk demonstrations on Hochanda many times and have been tempted to try one.   A few weeks ago they had a bundle of various designs on sale at a silly price - so I though I would take the plunge.

The panel is about 8" x 8" with an extra little panel of embellishments.

I wet the material and then water-coloured it using Cosmic Shimmer Fabric Paints, and IndigoBlu paints for the face.  When it was dry I ironed it to set the colours.

I then painted the embellishment section and when dry I did some embroidery on it and added some beads (i.e. pearls on the bow).  Again I ironed the panel to set the colours, and  then painted a mix of pva and water to the back to strengthen and stop it fraying, so that when dry I could cut out the items.

The little elements were then added to the panel with glue.  I also did a little more accent painting, as well as adding some gems and Nuvo drops.

It doesn't show up that well in the photo, but the image is very sparkly, as I went over the whole design with Cosmic Shimmer Sparkle Star Fabric paint.  (I am in love with this - the effect is similar to a sparkle pen on cardstock).

I will eventually stiffen the whole thing with either PVA and water or IndigoBlu Fabric Slap it on.  I also want to get some matching velvet ribbon for the frame (although I may paint it) to finish it off completely.

Sunday, 30 December 2018

A Family Heirloom

I set myself a challenge over Christmas.   Back in 2004 I discovered a tablecloth on which the embroidery had been started.   I don't know how old it is - It could have been started by my mother, albeit she was a knitter more than an embroiderer.   It could even have been her mother's (she died in 1938), as my daughter has a similar cloth that belonged to my mum. which I do remember coming out on occasions when I was a child  I will never know who started it - searching for vintage embroidery transfers on the net, I discovered that the ones in with the cloth  were probably from the 1930s to 1950s. (So still non the wiser who started the cloth!)  I certainly never remember seeing it all the time I lived at home).

I did  do a bit to the tablecloth a few years ago and finished most of the edge motifs, and having also got the original transfer sheets, I added some extra motifs in the middle, but then I got bored, forgot about it, and then my sight deteriorated.

As I have now had one cataract done, and can see a lot better, and even distinguish the colours of the threads, I set myself the challenge to complete the embroidery before the end of the year.  I have Succeeded with a day to spare.   Quite proud of myself as I am not a "clean" crafter, preferring to be dabbling with paint and mdf to being a gentile embroiderer - lol!

The finished tablecloth

one of the edge motifs

a corner motif

centre motifs (two designs)


the leftover transfers

So success one family heirloom completed, and if any of the family want to add to it - they are most welcome.   There probably aren't enough decent leftover transfers - but I suppose if the mood takes me I could make something or embroider a handkerchief !

However, I will do a bit more embroidery in the not too distant future as my nine year old granddaughter wants to learn, and I gave her a sewing box for Christmas, and also invested in a load of silks that I cold share with her.

Monday, 25 February 2013

Setting myself a challenge or two!

When my Mum died in 2004, I came across a couple of unfinished items.  The first was a crochet waistcoat and the the second was a tablecloth with one corner embroidered!

So the reason for a lapse in postings over the past couple of weeks was due to being absorbed in these two challenges.

Now I am the first to admit that I don't DO crochet or embroidery, although I do know the basic stitches for both and have done the odd things in the past.

I did have a little help with the jacket, as the original pattern was in different colours for each round, and the pattern my mum made was all same wool.  It required some triangular sections to finish it off, and I just couldn't work out from the instructions how to make them - so a friend of my daughter's came to the rescue and did those for me.

I then had the job of sewing in all the ends of all the granny squares (a labour of love) and then crocheting an edge to the jacket.  Now there wasn't enough wool left to do what was required in the pattern, so I found some complimentary wool and did most of it with that, finishing off the last round with the original wool to tie it all in.  (yes I am quite chuffed with overcoming that problem!).  

I don't know that I will ever wear it, as not really my colours (as my daughter said "It is very Nanny"), but I rose to the challenge, and might just wear it in the summer!


the completed waistcoat


Now to the second challenge - the embroidered tablecloth.

I haven't done embroidery since my teens - so that is over 50 years ago.  The first challenge as I couldn't find the embroidery silks of mum's that I know I had somewhere was to match up the threads.  Fortunately my daughter came to the rescue, as she and my eldest granddaughter are into counted cross stitch* so she had a large box of silks.

(* well that's another challenge I have started - I got a free counted cross stitch piece in one of my magazines - have never done that sort of embroidery before - watch this space!)

Well I really enjoyed this and it all came back to me - my first corner was a bit "rough" but I improved.  In fact I so enjoyed it, that as I had the original iron-on designs in with the tablecloth, I have transferred some more of those onto the cloth - so that will keep me out of mischief for a while, creating a new family heirloom.  (Of course I could be mean and put it all back in its original bag for my daughter to inherit and let her finish it - or even do her contribution, and then she could put it away for her daughter to add to it anon.  It could end up as a permanent heirloom sampler ....).

No I probably shan't be that mean - so keep an eye on the blog to see if I complete it this year!

The four corners  (mum's original corner - top right)