Going Green Blog Background

Showing posts with label Pebeo Gesso. Show all posts

Wednesday, 14 August 2019

Bee Happy


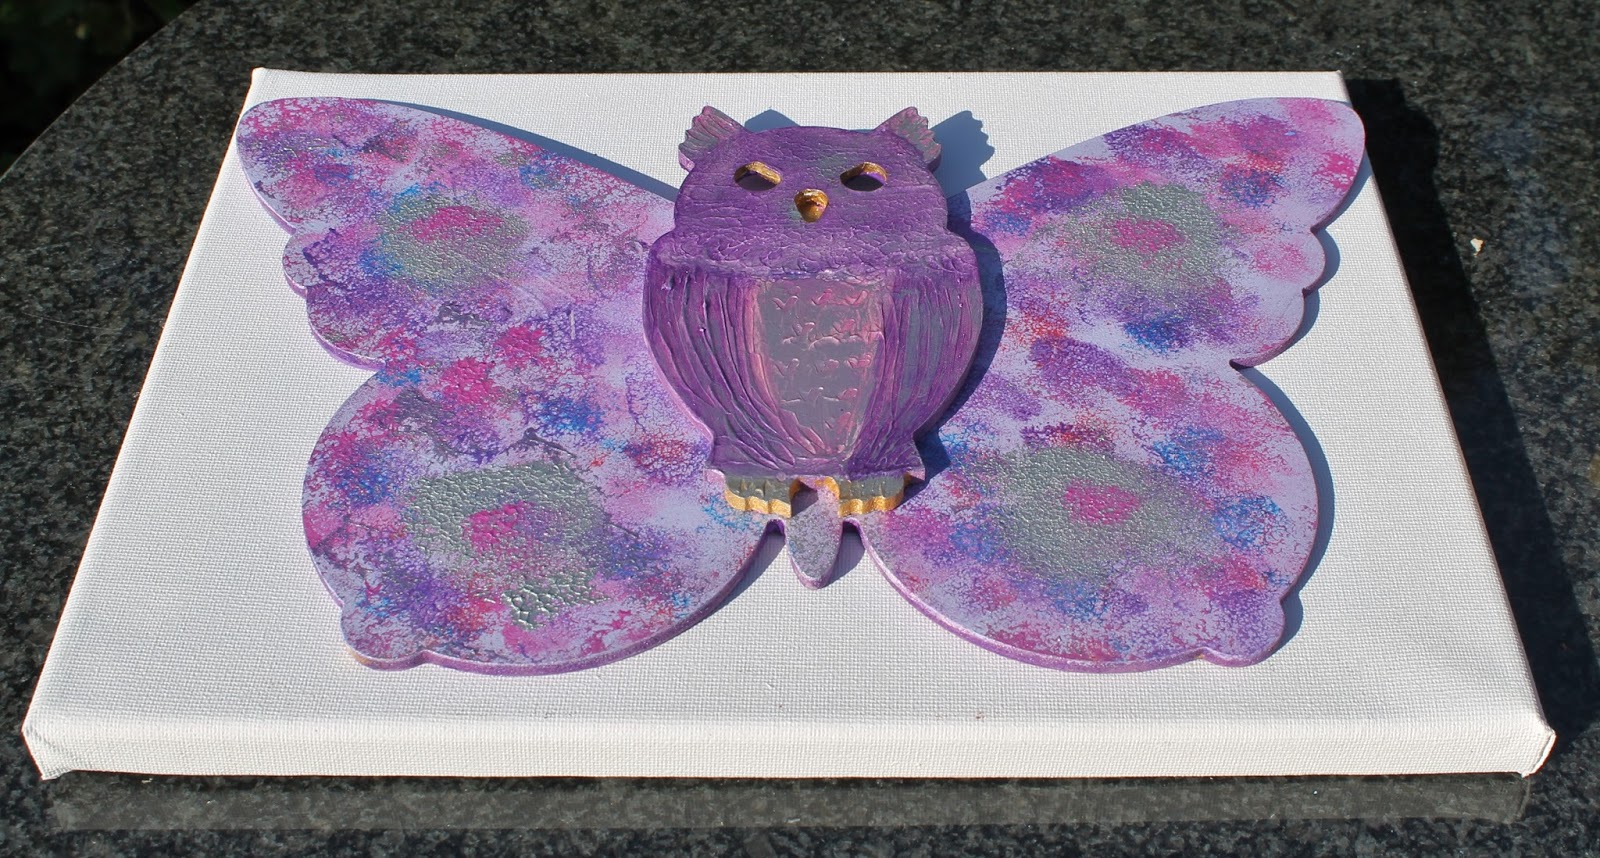
A little page from my Art Journal that I created a couple of days ago playing with my new Daler Rowney paints, Mama Makes stamps and IndigoBlu large Bee stamp.

I applied a thin coat of white gesso to the page, and then with my finger applied blue, pink and yellow paint randomly over the page.

I then used some of the paint and also Artistry ink pads with the Mama Makes stamps.  I stamped the bee on the page and embossed it with silver, and then on a separate piece of card I stamped it with a black ink pad and embossed it with clear powder.   This was then painted and fussy cut and decoupage on top of the stamped image.  Finally a few more background bits added with a Mama Makes stamp and white gesso and the "Happy" sentiment added in black, and highlighted with a white Posca pen to make it stand out.

Sunday, 7 October 2018

A little play in the Den - Gesso rules!


I managed to get up to the Den this afternoon in the sunshine, after a couple of days of sorting out eyes - check up at hospital on Friday  (got the all clear to have eye test for new specs) and also got told that they were going to do the other eye in the next few months - that was a surprise as everything I had read said the local authority were only paying for one eye!

I managed to get a cancelled appointment at the optician yesterday, so am now on countdown to getting new specs .... can't wait!   Couldn't do any crafting as such miserable weather and so dark!

Anyway back to the Den ..... I made a start on my challenge project.  First picture shows the box.  I applied some texture past to the "pages" and the painted on some gold gesso.  I also did the inside, but that may not stay like that.  the rest of the book box got an application of black gesso.


White gesso on  3 of the 6 ATC greyboards

I mentioned that I had the idea of doing double-sided ATC cards.  So I applied white gesso to one side and black to the other.

I also had a play with one of the MDF skills I have. I was going to paint it with flowers etc in The Day of the Dead vain, but decided to play with the side with the markings on first to see how it would turn out,  which was a bit of a challenge as eyes are still a bit iffy until I get the new specs, as cannot see detail that easily - or more to the point I can't see the end of the paintbrush!  Here is the result, just painted with white acrylic and a little black gesso.  I didn't like the black initially as it was to blak, but a little blending with some of the white, water, and in some cases that good old tool called a finger, I was pretty happy with the result.

I have painted white acrylic on the reverse side - so that will have the Day of the Dead flowers etc painted on it.


Thursday, 19 July 2018

Canal Barges - a little teaser


Sorry ... I couldn't resist ... a little teaser of work in progress.  I built two of these barges from Clever Cut and am now in the process of painting them.


I applied ivory powertex to the insides of both of them, in an attempt to make them more weatherproof.  One had powertex applied to the outside, and both had white gesso applied.

That is as far as I have got - I can't decide on the colours to paint them yet!

Wednesday, 18 May 2016

Steam Punk Book Box

Some time ago - like last year, before my husband died - I started this steam punk inspired book box.

Front

I had done the front, sides and inside, but confess when I finally got up into the Den this year to continue the project, I had forgotten what I had done and what I had used!  duh!  Anyway undeterred I started on completing the spine and the back, which I had at least applied black gesso to!

Fortunately I sort of remembered that I was using the Pebeo Dyna irridescent paints and sponges.  (What I didn't realise until I finished painting the back, that I had applied a layer of serviette to the front first and coated it with pva glue.   Hey ho, I could always start again if I so desire!

Back
 The back looks a slightly different colour, as the sun was shining and reflecting off the paints slightly differently to the front.   Also it looks as if I left more black showing on the front!

Front and side
 I used a packet of mixed cogs etc for the front and glued them on, and then did some more paint effect on them, as well as adding some Pebeo gilding wax on the edges.

The "leaves" of the book were created using Pebeo texture paste with a cream coloured paint applied to them, and then with my finger I rubbed gold gilding wax over the textured surface.

Another view

You can just about make out the texture of the pages in this picture.   The edge of the cover of the book also had gilding wax applied over the black gesso, which was easier than trying to replicate the paint effects on such a thin edge!

Not perfect by any means - as I said I can always redo it as the mood takes me!


Saturday, 1 August 2015

Owl & Heart and Owlerflies/Owlieflies!


Blue, purple and pink


It started some months ago - my son's daughter's were raiding my stash in the Den, and discovered the owl in my stash.  Needless to say they all wanted the Owl!  I only had one cut out owl, but I offered them some other owls, and the second eldest decided that she wanted her owl on a butterfly background - and decided to call it an Owlerfly!  I eventually managed to get some more of the owls, but needless to say they then didn't want them!  So eldest granddaughter having had first "bagsy" on the owl and heart originally got to keep her choice.   The second eldest stuck with her larger owl, and the three-year old also decided she wanted the plain owl and butterfly as well!

However, I was given instructions as to the colours they wanted!


Purple and pink (the original Owlerfly!

Youngest's Owlerfly - Blue and Pink

Everything had white Gesso applied to them.  The Owls then had some Pebeo Texture paste added to them, and then sponged and textured with one of my rubber modelling tools to give the effect of wings and some markings on the front.  

They were then painted with the requested colours, using a mixture of metallic acrylics and Pebeo iridescent paints,  The cut-out Owl also had a pink- red vitrail mixed with lightening medium and and a lilac fantasy paint for its breast. When dry I applied some Pebeo gilding wax - gold for the cut-out Owl and Silver for the other two.  Liquid gold leaf was applied to the insides of the eyes of the two Owlerflies. 

I then sponged the butterflies and heart with various metallic and iridescent paints to compliment the owls in the colours the girls chose.

I am nor sure whether the girls want these to hang by ribbon etc in their room, or whether they would like them mounted on a canvas to create a piece of artwork for the walls of their bedrooms.

This is what they look mounted on a canvas:


Hope you like the Owlerflies/Owlieflies (chose your own version of the name)  as designed by a six-year old  Thanks for popping by.