........ I think that is what the name for this is! I call it mucking about!
I have spent the last couple of days making the most of the gorgeous sunshine and playing in the Den.
Sunday's Efforts:
I bought the Mask in the Works. The granddaughter's saw it in the Den last week, and all wanted to paint it - so a trip to the shop was required to buy some more for when they come to play.
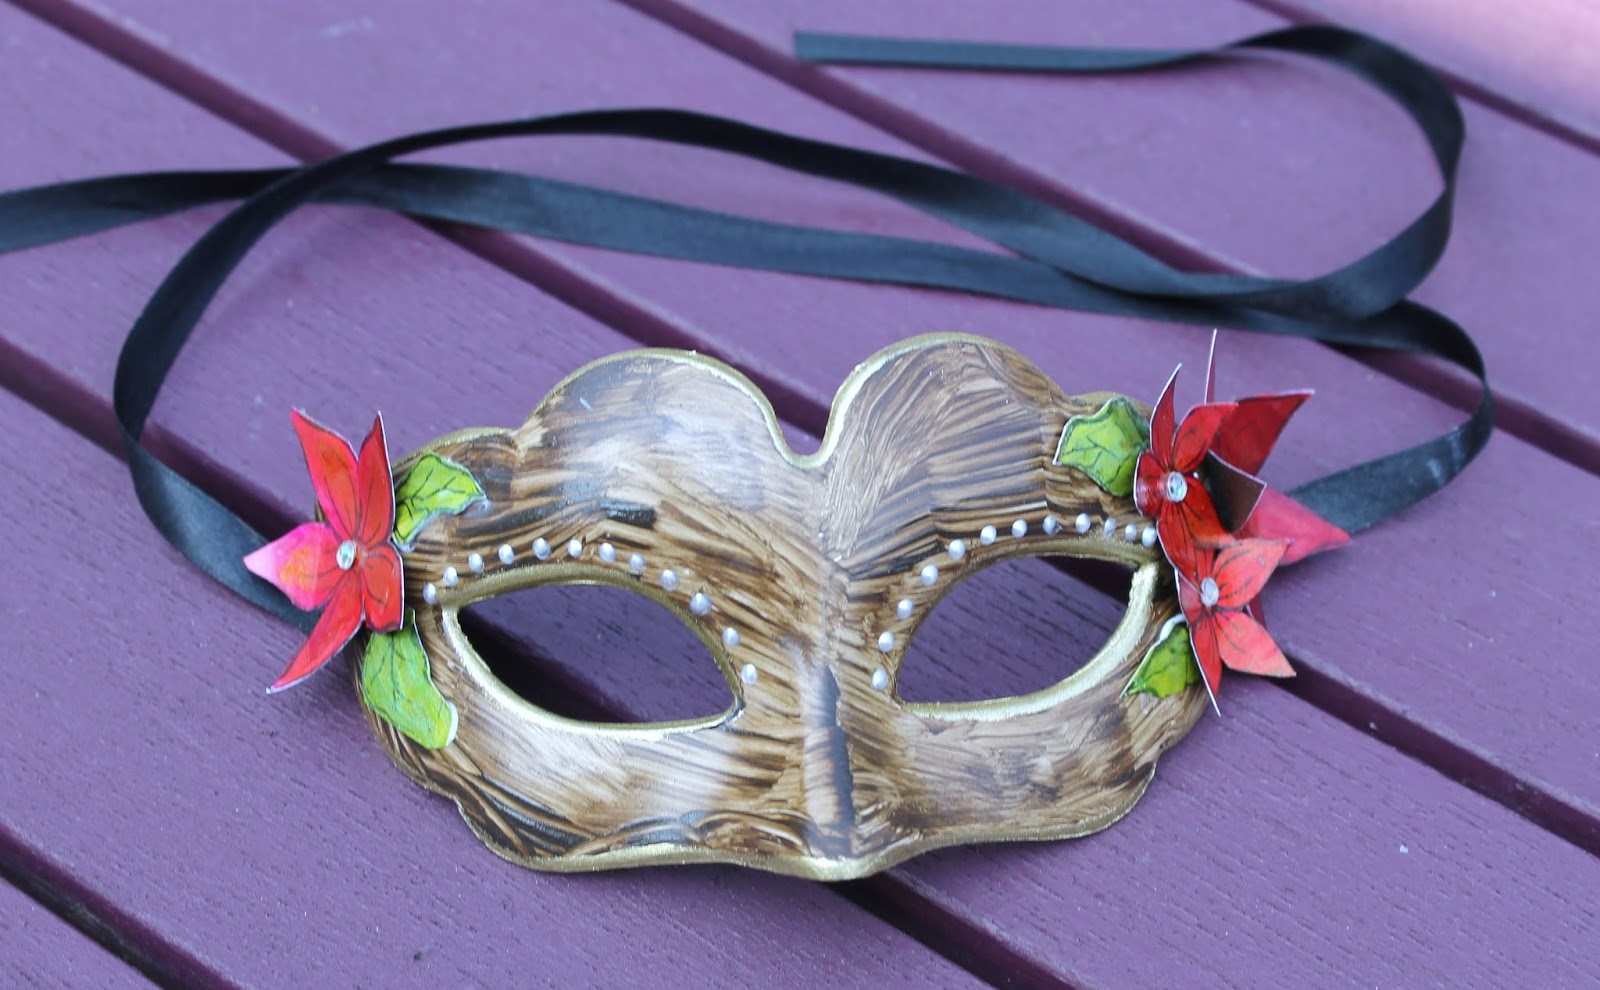
Thankfully I got some more for them, so I was able to play with my one to give them an idea of what they could do. Originally it was going to be painted black, but picked up my brown acrylic first and decided to go with that. I hadn't realised my brush was dry when I started to paint - but I liked the effect so much I decided to continue. I then applied some gilding wax around the edges and the eyes, and varnished it.
I painted a piece of card with acrylic to help stiffen it, and when dry stamped on the other side with my favourite stamps from Sheena Douglass. Painting over the images with primary elements - in various shades, although basic colour was cinammon. (Tip: go over the outlines when painting - gives a better finish when cutting them out afterwards.) When dry these were cut out and adhered to the mask with some modelling paste, some gems added to the centres of the flowers, and a smidgen of gilding wax added to edges of flowers, and pearl stickles applied over the eyes.
 |
| you can see all the flowers on this photo.... |
 |
| .... but this one is more realistic for the colour of the mask |
My next project was starting an altered art book cover.
As you can see I used the same flower stamps for this - actually when I first stamped them I couldn't decide which colour I wanted for the mask - so having used the red ones - the remainder were relegated to the book cover - and influenced the colours on the background.
I coated the cover with thick masking paste mixed with black gesso. I then used some Andy Skinner stamps to create the random effects on the masking paste - crackle finishes etc. With a palette knife I scribed the initials into the masking paste.
With the hot weather it didn't take long for the paste to dry!
When dry I got a selection of metallic acryllics and brushed them randomly over the background, edged the book with silver gilding wax, and then added more onto the cover as well as some in two shades of gold.
Finally I used pearl stickles to fill in the initials, and attached the flowers with more modelling paste, and added pearl stickles to the centres. Now to decide what to do on the back cover and the insides ......
 |
| altered art book cover |
 |
| and by the way the temp in the den yesterday! |
Saturday:
(sorry working backwards - story of my life!)
I have had this Indigoblu clock kit for some time, and finally got around to doing something with it.
I think the thing was jinxed, as I carefully cut all the numbers from the stamp sheet, and was very good and put them all back on the backing sheet - and blow me down the no. III has disappeared. I ahve searched high and low and retraced all steps from when I cut them out - but zilch - even got OH searching the cut off bits of rubber which were all in a packet to make sure I wasn't looking through them. It remains a mystery as I had been so methodical for once! Hey ho! it will turn up when least expected! in the meantime I cut up the no. VIII and used that.
I crackled the background, cream over red - but you would never guess that - yes the crackle refused to play - thank goodness for Andy Skinner's crackle effect stamp to save the day.
I also used gilding flakes for the first time - which worked well, but didn't show up enough, so had to overstamp with stazon! yes definitely jinxed this piece!
I stamped the flowers that came with the set and painted them, and then overstamped them again.
Not entirely happy with the result - but it was only a clock for the Den - and if it annoys me too much - I can either repaint it or paint he back and start again!
 |
The finished clock in the Den
|
Having got so frustrated with looking for the no. III for the clock, I occupied myself by creating myself a new button box.
I may add some painted designs to the bottom of the box, but in the meantime am pleased with the result so far. aintd with blue acrylic and one of Andy Skinner's crackle stamps used on the top using Stazon. I love the effect. I then found some freebie stamps that came with a Magazine (think it was Homemade mag.) Stamped the images and painted them with pale pearlescent acrylics. I actually stamped the hexagonals to create the "quilt" shape so I could attach the item as one piece rather than individually. The stamped items were stuck to the top, edges gilded and then varnished. Finally I painted a button and addded it to the centre.
 |
| Button Box |
Well I hope I haven't bored you with this long post - I supposed I should have posted them all individually, but at least I hope I have shared some inspiration.