Going Green Blog Background

Showing posts with label MDF. Show all posts

Sunday, 16 January 2022

It's been a while ....

 Gosh it has been a while since I posted to the blog.   The Festive period got in the way and then I wasn't doing much crafting!   I do have some bits and pieces that are work in progress, but they will take a while as some is sewing, some is crocheting and some is latch hook work!

In the meantime here is a little project I did just before Christmas and forgot to post:


and another view


MDF Snowmen - painted with acrylic paint.   These ended up on my doorstep over the Christmas peiord.

Monday, 25 October 2021

Christmas Plaque 2


Another plaque in a different colourway, but with a similar wood effect for the back.  The outer ring of this one is done with gold gilding wax.

Sunday, 24 October 2021

Christmas Plaque 1


A little Christmas MDF plaque (I can't remember whose kit it was).   The background was painted to represent a wooden plank.    I then add a snow effect to everything.  I shall attach some hooks to the top and add string or ribbon to hang it.

Wednesday, 22 September 2021

More messing about with MDF


Another little play with some of the bits from the Dream Catcher kit I have in my stash.  I think it is a bottomless pit of MDF!


Sunday, 19 September 2021

Messing about with MDF - work in progress


I have quite a bit of MDF in my stash, and in particular a whole lot of dream catchers, so I enjoyed te sun the other day and sat outside painting.  Not quite sure where I am going with this, but have made a start.

I confess the photo isn't that great and doesn't really show of the details properly, but basically the outer ring of "branches" have been painted in various shade of brown, and the leaves painted (am thining of putting the moss effect paint on those).   The centre part is painted in pink with silver gilding wax details - ditto the feathers.  The little flowers have been painted white with pink highlights.   I will probably apply Glossy Accents to these to make them more 3D.   I must then search my stash for suitable ribbon or threads to attach the feathers.   I still think it is lacking something, but no doubt inspiration will strike at some point.   (There are still a lot of elements in the kit to use!)


Sunday, 12 September 2021

Autumn MDF Wreath


I made the base of this wreath late last year.  It just had painted leaves on it, but I didn't know what I wanted to do with it - I was contemplating making Sunflowers or Christmas Roses!

Having painted the toadstools, I decided to use them on the wreath, and then raided my stash to find something to go with them - I opted for some wood slices, moss, string, and dried roses.

I wasn't quite happy with the base of the wreath, as one of the leaves had set in the wrong place last year - so I tried out some Pentart moss and grass effect paset to finish off the base of the toadstools.


Saturday, 11 September 2021

Toadstools !


Had fun painting these!   I didn't realise originally that they were in two parts!  I had a plan for some of them  so pop by tomorrow to see what I did with a few of them.  Not sure what I will do with the rest - but they are all ready should inspiration strike! lol!

Tuesday, 27 July 2021

MDF Train - updated

I shared a picture of an MDF train I built the other week, and have since done a few tweaks to it.  So here are a few views of the finish item:


Friday, 9 July 2021

Owl dreamcatcher


I finished this today - it has been sitting on my to finish pile for too long!    Mind you wit my dodgy eyes it took a while to thread the beads on - most of an afternoon!  (but, that did include searching for thread and beads that the thread would go through - lol!)

I took two photos one indoors and one out, as couldn't get the light quite right!


Thursday, 8 July 2021

Messing about with bits and bobs!


So I decided to paint a couple of bits that came as bonuses with a couple of orders.   I am not sure which way up the little pen holder is supposed to be so taken a photo both ways - lol!   A pal said it looked a bit oriental - perhaps I should have painted a dragon on it !!!

I decided to keep both items fairly simple as I am a bit out of practise with my one stroke painting!   the other two sides of the larger holder also had leaves painted on them.


Tuesday, 15 June 2021

MDF Train


This is a large MDF train that I have built and painted.   The train was a Clever Cut kit from Stamps Away.   I have kept the colours fairly simple, as guided by Ali Reeve, although I did add ted to the front and rear, as that seemed to be the norm for engines.   I just need to decide a name for it,  to go on the "headboard! - There isn't a lot of room, so as this is a present for my train-loving son-in-law, it will probably be called Sir P.

Wednesday, 9 December 2020

Another Wreath - Work in Progress.


Another MDF wreath today.   This one has MDF leaf shapes added to it,     I painted the ring to resemble wood, and then painted the leaf shapes to represent autumn leaves, in shades of green, red and orange.

I haven't quite decided how I will proceed, the idea is to create some christmas roses and holly leaves etc from Air-dry clay.

Tuesday, 8 December 2020

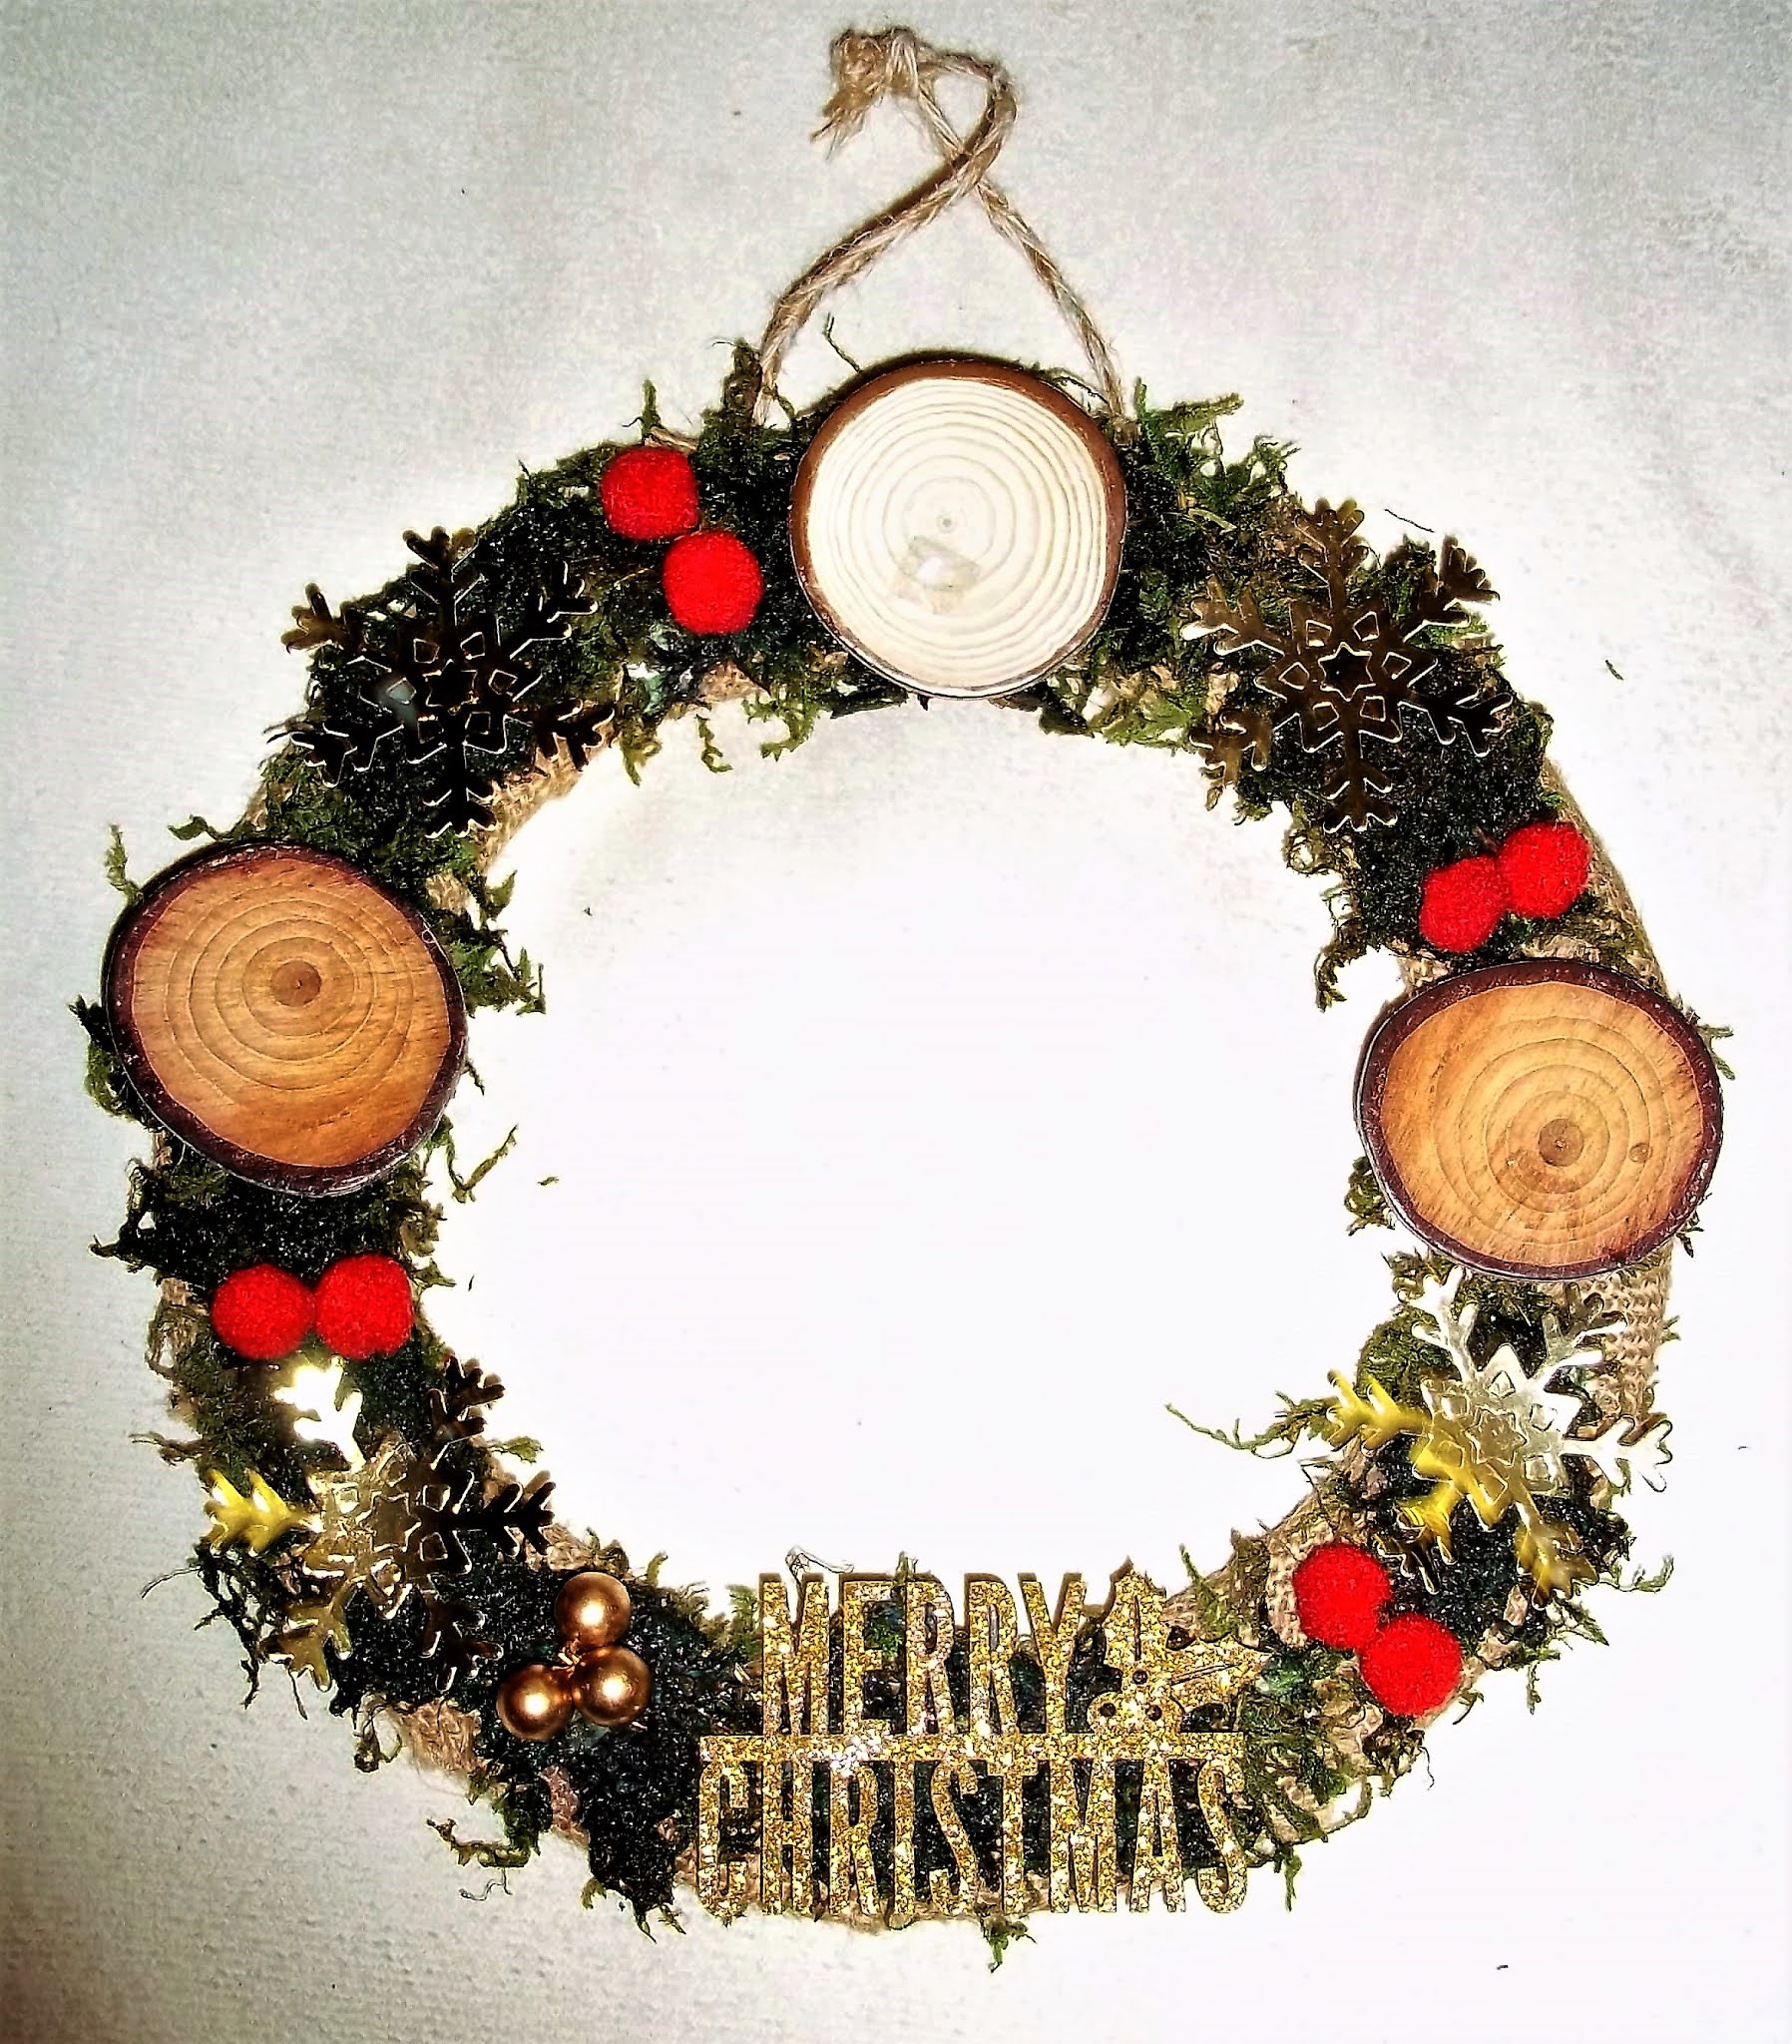
MDF Wreath


 I decided to have  play with some of my stash.    One MDF ring, wrapped with hessian.  I then added som imitation wood slices, and some moss mixed with DecoArt texture paste, which had a sheen to it,   I then raided mor stash for paper snowflakes some small red pom poms and a Merry Christmas sentiment.  A bit of twine for the hanger.

Thursday, 29 October 2020

Nordic Elves


I had fun with this little MDF piece from Madhatters Lasercut Designs.   The original design was for two wizards, but I wanted to turn it into a Christmas theme with Nordic Elves.

I built the stand and painted it to look like planks of wood, and then added a small stencilled design on the centre of each side.  I added texture paste and ice effects to the top for snow.

The elves were then painted and fixed in place.     For the window element I painted a stone effect around the edge, and painted the star in yellow/gold.  I gessoed the back element and random;y applied red, blue and yellow ink pad ink onto it mixing them with a blending pad.

Monday, 29 June 2020

More Stash playing again!


  What should have been a simple job to paint this - wasn't!  My own fault as I decided in my infinite wisdom to pain the letters whilst in situ on their carrier "sheet"  ......... wrong!   I know that when MDF gets wet it swells, but I thought as it was so hot and it was drying so fast it would be ok.  Lazy people take the most pains as they say.   It took quite a bit of fiddling to get the words out of the sheet;  and I will confess some of them broke - so it was a bit of a jigsaw putting them all back together.

The back plaque and ring were gessoed and then painted with pebeo blue/black paint, and then gold gilding flakes applied.

Sunday, 28 June 2020

Playing with more stash


Found this cheeky little fellow in my stash, and thought it would be a fun thing to paint on a hot summer's day.    As everything is etched into the MDF, it didn't require a lot of mental effort to colour him.

The decoart neon paints came out again for most of him, together with a little snow effect paste, and some glitter on top of that!

Can't remember the maker of the shape, I just know I bought it through Hochanda some time last year.

Saturday, 27 June 2020

Playing with Stash


I decided to raid my MDF stash in my Craft Den, and came across these two items, that I bought last year (or maybe the year before), and spent a relaxing afternoon painting them in the sunshine.   They are in two parts - a plain back and then the cut shape.    The back pieces were painted with black acrylic with a sponge.   The cut out shapes had white gesso applied with a sponge first, and then they were painted with Decoart paints - mainly using the neon colours.


Friday, 26 June 2020


The blue box is now complete, and the resin coated flowers added.   Views of all four sides and the inside.


Wednesday, 24 June 2020

Finished Sea Theme Box

Top

Front

Side 1

Back

Other side

Inside
The finished article was painted with acrylic wax and highlighted with pink and blue gleams.

Monday, 1 June 2020

Under the sea box

the start of the underwater scene


I built some MDF boxes and  having seen an underwater theme demonstrated on a different sort of box, and having some sea creature elements in my stash, it seemed the obvious choice.   I applied some blue/green pebeo Dyna paint along thee bottom in a rough wave shape, and added Weathered wood crackle paste. I then applied a darker blue over this, and a lighter blue above the line with a sponge, and added some dark and light splodges to this,  again with a sponge.  Using a stencil I created the bubbles.


finished box
Then it was a chance to play - painting up the various elements and adding some more stencilled images.   I gave the elements a light coating of gesso with a sponge first.

another view
I have still got to decide whether to add some more elements to the box, and perhaps a few more stencilled details to the other two sides.