Going Green Blog Background

Showing posts with label Pebeo Iridescent Dyna Studio Acrylics. Show all posts

Saturday, 29 June 2019

Mandala


Another MDF kit from my stash.  I confess I don't know the manufacturer - it might have been Olifantjie, I can't remember and there was no clue on the packaging!

The design reminded me of the rose window at Westminster Abbey - so that was my inspiration.

The mandala section was painted with pumice past to give it a "stone" texture, and was painted with paynes grey mixed with white gesso and with some Pebeo cream dry brushed over the top.

The back had white gesso applied, and then I traced a rough guide to the sections on to it.  I then painted the "rings" with Pebeo Dyna iridescent paints, which I then applied UTEE to for a really glazed look.

The flowers were painted with various pebeo paints amd sp,e Nuvo drops were added to the centres


Tuesday, 7 June 2016

Playing in the Den with the grandchildren

Well what a beautiful day it was on Sunday, the best day of the year so far, after what seems like weeks of rain and cold weather.

My son , his girls, and his girlfriend came over for lunch in the garden.   The youngest granddaughter has a party to go to, so her sisters asked if they could do some crafting in the Den.   The first time we have been able to do this this year!

I thought I would share their efforts:   (There is always some sort of stash in my Den for them!)

One painted a mask in Pebeo iridescent gold, and raided my stash of silk flowers to decorate it.  We then applied some Mixtion relief paste in dots above the eye holes, and applied mirror leaves to them when dry.


7 year old's mask


Her sister decided to paint a little wooden horse that I had bought - this is still work in progress as we ran out of time.   Painted with various Pebeo Iridescent paints, and some Mixtion applied once again with mirror leaves, and some googly eyes from my stash.    Next time she visits she is going to paint some "paint fusion" flowers on the blue seat.

10 year old's rocking horse (work in progress)

When they had gone home, I decided to have a little play too.   My Paverpol fairy was looking a bit tired, from where it was in the garden for the past two years (crikey did I really make it two years ago - where has the time gone!).  So, as all the Pebeo iridescent paints were strewn across the table,  the decision was made!

Here she is in her new colours:  (I actually smeared some Mixtion on part of her dress, but I haven't applied anything to it yet as awaiting a deliver of gold effect leaves)

Fairy on shoe last - 2016 Makeover

and here she is when first painted two years ago:

Autumn Fairy on a Shoe Last 2014

I hope you approve of her makeover!


Thursday, 19 May 2016

Door hangers

A little bit of an experiment for some door hangars for my granddaughters when they are visiting their Dad.

Fronts

I wanted to try and keep in with the colour scheme of the house he is renting, so used golds and creams.

Backs
After first applying a layer of white Pebeo gesso, I used Leonie Pujol's templates for creating the background to the words, sponging on the colours, and then I outlined the words with transparent Pebeo Cerne Relief.   I love these templates and the various words.   When dry I filled in the letters with Pebeo fantasy paints in Moon and Prisme.

The butterflies and the little tags on the back were also flooded with the Fantasy paints, and appropriate initials added in gold Cerne Relief, as were the zzzs on the tags.

The flowers and dots were done with Pebeo Mixtion relief and when that had dried (which leaves it with a glue like finish) I add gilding flakes.

The hangers were finished off with a touch of gold Pebeo gilding wax on the edges.

I am quite pleased with how they turned out, and are certainly different to the girly fairy ones I made for their rooms at home a couple of years back.


Wednesday, 18 May 2016

Steam Punk Book Box

Some time ago - like last year, before my husband died - I started this steam punk inspired book box.

Front

I had done the front, sides and inside, but confess when I finally got up into the Den this year to continue the project, I had forgotten what I had done and what I had used!  duh!  Anyway undeterred I started on completing the spine and the back, which I had at least applied black gesso to!

Fortunately I sort of remembered that I was using the Pebeo Dyna irridescent paints and sponges.  (What I didn't realise until I finished painting the back, that I had applied a layer of serviette to the front first and coated it with pva glue.   Hey ho, I could always start again if I so desire!

Back
 The back looks a slightly different colour, as the sun was shining and reflecting off the paints slightly differently to the front.   Also it looks as if I left more black showing on the front!

Front and side
 I used a packet of mixed cogs etc for the front and glued them on, and then did some more paint effect on them, as well as adding some Pebeo gilding wax on the edges.

The "leaves" of the book were created using Pebeo texture paste with a cream coloured paint applied to them, and then with my finger I rubbed gold gilding wax over the textured surface.

Another view

You can just about make out the texture of the pages in this picture.   The edge of the cover of the book also had gilding wax applied over the black gesso, which was easier than trying to replicate the paint effects on such a thin edge!

Not perfect by any means - as I said I can always redo it as the mood takes me!


Monday, 9 May 2016

MDF Dream Catcher


I bought this MDF dream catcher back in Februyary at Make It, Farnborough exhibition from Button-It and Craftwood Creations, and have at last got around to doing something with it.

It was gesso'ed and then painted with pebeo Iridescent Dyna paints,and Pebeo deco paints. but then I decided to apply Pebeo gilding wax to it - gold on the ring and words, and silver on the "strings".

The feathers were painted with a pale cream and white and then over-painted with a white and a gold fantasy paint with a kebab stick, and finished off with some Maimeri Iridescent paste and Glassy Gel mixed together. .

I then added to the feathers to some eye pins which have various hematite and bronze "pear fnish" beads added.  (Unfortunately the last little feather had a very delicate hole on it, and broke, so I stuck it on to the strings.  Finally I added some flat back pearls.

The picture I took tonight hasn't really done it justice - I shall have to find a whit background to photograph it in the morning.

Wednesday, 2 September 2015

A little experimental canvas


A couple of weeks ago, I bought a sort of folk art mould for cake making at a ridiculously low knocked down price at Dunelm - well it would have been rude not to buy it!  I had no idea what I was going to do with it, but thought it might amuse the grandchildren, if we were playing with cloud clay.

Well yesterday I caught up with a programme on Create and Craft, woith Kathryn Sturrock showing how to make a canvas with clay embellishments, and thought I might try the new mould out.

The canvas was prepared with some texture paste through some Sheena Douglass stencils (albeit the deisigns are not showing up, I should have made the paste thicker.  I then applied gesso all over the canvas and when dry I stuck on the embellishments which I had made from Hearty Clay - some from the mould and a few plunger flowers

Gesso was then applied again.  When dry I applied some mica sprays over it all - and wasn't really happy with the effect - so blotted that, and out came the pink and blue Iridescent DYNA acrylics, and I just did some random "dry brushing".


Sunday, 23 August 2015

La Fleur Box


A little "fusioning" from the Den tonight.   It was lovely there today in the sunshine.  The paint was drying as soon as it was applied.   It took longer to remove the latch and hinges and put them back on than it did to paint the box!

This is a little box from The Works, painted with black gesso and the Blue/Black Pebeo DYNA iridescent paint.

I lightly stamped the outline in light grey paint, and then applied the relevant colours.  This is the first time I have used this stamp.  It seemed a bit daunting at first, but with the practise sheet to hand, it was quite simple.  (Stamp is La Fleur from Sheena Douglass's paint fusion range).


another view

I could not capture the colour of the background, which in real life is a lot darker.  As I took the photo outside I think it was picking up that beautiful blue sky we had today.

Saturday, 22 August 2015

Zellie - the Zentangled Elephant

Well here she is in all her glory - finished at last.  I decided to paint her headdress and "saddle" rahter than fusion them.


and a few more views:


Wednesday, 12 August 2015

Owl Heart


I spent the afternoon in my Den with my eldest grandaughter today.  Her mum is "owl mad", and her favourite colour is turquoise, so I made this little plaque for her.

Both parts had black gesso applied, and the heart then had black Pebeo acrylic applied, and the edge painted with silver leaf paint.

The Owl had some texture applied by sponging on Pebeo modelling paste.  Then it was painted with iridescent DYNA blue/green acrylic and highlighted with silver and gold DYNA, and the branch painted with bronze DYNA.

It was then glued to the heart, carefully lining up the hole in the heart with the hole on the owl  (a kebab stick came in very handy).  Finally a coat of spray and shine was applied.

.... and best of all - my daughter loved it!

Saturday, 1 August 2015

Owl & Heart and Owlerflies/Owlieflies!


Blue, purple and pink


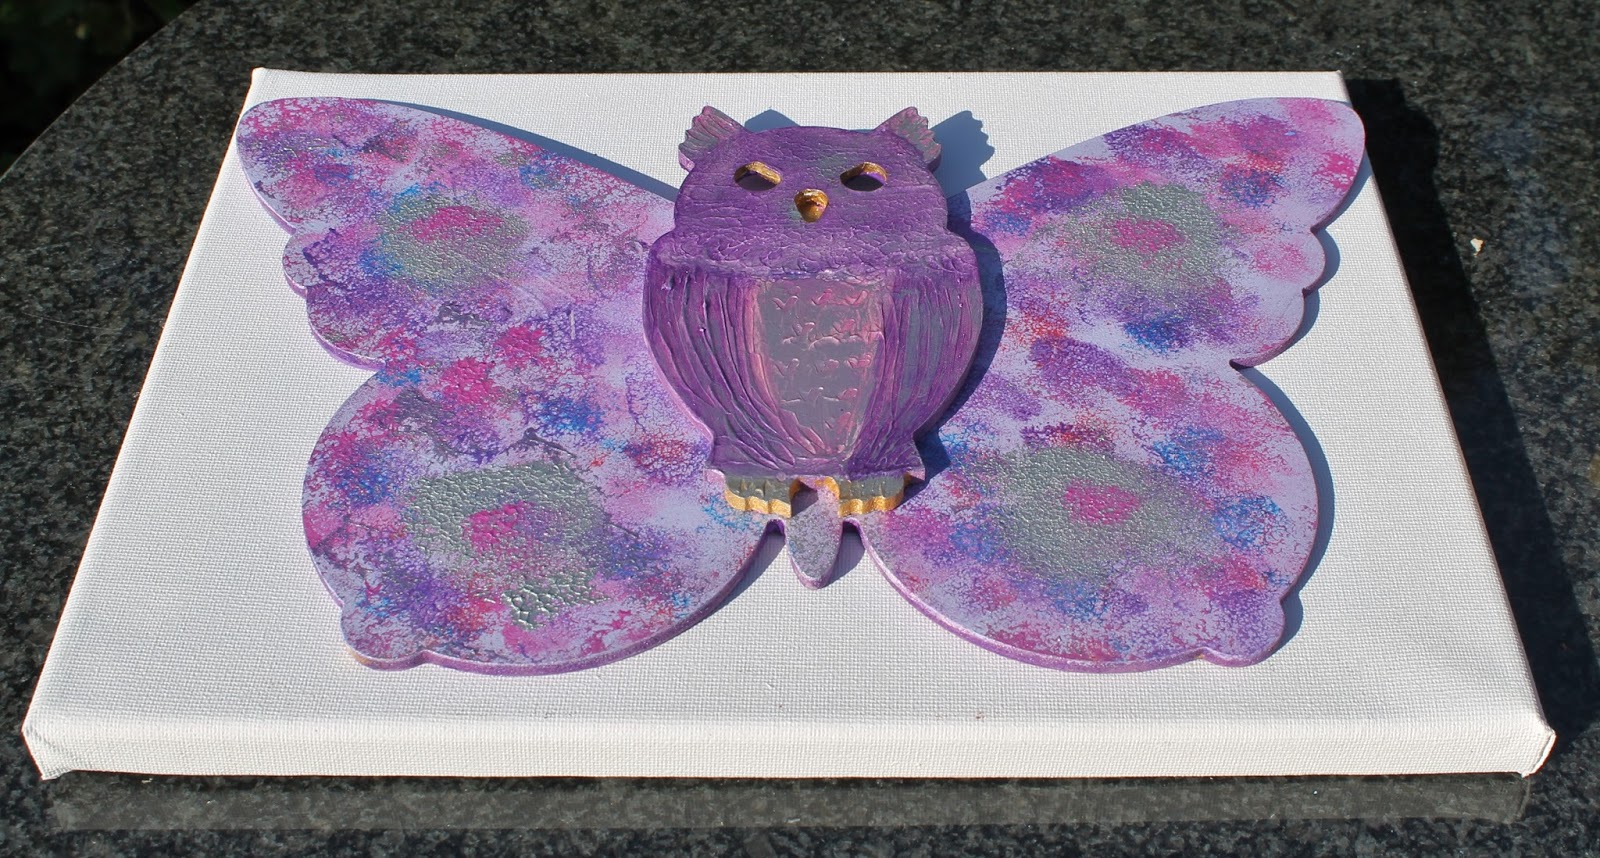
It started some months ago - my son's daughter's were raiding my stash in the Den, and discovered the owl in my stash.  Needless to say they all wanted the Owl!  I only had one cut out owl, but I offered them some other owls, and the second eldest decided that she wanted her owl on a butterfly background - and decided to call it an Owlerfly!  I eventually managed to get some more of the owls, but needless to say they then didn't want them!  So eldest granddaughter having had first "bagsy" on the owl and heart originally got to keep her choice.   The second eldest stuck with her larger owl, and the three-year old also decided she wanted the plain owl and butterfly as well!

However, I was given instructions as to the colours they wanted!


Purple and pink (the original Owlerfly!

Youngest's Owlerfly - Blue and Pink

Everything had white Gesso applied to them.  The Owls then had some Pebeo Texture paste added to them, and then sponged and textured with one of my rubber modelling tools to give the effect of wings and some markings on the front.  

They were then painted with the requested colours, using a mixture of metallic acrylics and Pebeo iridescent paints,  The cut-out Owl also had a pink- red vitrail mixed with lightening medium and and a lilac fantasy paint for its breast. When dry I applied some Pebeo gilding wax - gold for the cut-out Owl and Silver for the other two.  Liquid gold leaf was applied to the insides of the eyes of the two Owlerflies. 

I then sponged the butterflies and heart with various metallic and iridescent paints to compliment the owls in the colours the girls chose.

I am nor sure whether the girls want these to hang by ribbon etc in their room, or whether they would like them mounted on a canvas to create a piece of artwork for the walls of their bedrooms.

This is what they look mounted on a canvas:


Hope you like the Owlerflies/Owlieflies (chose your own version of the name)  as designed by a six-year old  Thanks for popping by.


Friday, 17 July 2015

Powertex Canvas - finished!


You remember my indecision as to how to finish off the canvas - well I finally made a decision and applied black gesso over the material and then dry-brushed it with Blue/Black Pebeo iridescemt DYNA acrylic paint.

It really shines in the sunlight - and I am pretty pleased with the end result, as it turned out just as I had envisaged in my mind.

Thanks for popping by.


Saturday, 11 July 2015

Work in Progress

I meant to have started to share this project the other day, but forgot.


Planning the layout
I have a polystyrene "canvas" that I have been wanting to play with for some time.  I made some roses and leaves from Hearty air drying clay  (ignore the colours I was just using up clay).

2nd stage

I then set to with the Powertex and some strips of t-shirt material and created the basis of the canvas

2nd stage different angle of view

Today I started on the painting using Pebeo DYNA iridescent paints and some primary element pigments mixed with Pebeo Gel

Leaves painted


Flowers painted (picture taken in sunshine)

Flowers painted (picture taken in shade)

The big dilemma now is how to finish off the material - Do I leave it black, do I paint it some sort of blue, do I dry brush it with a colour, or do I add gilding wax?    Any thoughts dear followers?

I like the black, but think it needs "lifting".  I am toying with the idea of using the Pebeo Blue/black iridescent paint.   Decisions, Decisions - so I have dipped another piece of material in Powertex and am waiting for that to dry to try out some effects on it as a sample.   Then hopefully I can finish the project.

I also have to decide what to do with the hole in the middle - I am thinking something mirror-like, but as this is probably going on garden wall, I don't want the sun reflecting on the mirror too much.    I am thinking another piece of material stuck behind with Pebeo mirror foil finish to it.  We shall see - watch this space!

Wednesday, 8 July 2015

Box Book and Faux Leather

 It started off like this:


in the beginning - stage one


A bit of a tatty mess with watered down pva and crumpled serviettes, a technique I wanted to try. ( Note I was very good and removed the hinges before starting!)


When dry, I used sandpaper on the edges to remove the excess tissue and then gave it a coat of red Pebeo acrylic pant, and over-painted that with various Pebeo DYNA iridescent paints: red/blue, bronze, golds, orange/yellow, yellow/green, and a bit of plain brown acrylic. Some applied with a brush, some with either a sponge or scourer.  I just kept going until I was happy with it.  The edges had two shaded of Pebeo gold gilding wax applied.


For the pages, I applied a pale cream acrylic and then with a scourer applied brown and gold DYNA paints, and also a bit of gold gilding wax - also applied with a scourer.  I also painted the inside with cream acrylic.


getting there

and hinges back on with a little gilding wax over them


I created some faux leather with some of Sheena Douglass's embossing folders and die cut some owls from the wood-grain "leather" using Joanna Sheen's owl die.

wood grain faux leather


The leaf folder faux leather was coloured with DYNA iridescent paints - green/yellow, blue/green, green/blue, orange/yellow, bronze, two shades of gold and a smidgen of brown until I was happy with the effect.  Again some applied with a brush some with a sponge or scourer.


leaf faux leather


The owls had various shades of brown distress ink pads applied, before I painted them with a mix of red/blue, bronze, orange/yellow and gold DYNA iridescent paints, with finally a little gold gilding wax applied.


Finished "book" box

There is actually a perspex cover for the centre part, but it caused too much reflection to photograph it with it in situ.

The whole project was sprayed with Crafter's Companion Spray and Shine inside and out to seal it and give it a nice shine.

Thanks for popping by to read about my experiment.

Monday, 29 June 2015

The idea was good, but ......


...... it didn't go quite right,  You just never know how mixed media ingredients are going to react!

I ran the sheet of canvas through the embossing folder. applied gesso and painted the back ground with blue/green Pebeo iridescent DYNA paints, and then with my finger rubbed some green/blue over the swirl and painted the top of the baubles with precious gold.  Fine so far and then it went pear-shaped when I did the mixed media baubles!

The only two that turned out OK were the middle one at the top and the bottom left (well it would have been ok if the paint hadn't overflowed!)

However, I shall not give up on the idea - I shall just use fantasy paints on their own next time.

Sunday, 28 June 2015

Mini Mannequin


Some months ago I purchased some mini mannequins from the Range for my grandchildren as Easter presents instead of eggs, and I also bought a set for myself.  So today I thought I would have a play with my set.

I dipped some t-shirt material in a mix of water and pva glue, and draped it around the figure, and set it in the sun to dry.  I was a tad impatient so I started to paint it with Pebeo Blue/Black DYNA iridescent paint (bad girl that I am), but actually I think it was quite a good idea as I was able to paint underneath the wrap in the front and arrange the folds at the same time.    

I think I will give it another coat of paint and try and get a bit of shading on it too, by perhaps adding a bit of iridescent silver to the paint.  (Hopefully by the time this gets scheduled for posting, there will be another updated photo below).

The flower was made from Hearty Clay using my new Christmas Rose folder from Sheena Douglass.  I just rolled the clay thinly and squished it between the folder, and then cut the flower out.   I set it to dry so that it curved.   I then painted it with a pale cream acrylic, over-painted/blended with the purple/blue and blue/green iridescent colours.

Final touches were the addition of a dark blue gem in the centre, surround by some tiny clear gems.

(My original idea was to create the dress using Paverpol or Powertex, but not wanting to get too messy I decided to use just the watered down pva.)

a second coat of paint this morning!  really pleased with the effect

Saturday, 27 June 2015

Christmas Rose

Left: Card.  Right: Canvas
Yes I know it is only June but my new embossing folders arrived this morning, and I just had to play!

I experimented with card and canvas.  After embossing, both the black card and the small canvas had a thin coat of black gesso applied first.  I then applied silver gilding wax, before painting, but then decided to apply green/yellow Pebeo DYNA paint to the raised bits of the leaves with my finger.

The flowers and leaves were then painted with the iridescent DYNA paints in various colours. However, I did apply a bit of pale cream acrylic to inner parts of the petals before blending in the pink DYNA.

Finall, I went over the embossed bits again with a little gilding wax.

Monday, 22 June 2015

Painted Bracelets


My youngest grandchildren came to visit today as it was Father's Day, and for once it was sunny.

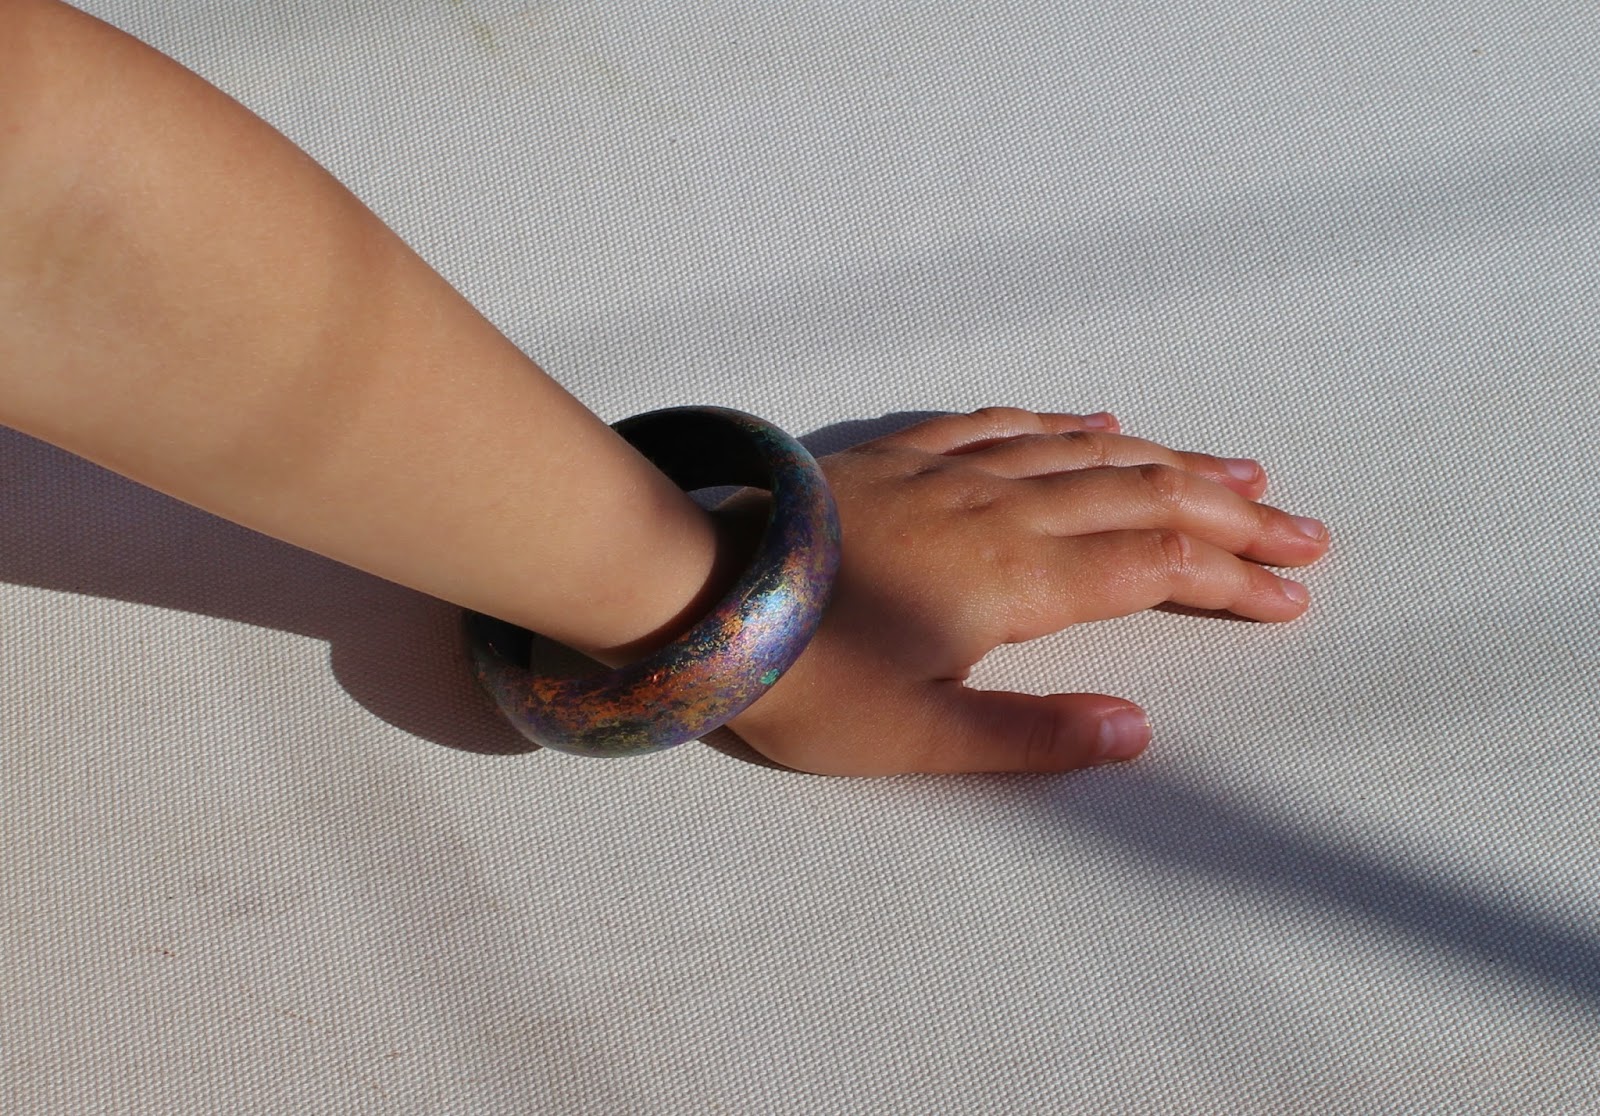
I had promised them some time in the Den.  They had already earmarked some things they wanted to paint a few weeks ago.  So today they painted some wooden bracelets.

9 year old's bracelet
I had prepared the bracelets with a thin coat of white gesso - but of course they decided they wanted to try the paint effect I had done on some drawers and boxes, so first of all they had to apply some Black gesso.

3 year old's bracelet

I decided the easiest and least messy way was to use some kitchen scourers that I had cut into small pieces, thus enabling a quick thin coat of the black gesso.  Being sunny this didn't take long to dry!

6 year old's bracelet

They then set to with the Pebeo  iridescent paits, using the scourer side of the sponges.   Well they all chose the colours they wanted, but then got carried away using nearly all of the eleven colours!

Amazingly there was very little mess, and even their hands were pretty clean - mostly black gesso in a few places, which soon washed off.

Even the three year old painted her own bracelet, with me just holding it for her!  She was really very good.

We left them in the sun to dry and then I varnished them with Spray and Shine.   They did an excellent job didn't they?

Tomorrow I will share what else they did .......


Tuesday, 16 June 2015

Stencilled Wooden Heart

Front

Another little play with a couple of my newly purchased stencils from Clarity Stamp open day.

I had already prepared the background with blue/green DYNA iridescent paint.  Yesterday, I mixed green/blue DYNA with Pebeo modelling paste and stencilled through the Clarity Large Leaves stencil, and added some shading with the bronze DYNA and a green acrylic from my paint fusions paints, with a little distressing with a scourer around the edges of the heart.

I then used the Reeds stencil, from the Natural Accents set and applied Pebeo sand texture gel.  When dried this was painted with various DYNA colours.

The three butterflies were created from Hearty clay, painted with DYNA violet/.blue and then gold gilding wax applied to them.  The shells were painted with the same colour and a touch of bronze DYNA.  Gold gilding wax applied to edge of heart.

I intended hanging the heart, but having taken the picture with it sitting on a canvas, maybe I will mount it on that.

Back
Still undecided whether to mount the heart on card, I painted the back, which was already prepared with black gesso.  (just because I could! )

I used another of the stencils from the Natural Accents set and stencils DYNA yellow/green over it, and then added some more stencilled colour to the "non-leaf" section with green/blue.

Having found it's original cord, I decided to go with the hanging version rather than a mounted heart.