Going Green Blog Background

Showing posts with label Air Dry Clay. Show all posts

Sunday, 24 May 2020

A Green Man


I bought this lovely Green Man mould with a view to casting him in resin, but chickened out at the last minute (although I will cast him in resin in due course).   However,  this one was created using air dry  clay and then painted with acrylic paints.    I was really pleased with the finished result.   I may apply a very thin coat of resin on him to protect him and make him weatherproof, or use weatherproof varnish.     I am hoping that they make the moulds in smaller sizes eventually too.

I also sent for some more craft concrete, and I will make him using that too. which will also make him weatherproof.  He would look great on a flowerpot

Thursday, 30 January 2020

Brick Man Part 2


In addition to Dr Who, I also made a Harry Potter figure.  Again painted with various acrylic paints and Posca pens.  Card added for collar and also used to create his glasses.  Hair, Golden Snitch and Hedwig the owl were created in Air Dry clay


sitting

golden snitch

Hedwig

Wednesday, 29 January 2020

Brick Men Part 1


standing


As regular followers will know I have been a bit quiet on the blog recently, and that is because I have been working on a couple of secret projects for my daughter's birthday.

There was a special offer on MDF models etc recently on a friend's website.   I said I didn't need anything and my daughter said she was thinking of buying a couple as she fancied a Dr Who and a Harry Potter figure.  Thankfully she forgot to order them ...... but I had duly noted her wish and I bought them and have been secretly building and painting them over the past few weeks.    Fortunately for me (but not her) she has been quite ill, and hasn't visited quite so much recently, so I only had a couple of mad panics to hide them when she visited unexpectedly!.


sitting
The model kits are from Stamps Away.  I painted them using various makes of acrylic pain and Posca pens.  I added some collars using card, and also a cravat using scrunched up tissue.   I also knitted the scarf -now that is a feat in itself as I hate knitting (and as my daughter remarked when I gave her the model - "ah, that is why your knitting bag was out the other week!).   I created the hat and the hair from air dry clay, as well as the sonic screwdriver,   Yes I did my research on The fourth Dr Who, and discovered what his sonic screwdriver looked like!

I even amazed myself when I painted his face as I think it actually looks like Tom Baker - more by luck than judgement I confess!

Wednesday, 18 December 2019

As promised

I said on my last post, that I would share the journal covers that the other two grandchildren had made, and having been under the weather I forgot, so am rectifying that tonight:


Monday, 15 July 2019

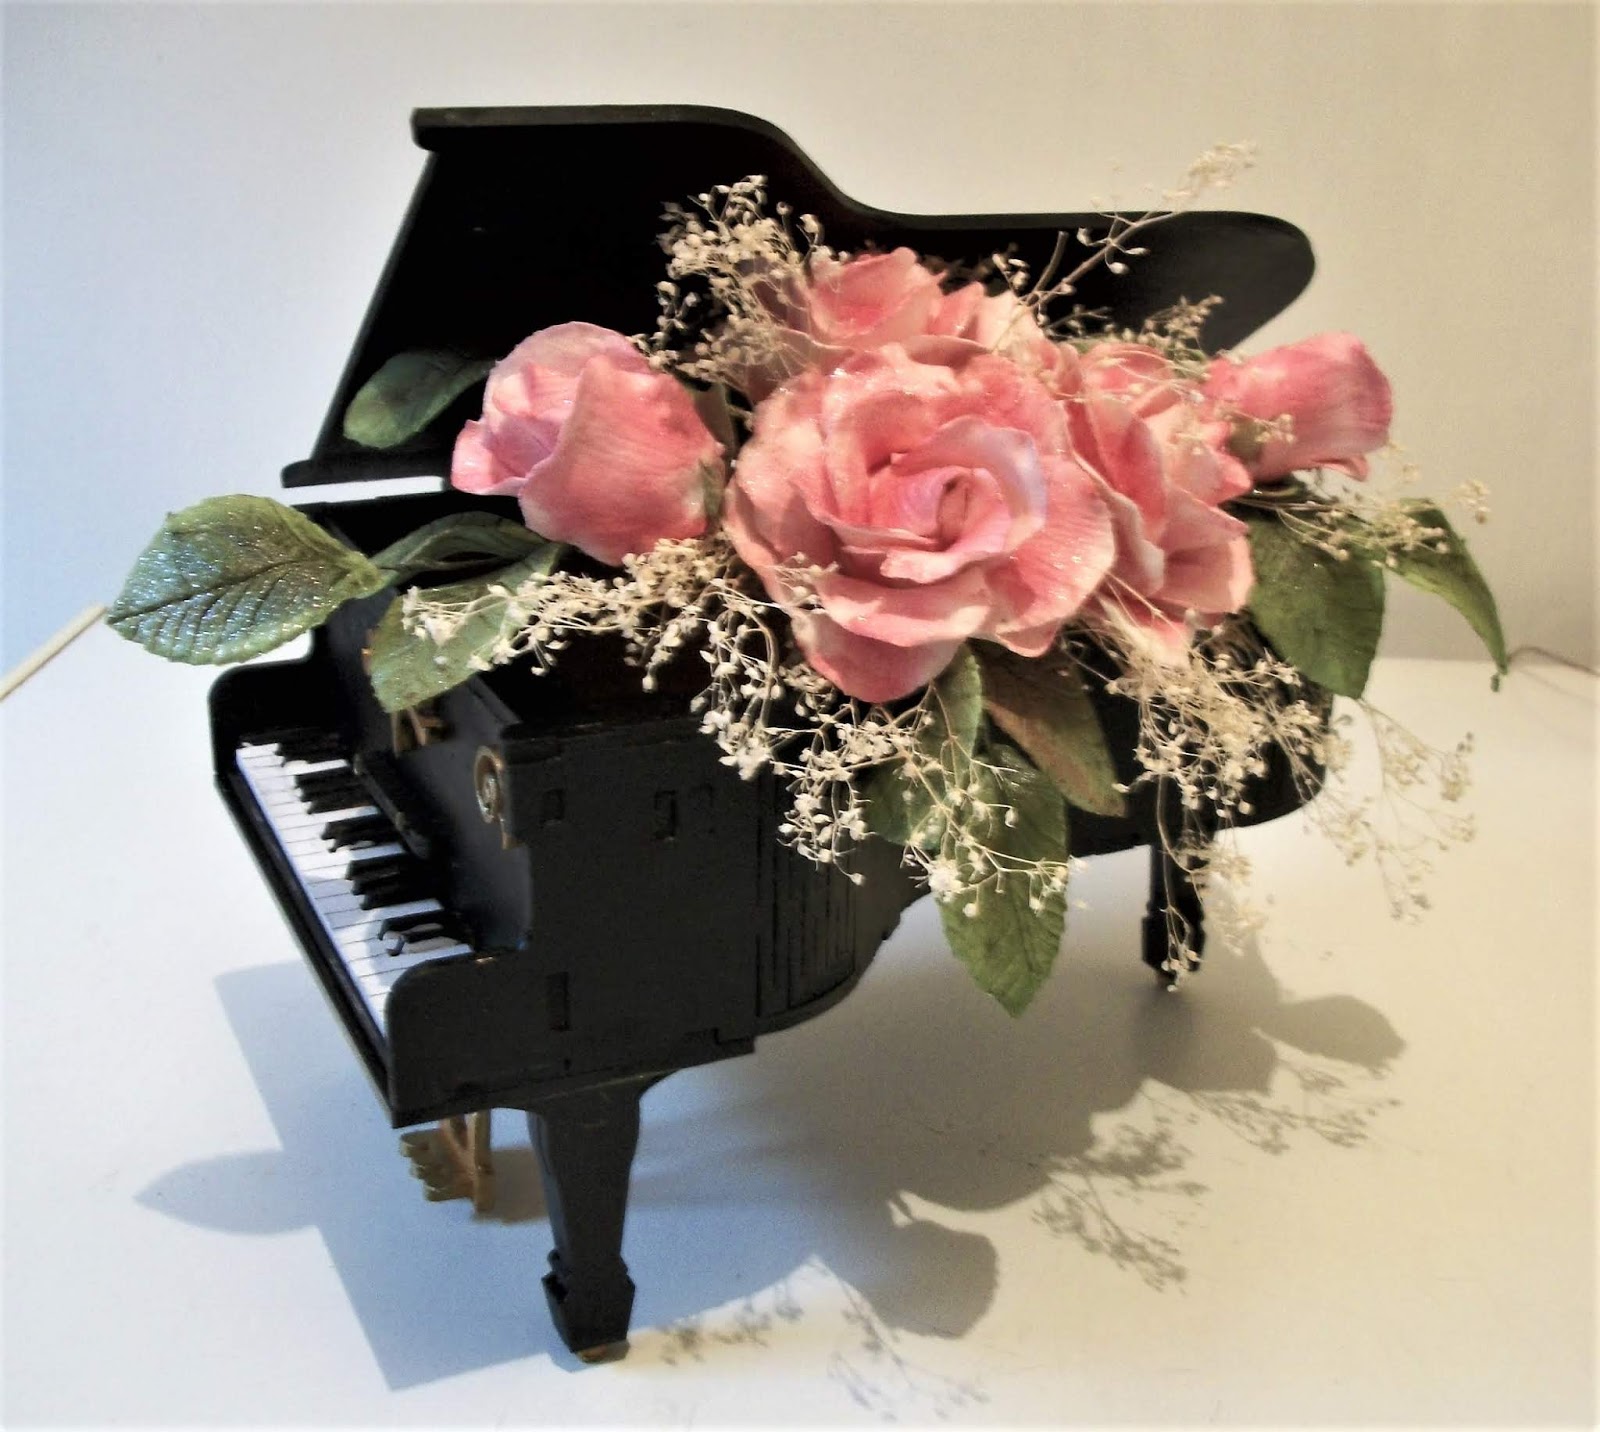
Finished Piano


Here is the finished piano, complete with its flower arrangement.   The flowers are made from air dry clay - mainly using FMM paste, but also a little Hearty Clay.   I made the roses and leaves in white paste and then dusted them with cake decorating powder colours.  As I wanted a softer effect instead of making the gypsophila from clay, I used some dried gyp from my stash.  I have had this for over 20 years from my cake decorating days, and although it was in a dark place under the stairs it had aged a tad.  Undaunted as a crafter I dry brush it with a bit of white gesso to bring it back to life.  (I have now ordered more - so I will remake the arrangement in due course).

another view


The flowers and leaves before and after they were dusted


Friday, 21 December 2018

MDF Harry Potter


Regular followers may remember the Tim Peake Brick Man that I created.  Well my son couldn't decide how he wanted his painted the other day I had another bit of inspiration and as he girls love anything Harry Potter, I decided to try and paint my MDF man to look like him.
It was quite interesting researching what colours he should be painted and I discovered that in the earlier films the stripes etc were more scarlet and yellow, and in the later films they were burgundy and gold - who knew?

I created his hair from hearty clay and I made his spectacles and his colare out of card. to make them a little more 3D.   I also found an owl mould in my ancient cake decorating stash, and created a white owl from Hearty clay too.  


Monday, 3 December 2018

MDF Sewing Machine

 
Finished item

I had so much fun creating this - and am really pleased with the end result.  My origina plan was to create a white machine with turquoise flowers - and then I had some inspiration when I glued the embellishments on it, and I thought I would go with a vintage look.   So out came the black paint and the pebeo gilding wa, and my favourite marble finish spray.

Then came the fun part  creating some flowers to compliment it.  I had the idea of doing a gold, ivory and black them with the flowers   I made them all in white air dry clay to start with, and I was tempted to leave the roses white, but when I looked at it in daylight the next day, I went off the idea.  (The roses, leaves and ferns were made using the FlowerPro moulds and veiners )    -....
The white version  (as you will see from the photo above, I also added some more
mdf embellishment pieces

...... so out came my cake decorating dusts and I coloured the flowers with those.   There was also a bit of artistic licence with the use of some glitter and gold gilding wax.


I hope you like it - everybody that has seen it so far has fallen in love with it - I certainly have!

Sunday, 16 September 2018

Space Project


Today I am sharing one of my 6 year old granddaughter's effort - her space project for school.   She came up with the idea of what she wanted to do - and her father came up with a way of illuminating it.

This was nearly all her own work.   She made the planets from Hearty Air Dry Clay, and painted them with watercolours following a chart from the internet.  Making them as as realistic in size as she could - though Jupiter and Saturn should be a lot larger in comparison, but had to be realistic with the size of box she was working in (one from her own shoes).  She threaded the planets on some black fishing line (courtesy of a friend of her mother).  She painted the shoe box with black sparkly paint  for the night sky and added a few drops of glue and some and some glitter for even more stars. 

The sun was created from some old packaging, which she paint with clear gesso and alcohol inks.


She needed a little help creating the holder for the torch, which was created from some more packaging; and she needed a little help from her cousin and me to wield the hot glue gun to stick it to the box ..... and to cut the hole in the box with a stanley knife. For safety reasons, I think that is allowed.  (The torch shines through the side of the box and the sun.

Note the rings on Saturn - created by cutting out the shape in clay with two bottle tops!  Also the Earth has its moon (confess an inspiration of mine in the middle of the night to use a map pin - and her aunt came to the rescue with one!)

I hope you agree that she had made a brilliant job of it.

Sunday, 26 August 2018

Grandchildren's craft - Air Dry Clay


I had the grandchildren unexpectedly the other day for  couple of hours.   They had been shown how to make roses the previous day by a friend and wanted to show me what they had learned. Out came the air dry clay and some cutters as well, and this is the result of their efforts over a couple of hours.

 
I wasn't too sure about letting them loose with acrylic paints - so they used watercolour paints.   (I did prepare the round plaques with gesso for them, and the black canvas was a prepared black one.)


I gave them a few more hints on how to make the roses (what I call marzipan roses) which are just made by hand.   I think they did very well.

Tuesday, 21 August 2018

MDF Wishing Well


I had fun with this little project.  It was another of the Clevercut models.  Whilst I was putting it together, I applied a coat of Powertex, in the hope that it made it more weatherproof. (I did post a sneaky pic of that earlier)


a glimpse of the powertex undercoat - looks awful doesn't it before the painting!


As you will see I have taken a few photos in various locations, the one below is its final resting place (for the moment).

The well was overpainted with various acrylic paints, and the base and bucket had some ultra thick embossing powder applied randomly to give a weathered look.

The roof and the inner surround to the well were covered with air dry clay using some PME mats to create the texture - cobble stones for around the well, and stone wall for the roof.   Black paint was applied to the textured clay, and then immediately wiped back with a wet wipe.  (A fantastic technique learned from a demo by Kathryn Sturrock).   I also applied a little green paint and distress oxides to create a "moss" look, which also had some UTE powder added for texture.


Saturday, 21 July 2018

One Finished Barge


Well the first barge is painted (and even has a name).    I confess I changed my mind on the colours to paint it a couple of times.


As I mentioned before I painted the barge with Powertex, and then gave them a coat of white gsoo.  I commenced the painting with various acrylic paints (Makes include Amsterdam, Hobbycraft, Pebeo, IndigoBlu and Pentart.)


I created the flower containers, jug and bucket from FMM Air Dry clay, and then painted them. 


The "rope" came with the kit.


The decoration was painted with miniature ball tools, using the paint fusion technique.


and finally I gave it a name ... although I think I should have called it the Elena Dawn , which would have been a bit more "classy"

I have to admit that I am pretty pleased with the result, considering my eyesight isn't great these days as I am awaiting a cataract operation,

Tuesday, 5 June 2018

Clay Modelling with the grandchildren, and a visitor's watercolour painting.

 It has been half term week, and I have had the youngest grandchildren here for a couple of days and they wanted to do watercolour painting and clay modelling - so we combined the two.   The first day was spent modelling with air dry clay.


6 yr olds apple with legs and a fairy door

Fairy door
9 year old's "Daddy & BBQ"

12 year old's mermaid on rocks.

This was all their own work (I had been hoping to do something myself, but I was too busy supervising!)  I did get to coat the boards with the texture mediums for the sea and the grass for them, so that they could dry before they got to paint them, and I helped with the initial shaping of the apple, and made suggestions for the painting of the apple.

My Wilton people molds, that I must have had for nearly 40 years came into their own for the heads and bodies, and the Fairy Door was a Sugar Buttons mold.

As I didn't dare risk them painting with acrylics, they used watercolour paints and some goache, which worked quite well  The 12 years old did use some of my metallic Posca pens for the mermaid's tail.

I think they did extremely well.

On the second day, when they were painting, their Aunt (my daughter) called in, and she wanted to try a watercolour painting.  So under my guidance (that's a joke really, as I am only just getting to grips with learning how to do it) she produced her first painting.

Misty Dawn
She wasn't too happy with it, but what a difference when we took the masking tape off - I think it is brilliant for a first effort on linen watercolour paper, with my new Matthew Palmer brushes, and just my guidance.   (At least I had a video recording of a demo to follow when I did mine!)

Thursday, 5 April 2018

Playing with textures


Well this may look a bit "naff" but the object of the exercise was to play with some textures on something that didn't matter - i.e. a custard tin.  From base up I used Amsterdam Pumice Medium, Pearl Medium and Gel Medium and let them dry.


The original idea was to try and paint a "seaside" scene on the side of the tin  - well that didn't quite work, as the finished texture of the gel medium didn't really work ..... so out came the air dry clay and some cutters and moulds and I made daisies and leaves, which were painted with acrylics.


 Next it was time to tackle the plastic lid.   I used the new Izink Diamond Glitter paints - wow these are brilliant.  I used a green for the centre of the lid and a mix of blue and purple dabbed on to the rim.

It needed something else for the centre so the acrylics came out and I painted a paint fusion rose (ok in hindsight I should have painted a daisy to compliment the sides!)

Yes it looks a bit weird and not what I had originally planned, but was a good bit of Mixed Media play.  No doubt it will find a place in the Den to hold something!

Sunday, 13 August 2017

Playing With Clay


I have been child-minding the youngest granddaughters a couple of times recently.  Last week, I got the clay out and the made these items

duck by 8 year old

Plate by 5 year old
 Yesterday as they had dried and it was lovely and sunny we sat outside and two of them painted their items.  (Eldest was away at Guide Camp)


All done with Pebeo paints - some decocreme and some DYNA iridescent.   The red on the plate doesn't really show up in the light - it was done with red/blue DYNA and it changes colour as you move the plate.  The duck was given a coat of Pebeo gold glitter paint, before we varnished it.

The 11 year old still as this one to paint at some point


Saturday, 11 March 2017

playing with Pebeo Fantasy paints and clay


A friend posted a video of some butterflies she made with Fimo and a mould, which she painted with Pebeo Fantasy paints.

Inspired I decided to experiment.  I don't have any Fimo, and I find it to hard to work with.  However, I do have air-dry clay, and some little moulds that I bought recently at a Craft Show.  

The flowers and butterflies were made with white clay and then painted with black gesso and varnished with All Round Medium.  When dry I applied the Pebeo paints (Fantasy Moon and Prismé) and a little glitter vitrail.  They turned out surprisingly well, and being air-dry clay are still slightly flexible.

I shall find some more moulds, and play again.

Tuesday, 13 December 2016

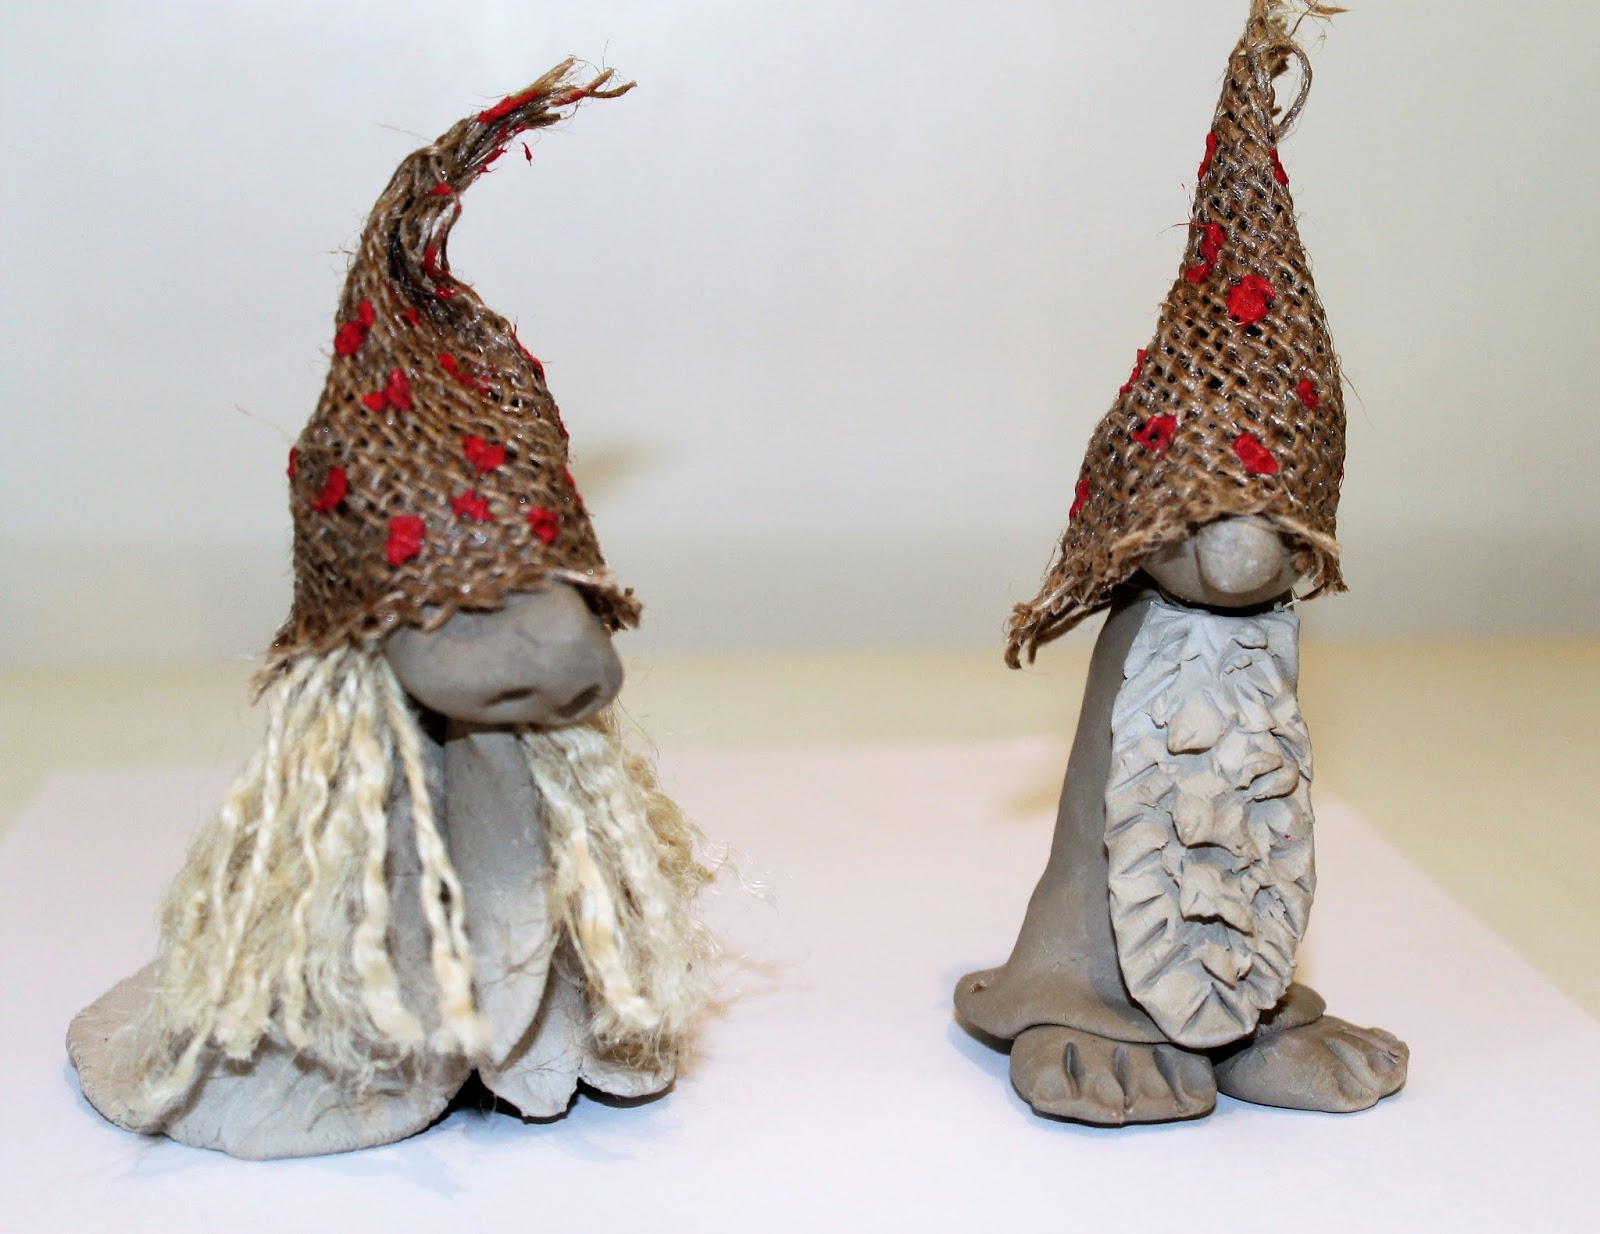
Clay Gnomes & Wizards


I had a little play with some air dry clay the other day, and made a couple of gnomes/wizards that I had seen demonstrated a while back on Hochanda.   (It took a while for my order to arrive, by which time the programmes on catchup had expired - fortunately I managed to watch one of the last repeats and "snip" some inspiration and save it).

For the figure on the left I shaped a cone of card and draped the clay round it.   Added some twine (unraveled) for its beard.   Then added a nose (you don't need a head as such just a large nose shape.   I then worked some all round medium into a piece of hessian for the hat.

The figure on the left is slightly hollow - using my fingers.  He had a round head an a smaller round for his nose.  I then flatted a strip of clay and snipped into it and textured it for his beard.    When I looked at my original "snips" from the show - I discovered he was supposed to have a clay hat!  (oh well next time - lol!)

In the first picture I realised the gnome looked more female as its beard had moved and it looked more like hair - so I re-arranged the twine - hopefully it looks more like a beard in this photo:


When I have time I will make a little family of these for next year, as I want to make some more fairy doors, and I can hopefully create a little scene.  I might even try to paint some of them as an experiment too!