Going Green Blog Background

Showing posts with label Jewellery. Show all posts

Friday, 23 July 2021

Resin Jewellery


I confess I have been a bit remiss and not posted recently, although I have been playing with various "goodies. so I am tempting to catch up over the next few days.   My excuse is that family matters have had to take priority (as they do from time to time).

I had a lovely play with some resin and jewellery findings the other day when it was lovely and warm and I could work outside and in the Den.   (I try to avoid doing resin indoors, as it can get a bit messy!)  The top picture wee using various molds with either dried flowers of coloured resin.


The next two pictures were made in cabouchon molds and then stuck onto bezels:


These next two photos show resin done in backless bezels (you have to have them stuck to special sticky tape to pour them, which you then remove.   I have used various colors of resin, dried flowers and glitter bits/   The second picture shows the backs 


Friday, 4 June 2021

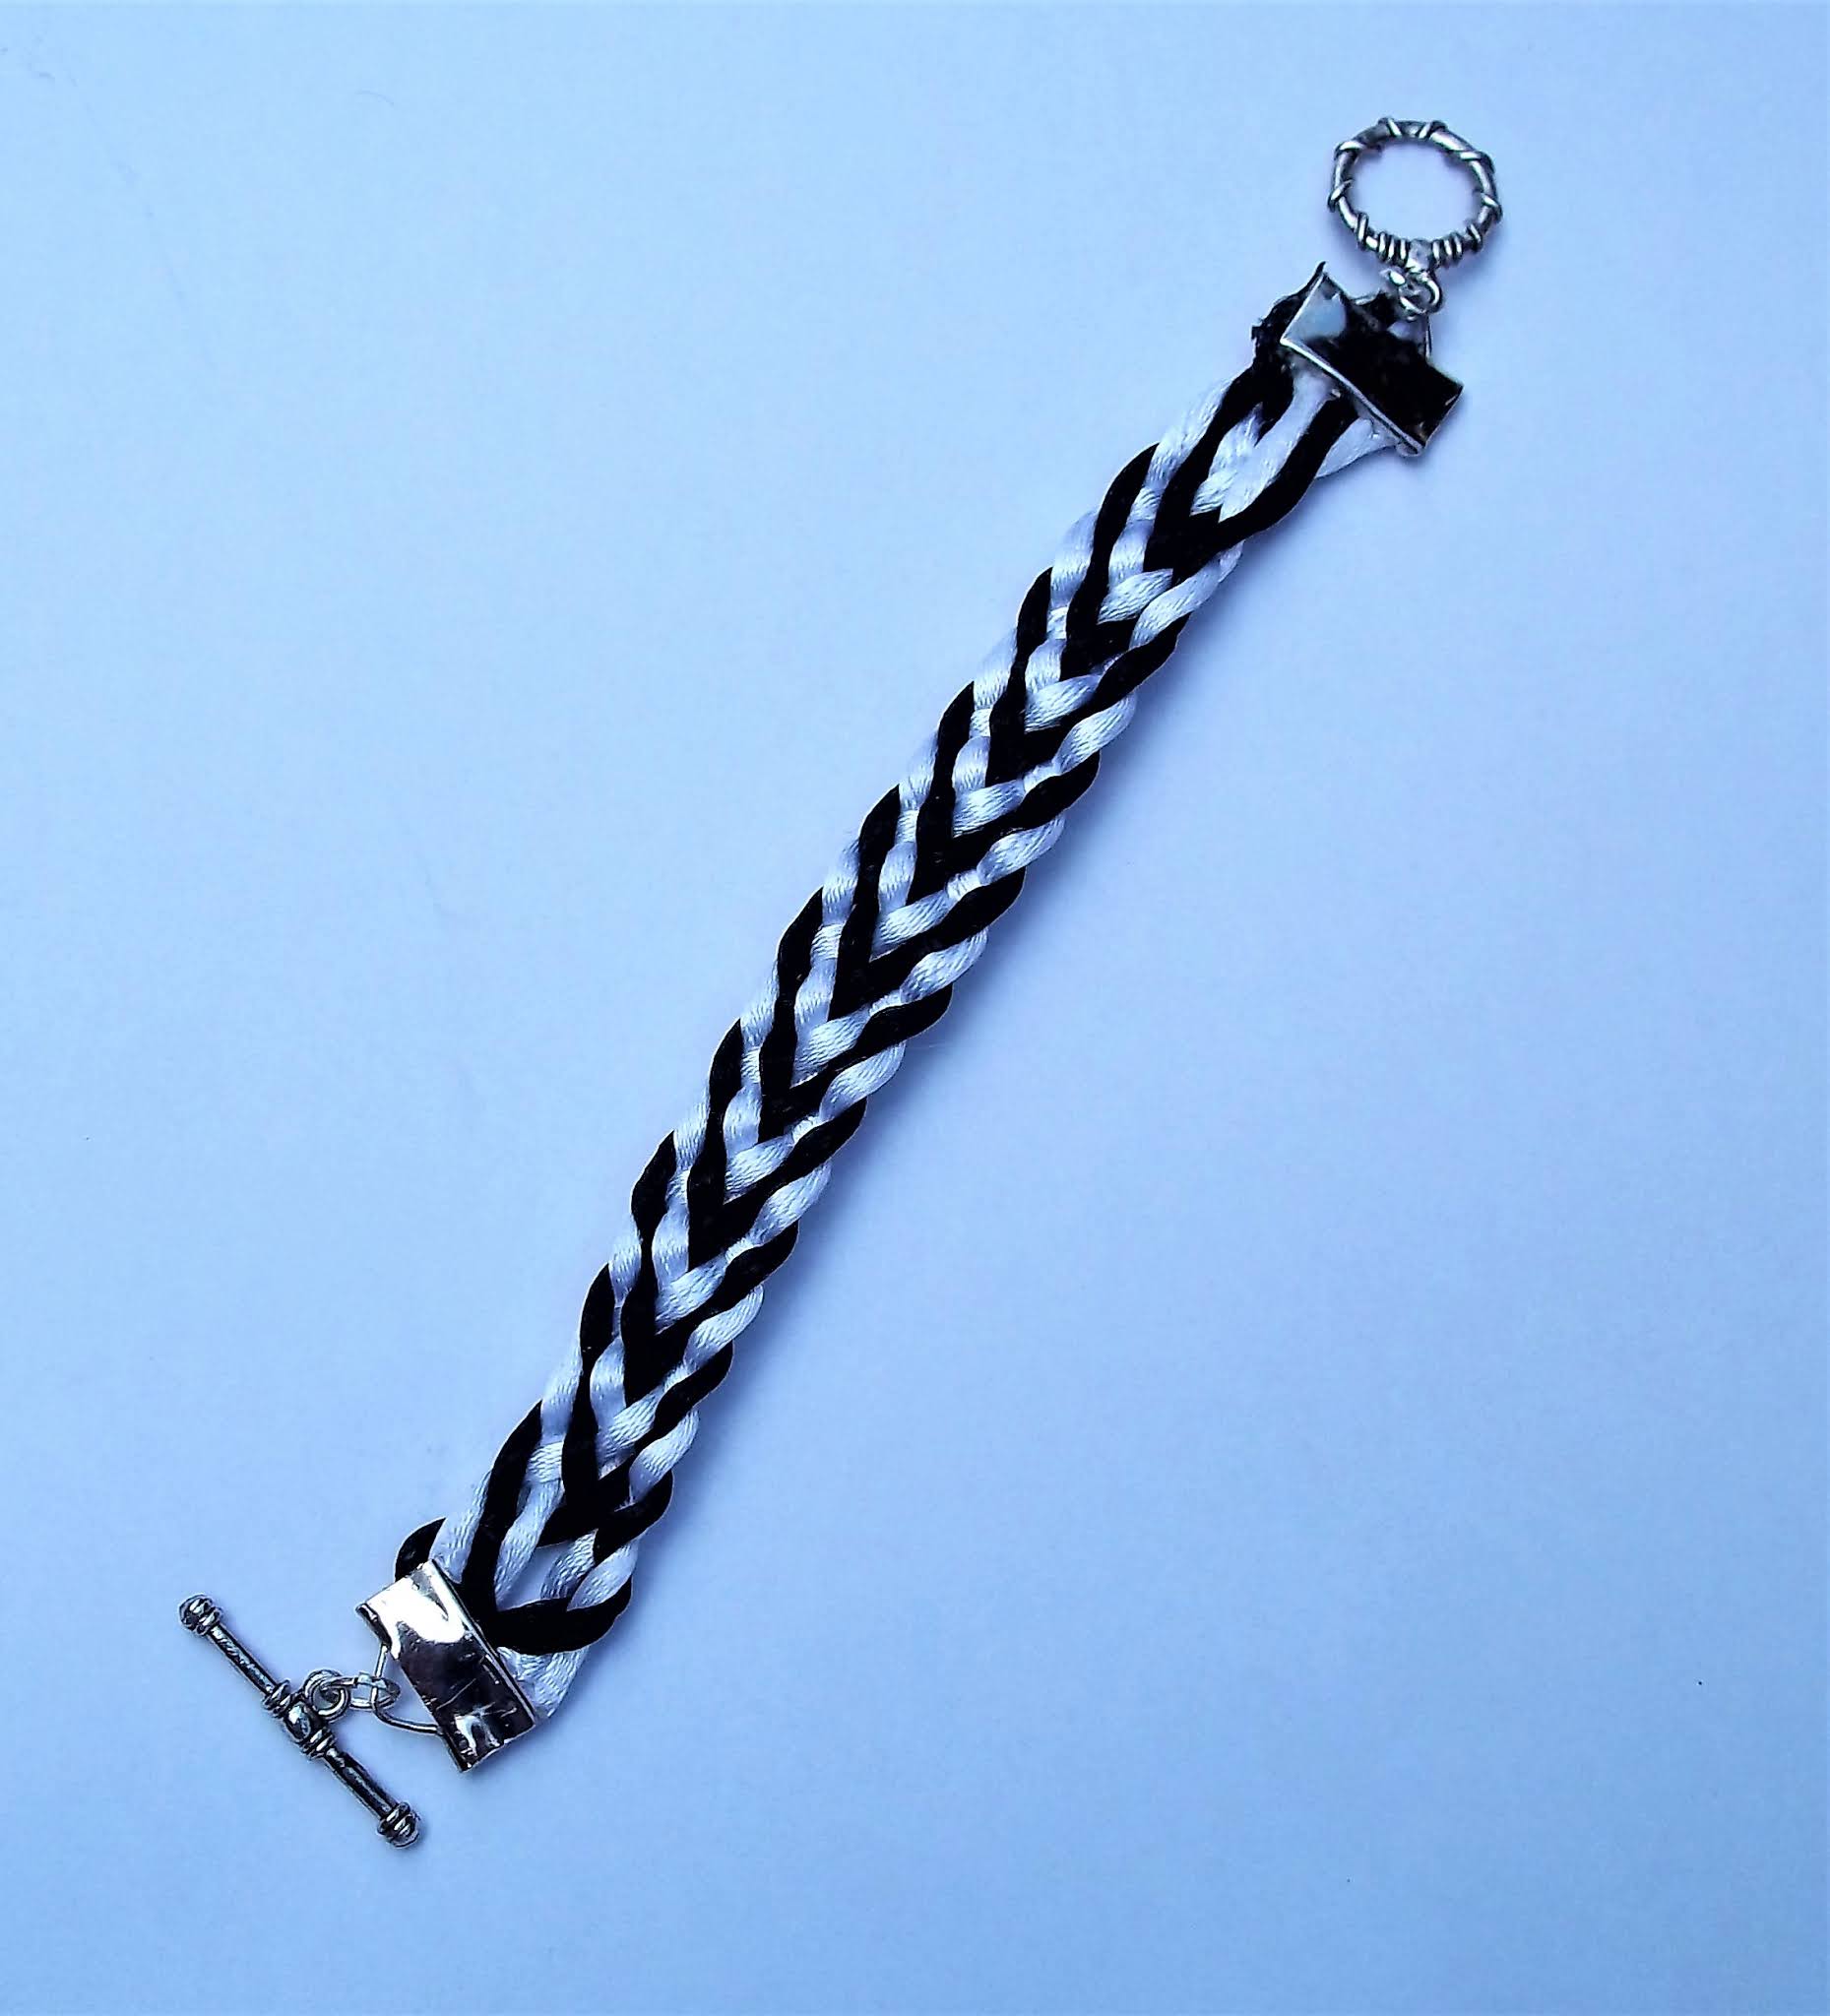
Flat Braid Bracelet


I wanted to see if my eyes could still cope with some jewellery - so I attempted a flat braid bracelet.  Not perfect as I had a bit of trouble with the claps, particularly as I seem to have run out of my jewellery glue to hold the braid in first before attaching the clasps,   We also won't mention trying to open and close jump rings when you can't see what you are doing!  but hey ho - as my dad would have said "A blind man would be pleased to see it!!   

Friday, 7 June 2019

Resin Pendants


I had some leftover resin when I had finished applying resin to the paint pours, so I decided to try out some moulds I had .  I dribbled the resin in carefully, and then stirred a smidgen of pigment into the resin and added a few bit of gilding flakes.

They could have been a little fuller, but I only had a little resin left over.   Now that I have some casting resin which will be thicke, than the pouring resin used I will do some more.

Monday, 17 December 2018

Monday, 19 March 2018

Angel Chandelier


I confess this kit was a bit of a nightmare to make, mainly due to the fact that it was a tad fiddly, but secondly there weren't enough jump rings to make it.   The kit instructions said 18 jump rings, but it was obvious when you underlined every mention of jump rings in the instructions that you needed 24.  Ok there were a few extra, but I had to resort to making some rings from ends cut from head pins to make up the 24 as I had none in my stash of the right bronze colour .   (I wasn't amused!)

I was even less amused when I came to connecting the chain.  The options mentioned were to open a link of the chain ..... erm yes fine but they were too small to attach to the elements shown above the wooden ring.   I couldn't face making any more jump rings, so resorted to using some gold jump rings from my stash that were same colour as the chain.    So instead of 18 jump rings as detailed in the instructions I actually needed 30!
 
I shall complain of course - particularly as I have another kit to make up ...... that might not be for a while.  I will have to get in the right frame of mind to tackle it as it is a tad tricky, and took me a long time to put together, albeit the instructions were relatively simple and easy to follow; but I also need to hope that extra jump rings get sent or I can purchase some in the a bronze colour to match.

Monday, 4 September 2017

OK I confess, I am hooked on making these!


Greengold Vitrail, emerald prismé and eggshell white prisme
(and a happy accident - the gem landed the wrong way up!)

Yes I admit it - I am hooked on making this cement jewellery.  Again work in progress as you can see from the first picture I need to finish the edges and the backs.  (I am waiting for my liquid gold leaf to arrive).

With apologies that the colours aren't as good as they should be - blame it on the grotty English weather today!

Turquoise vitrail and turquoise prisme and gold leaf
(attempted a sort of spider's web drawing through prisme with a cocktail stick)

Parma voiloet vitrail and violet prismé and gold leaf
(yes it is violet although doesn't look like it in this image)

Gold Vitrail with English Red and Eggshell White Prismé
and a start gem

White vitrail and onyx prismé
(paler in real life)

The complete selection

Sunday, 3 September 2017

More Cement Jewellery


Think I am hooked on making these.    Work in progress, as I need to finish the backs and edges, when the fronts are completely dry.

Wednesday, 30 August 2017

Cement Jewellery

Cement jewellery I hear you say?  Yes - using jewellery cement by Rayher.  It is quite lightweight.

I ordered the kit and some extra bits and bobs back at the beginning of August, but there was a delay on delivery, so was hoping that I would remember how to use everything!   Fortunately there are some very simple instructions in the packs.

Having caught up with all the washing from a long weekend away with the family, I was itching to get my fingers on the goodies that arrived yesterday morning.

Here are last night's castings:

The turned out castings
When I had filled the rubber molds, I dropped some little sticky gems from my stash onto the top, when the clay was beginning to "crust" over.  (As you can see the molds are designed so that you have a hole for your cord.)


This morning came the "fun" bit - decorating them.  I had no idea where I was going with them.  The kit comes with some "adhesive milk" some fine very sticky double sided tape, gold leaf, paintbrushes and varnish.

The decorated items
Below are individual photographs and how I did each one.   (I will add that I started off by trying some brushos on them mixed with Brusho Aquawax, but wasn't completely happy with the result - so left the backs finished with that.   I used the gold leaf, adhesive milk and the double sided tape on some, and then experimented with Gilding Flakes and various Pebeo Fantasy paints.

Oval: using adhesive milk and gold leaf, and then Pebeo Vitrail and Prsmé


Heart: Using adhesive milk and Gilding Flakes, and a stripe of unicorn sparkles
(shows up better in the group photo)

Diamond: Gold leaf stripe using double sided tape and Pebeo Prismé

Oblong:  using Pebeo Moon and Prismé

Round:  Stripes using double-sided tape and gold leaf;  Pebeo Prismés at top, and
adhesive milk and unicorn sparkles at bottom

Hope you like the effects.  I have plans to try some stamping on the clay blanks and perhaps using some peel-offs and acrylic paint/ Pebeo Fantasy paints......... Watch this space!

Tuesday, 25 April 2017

Rings for the Girls


I treated myself to a set of ring sizers and a mandrel the other day, so my youngest granddaughters and I made some rings, when they came over for the day.

They had fun choosing their beads, finding the right size and then  watching me make the rings.  Not bad for a first attempt, and by the third one I was getting the hang of it and even improvised on the pattern (middle ring in the picture).    They are prized possessions now!

Might have to make myself one next!  

Thursday, 29 December 2016

Hematite and Snowflake Necklace


Well the title describes it really doesn't it.   Square Hematite beads, alternated with  snowflake beads.  A Christmas gift for my son's girlfriend.

Tuesday, 25 October 2016

Angel Charms


It's ages since I played with my jewellery stash.  I suddenly remembered that the last time we went to jewellery show, I purchase some angel wing kits - crikey that was probably October lat year!

Anyway today was a little miserable outside, no rain just a bit of a grey day, with the sun trying its utmost to peep through.   I needed to tackle the dreaded ironing pile, but first I decided to sit quietly and play!

Voila 10 little angel charms.   They were mainly from a kit from Riverside Beads, but I had also purchased some separate wings to create my own with tear drop beads, so although they are basically all the same I used some of my other wings for a bit of variation.


Tuesday, 15 March 2016

Playing about with pearls

Many, many moons ago I had some rather nice earrings from Avon.  I don't have pierced ears and clip-on earrings used to pinch after a while, but the ones I had had no clip, and were fab.  Unfortunately over the years I managed to lose them.

Today I tried to replicate the idea with some single hole pearls I bought recently


three pairs of beads - two with round pearls and one pair with a flat backed pearl

Trying to get the length of the wire was a bit interesting.  I thought I had one remaining earring in my jewellery box, so I could copy that, but it seems to have disappeared!  I shall play about a bit more and perfect them.   The bag of pearls only cost £1 for each type of bead.  I could actually do with getting some a bit smaller.

Monday, 8 June 2015

Enamelled Jewellery

Chatting to a friend today, I was searching for an entry on my blog, and it seems I omitted to to write about some enamelled jewellery I made with Pebeo Fantasy paints.  So this is now rectified.  (Apologies if I did blog them before, but just can't find them!)

Last year I made these pendants - the first two are double sided, and I was trying out some steam punk ideas, with some watch bits etc that I bought at Sandown Craft Show.

Fantasy paints were dribbled into the cabouchons, and then the various metal findings added.   

They were then glazed with Magic-Glos UV Resin (made by Lisa Pavelka) which I prefer to the resins you have to mix, mainly because, it is foolproof, (which is a must for me) and it is fairly quick drying in sunlight (or you could in the winter use one of those UV nail drying lights.   I have found in strong sunlight it is touch dry within half an hour.  Also there is no guessing on how much resin you need to mix for a project - you just squeeze it out of the nozzle on the bottle.  (As I said foolproof - or should I say idiot proof in my case!)

No 1 - First side purples and creams

No 1 - Second side - red

No 2 - First side - turquoise

No 2 - second side - blue

This was an experiment using a daisy from the lawn, only I was too
impatient - and didn't wait for the paints to dry - so the daisy took on the colour
of the paint!

A leaf pendant lightly painted with blue Fantasy paint


I apologise in advance for the quality of these two square pendants, but these were the best photos I could get with all the reflections.


Square pendant 1 - Blue Purplse

Square Pendant 2 - Green

Typical now that I have typed this post out - I have found my original one under Steampunk label  - anyway there are some slightly better photos there, so here is link for better photos:

http://nannygees.blogspot.co.uk/2014/04/steam-punk-bezels.html


Monday, 8 December 2014

A Bit Of Bling

Gosh is it really nearly a month since I posted on the blog?   How bad am I.  Where has the time gone, I have been busy - honest.

Anyway, here are a couple of items of jewellery that I created today.


I had a request for a necklace for a Christmas present, so I came up with this design.  I couldn't decide whether to use pearls or crystals - so I used both, with silver snowflake beads!  It does look fab in real life, and I am really pleased with it.  Hope the recipient likes it.


This is another Christmas present, and I kept this simple, and did a variation of one that I had made for myself, which I am always getting compliments on when I wear it.  This has faceted hematite beads on it, with the lovely silver oblongs..   The simple design means you can wear it every day - or for a special occasion.

Both necklaces have magnetic clasps.   I am making everything with magnetic clasps now.  So easy to take on and off, and no having to ask my husband to do up/undo a necklace for me!  There are some really pretty clasps available now too.


Wednesday, 12 November 2014

Crystal and Mesh Nexcklace


I was tidying up the craft room, and came across the remains of a bag of purchases I made recently at the Big Bead Show, that I hadn't got around to doing anything with.  Needless to say tidying up came to a little halt, whilst I had a play!

It was a very simple kit, and didn't take long to make (even with me dropping a load of the crystals on the floor!)

Thanks for popping by.

Monday, 27 October 2014

LeafyNecklace


Just realised I forgot to share this creation I made last week  I saw the design on Beads with Attitude website, and knew I just wanted to make it.

Friday, 24 October 2014

A couple of Necklaces


My daughter and I went to the Big Bead Show at Sandown last Saturday, and I treated myself to these triangular "beads".  Wanted them since last time we went but they were out of stock.  

decisions, decisions!

I then wanted to make another necklace with these "beads", but couldn't decide on the design .......


 ........  however, I finally decided.  Using some little black beads in my stash.


really pleased with how it turned out - looks fab on!  (Added bonus, still have some of the shapes left, so could still do the plain one or another colourway!)


Thursday, 29 May 2014

Reflecting on one of those special days

Yesterday turned out to be one of those "special" days.  I had to look after my eldest granddaughter, whilst her mother ran an exam revision class for her students during half term.   As I knew Sarah Millsop was going to be on Create and Craft demonstrating rubber band looms and bracelets, I suggest she brought hers over.   This is what we got up to during and after the show.

Five of the bracelets are hers - mine is top right.  The one on the bottom left she made for her mum, and the other two on the bottom row, were new patterns to her following instructions on Crafter's Companion website.


As it was too cold and damp to go up and play in the Den, we took up an invitation to go and see her young cousins in the afternoon.   It's not often they all get together, and not often I get to play with with all at the same time either.    We spent the afternoon Zentangling.  Me helping the 5 year old and the 8 year old being aided and abetted by her cousin.   They had great fun "tangling" an Inky Owl.  (this is an owl shaped pillow that you draw on with special pens, and then it can be washed and you can start over again.)

They also learned how to do the bracelets as E took her loom over with her.  (Just as well I have ordered one for them!)   They were so well behaved, and had so much fun.  It was lovely to hear them laughing. Even the 2 year old, although unable to partake in the "tangling" was singing to us and joining in the laughter. Yes, definitely one of those "special" days to be treasured.

I just wish the battery hadn't died on my phone - I would have loved to have captured the moment of them all playing together.

I had also intended to try and make a tree of life pendant with E, after we had finished the rubber band bracelets, but of course we never got around to it.  So last night I attempted one.

Here is my first attempt.


I had followed written instructions on the net, and worked from the bottom up, but having made it I then found a U-tube video which started from top down (which is how I will tackle the next one).  However, there were a couple of good tips on the video, so I tweaked the "roots a little.  OK so it distorted the original nice round circle, but as the video said you can make them any shape -I am not worried, and definitely prefer the tweaked version.
tweaked pendant

Saturday, 3 May 2014

Jasper Necklace


I fell in love with these beads at Sandown, and have at last got around to making a necklace.  Stones are strung on silk cord and knotted.

Still got plenty of beads so probably a lariat necklace and a bracelet will be made

Tuesday, 29 April 2014

Faceted Haematitie and Pearl Necklace


I am really pleased with this necklace.  It is actually a long one (30") but to display it I have wound it around the display twice.

I have wanted to design something like this for a while, and it wasn't until I went to the Big Bead Show that I found exactly the right connectors and findings to make it.  The haematite and pearl beads are on eye pins, and are connected to the rings with"w" clips.  So glad I found those clips - absolutely brilliant.

Just a simple design, but I think so effective.