Going Green Blog Background

Showing posts with label IndigoBlu paints. Show all posts

Sunday, 24 March 2019

Art Folder again (Outside)

The Back
 I am really pleased with how this turned out as an experiment.  I used one of Leonie Pujol's latest stencils for Clarity Stamps.

I used a finger dauber and acrylic paint.   The face was done with IndigoBlu fair, and the rest was done with the American acrylics in a random fashion (as they were still out on my desk).  I also used a bit of IndigoBlu Olive Waistcoat green paint. I then added a few extra "squiggles£ with black and white paint and outlined the hearts etc to make them stand out.  I also painted in the eyes and lips with a brush.

Having done the Folk Art inside and this stencilled back, I decided I didn't like the black and white front that I had done - so added a little extra colour to that.  (I think I have shared this already - so to recap it was stamped and embossed with white embossing powder.


The Front

Monday, 4 March 2019

I can't draw for toffee ..........


I had  my 12 year old granddaughter staying overnight over the weekend, and we had an "Art" session.  She loves drawing.  We decided we would draw faces - now I can't draw for toffee, but I do have a set of Jane Davenport eye stamps.  I also have some of the Peerless Designs Let's Face It masks/stencils.   So I cheated and used those, whilst my granddaughter drew the one below free hand!

Freehand drawing coloured with Spectrum Noir Alcohol markers and
Promarkers by Granddaughter


 Couple of close ups of my two drawings - coloured with Indigoblu acrylic paints and Cosmic Shimmer paints.


Well I tried, and although I cheated, I supposed they weren't too bad!

Sunday, 3 February 2019

Another storage unit


Another of the shelf/storage trays today.   I covered this one with tissue applied with heavy duty gel. I then painted it with gesso mixed with a pink IndigoBlu paint.  I then dry brushed IndigoBlu Fuchsia overt the inside whole thing,  as well as some crimson starlight paint over the outside.

I stamped various sentiments over the box in black Nuvo Ink.  The top edge was painted with the Fuchsia too.  Finally a little Starlight pearl was added with a finger to create some lighter areas around the outside.


Thursday, 17 January 2019

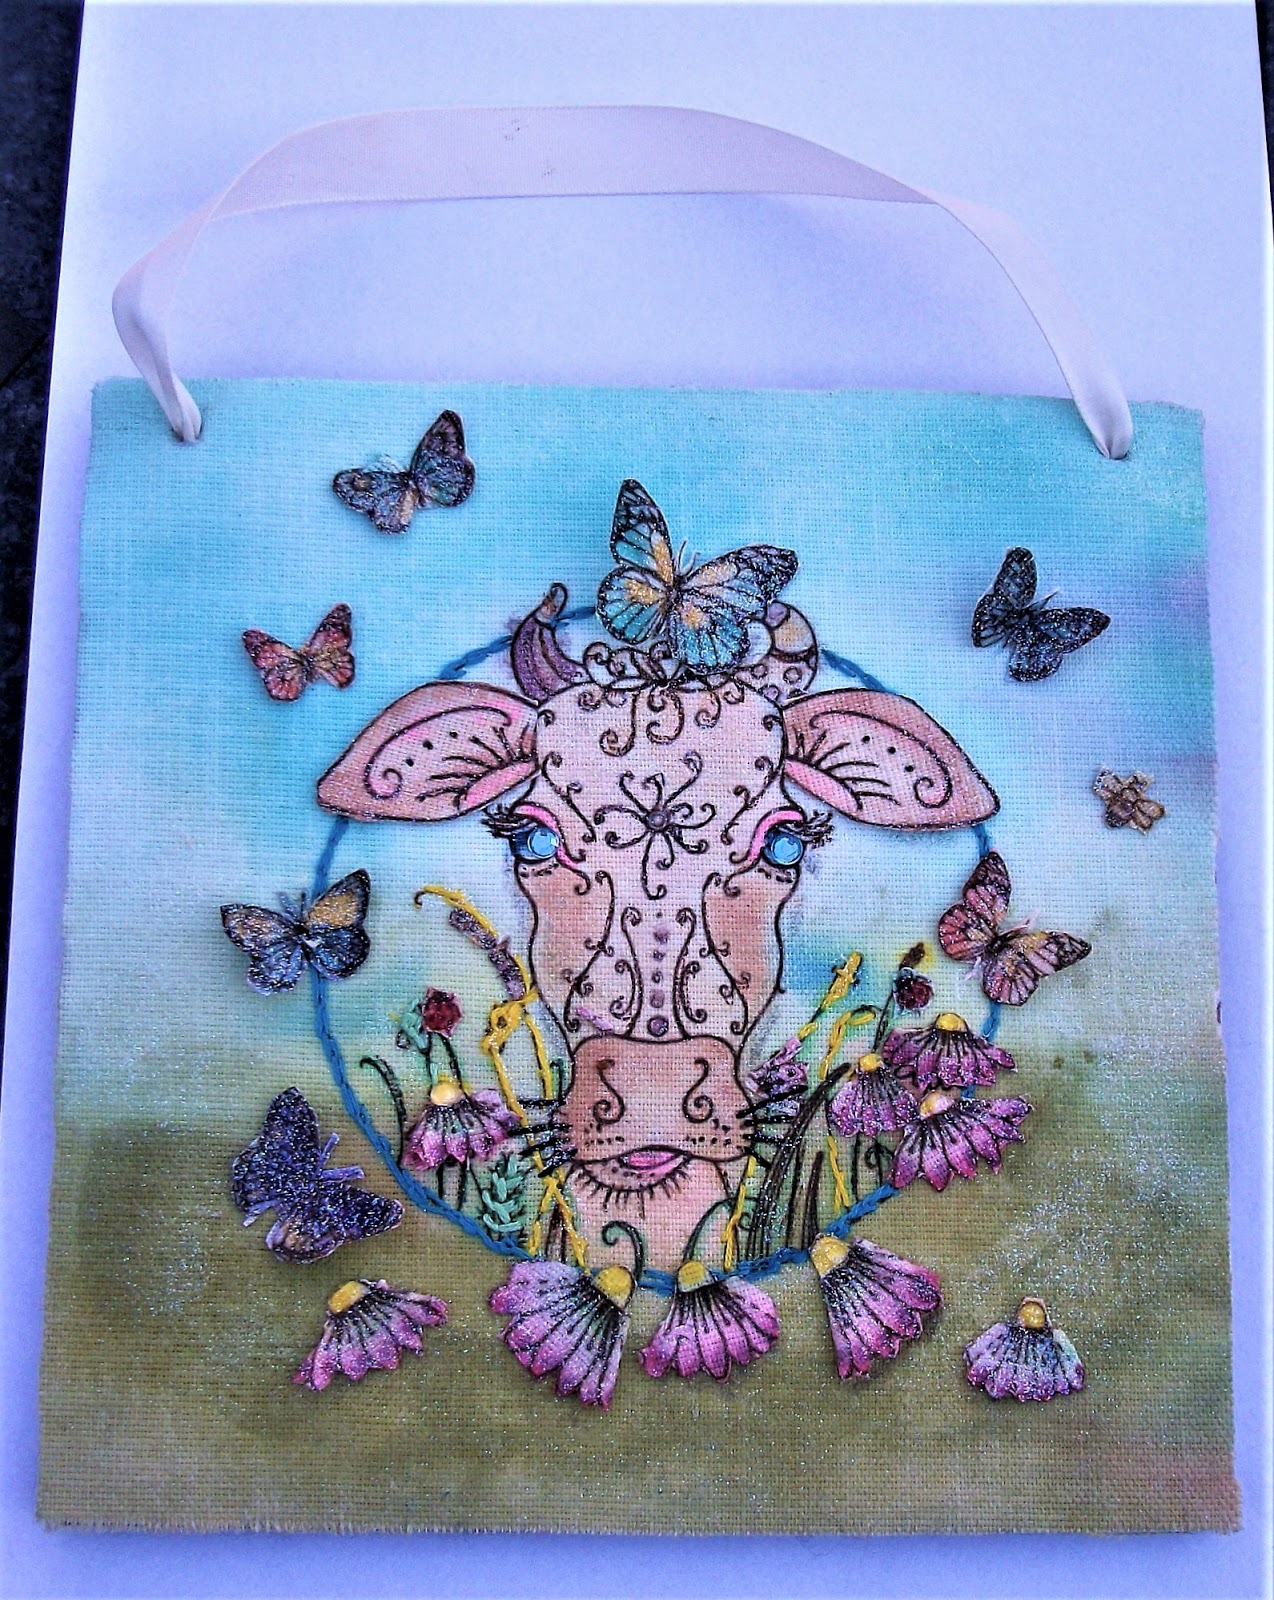
Moo Cow Canvas


Finished plaque


Another Pink Ink Design.  I must admit I am enjoying doing these.   I painted the canvas and the elements (see picture below),  I used various paints - some translucent ones from IndoBlu and some from Cosmic Shimmer, with a few elements highlighted using Posca pens.

I then did some embroidery on the main canvas - outlining the circle with chain stitch and then picking out some of the grasses etc.

The elements and the canvas were ironed to set the colours and then had IndigoBlu Slap it On (Fabric) applied to seal it.

I couldn't decide how I wanted to display the canvas - pondering on whether to use another embroidery hoop, but then I decided to use a square MDF plaque.  I used some  lining material from The Mill Shop online, which was adhered to the canvas with their special bonding material.  (Confess I have forgotten its proper name).I then glued the padded canvas on to the MDF board, and created holes in the canvas with a screw punch to align with the holes on the MDF, and added some ribbon to create a hanger.

I then glued on the various elements - I found heavy gel medium excellent for this.


Thursday, 10 January 2019

Mixed Media: Decoupaged, Painted and Embroidered Panel


Really pleased with how this turned out.  I have watched the PinkImk demonstrations on Hochanda many times and have been tempted to try one.   A few weeks ago they had a bundle of various designs on sale at a silly price - so I though I would take the plunge.

The panel is about 8" x 8" with an extra little panel of embellishments.

I wet the material and then water-coloured it using Cosmic Shimmer Fabric Paints, and IndigoBlu paints for the face.  When it was dry I ironed it to set the colours.

I then painted the embellishment section and when dry I did some embroidery on it and added some beads (i.e. pearls on the bow).  Again I ironed the panel to set the colours, and  then painted a mix of pva and water to the back to strengthen and stop it fraying, so that when dry I could cut out the items.

The little elements were then added to the panel with glue.  I also did a little more accent painting, as well as adding some gems and Nuvo drops.

It doesn't show up that well in the photo, but the image is very sparkly, as I went over the whole design with Cosmic Shimmer Sparkle Star Fabric paint.  (I am in love with this - the effect is similar to a sparkle pen on cardstock).

I will eventually stiffen the whole thing with either PVA and water or IndigoBlu Fabric Slap it on.  I also want to get some matching velvet ribbon for the frame (although I may paint it) to finish it off completely.

Monday, 15 October 2018

Robbie Robot


At least he can kneel!
Well I have finished painting the robot, albeit things didn't quite go to plan.  I got interrupted when painting him, and although I had freed up all his joints as I went - I seemed to have overlooked his hip joints.    When I went to pose him and take his photo I managed to break his hip joints.

I tried to remove his hip pin, but it was beyond repair, and knowing how difficult it was to assemble his legs, I abandoned the idea, and just took the hacksaw to the spindle and stuck his hips on.   As you can see  he can kneel, (and he can stand up straight - he just can't sit any more!)


A picture of what he looked like standing before I had finished painting him


a posed picture of him sitting before  I operated on his hips
(they aren't actually attached in this photo!)
Such a shame I messed it up.  I was a tad disappointed as he had been clear gessoed before painting to prevent paint leaking into his joints (and they all moved at this stage).     Hey ho worse things happen at sea as they say - and I did manage to remedy the situation, although not as perfectly as I would have liked.

For info he was painted with Indigoblu translucent paints (I wanted some of the detail on the MDF to show through, particularly on his body).  I then overpainted with Starlights paints - sort of dry brushing the colour on, and then added some Pebeo gilding wax on the elements that appear metallic.
His eyes were painted with Pebeo Ceramic and Fantasy paints.  (Really pleased with the effect).

Monday, 8 October 2018

Dead of the Dead Mask


I attempted to paint a Day of the Dead Mask.  Hopefully it isn't too bad, bearing in mind that I can't draw for toffee, and currently can't see where a pen meets paper (or in this case mdf),  and this was done freehand using some inspiration from the internet.  I used Posca pens, Starlight paints and Indigo blue paint.   I also added a little "grey" shading with distress oxides.  The teeth were overpainted with phosphorescent gel.    Finally a thin coat of multipurpose gel medium was sponged on and a little diamond frost sprinkled over the surface whilst wet.


Reverse side


The other side in case you missed it yesterday - and I have actually done a bit more to it since then - though you probably can't see that! - I gave it a thin coat of multipurpose gel medium again with a little of the sparkle added and then over-painted all the white parts with phosphorescent gel medium.
Hopefully when "charged" the paint should glow nicely in the dark.   I may be scaring the trick and treaters this year!

Sunday, 8 July 2018

Mini Vardo


Just a quick glimpse of work in progress on a mini Vardo.     I do love these models.  Once I have finished painting it I will show the rear of it, which even has shutters on the window.   As you will see this mini version also has a chimney.

The granddaughters want me to paint the roof purple ..... so watch this space as they say!

Well before this post was scheduled to be published, I finished painting the Vardo.    So here it is finished.  I kept it simple and used two shades of blue Amsterdam paints, and Indigoblu Fuschia for the roof.

I finished the decoration using Nuvo drops.


Friday, 22 June 2018

MDF Birdhouse


Another of my MDF Models    This one was painted with Pebeo paints and two shades of blue Amsterdam paints.

I used Golden Fibre Paste for the texture on the "straw" roof.  I painted a vine and leaves with Indigo Blue Olive Waistcoat, and created some little flowers from FMM Air Dry Clay.

Thursday, 21 June 2018

MDF Models


These are the first of a few models I have been working on.   They are from Clever Cut.  You have to build them yourself and then paint them.

So far I have built to jeeps and two biplanes, but have only got around to painting two of them so far.  I did make the mistake of gluing them complete together ..... it would have made life a little easier if I had not stuck the seats in the jeep and not stuck down the supports on the wings of the biplane, as it made painting a little difficult.    I normally think about this when I am building them, but think I must have been tired and not thinking properly .... you live and learn.

They were painted with acrylic paint mainly Amsterdam paints, but the green of the jeep was IndigoBlu Junk and Disorderly paint in olive waistcoat, which was absolutely perfect for the jeep.  The silver paint was from DaliArt.

Not sure what colours to paint the next two.

Friday, 8 June 2018

Painting on Fabric


I purchase some little printed calico panels from IndigoBlu a short while ago, and having at last bought the paints I need for the face, I decided to tackle it.

First time I have done something like this, which is basically colouring, but with fabric paints.  It was quite a while ago that I watched Kay's demo on how to paint the face, and it seems I was paying attention, as I am pretty pleased that a) I managed to do it and b) I remembered how to do it!

I used mainly IndigoBlu paints, although some of the finer detail were painted using posca pens, mainly as they were to hand, and I could dispense a small amount of paint at a time, which was more economical.

Yesterday I purchased a frame for it.   Wow that really set of the image.  I feel like a real artist now - lol!