Showing posts with label Mixed Media.. Show all posts
Monday, 30 October 2017
More Christmas Bell Jars
Following on from an earlier posting, I made these two jars for my son. Very similar to the earlier ones, but a gold base with ribbon, and some Nuvo drops on the trees.
I was also very pleased that my daughter discovered some tealights that fitted the jars in Robert Dyas, so now little jar has a light in it, as so does the earlier one I made.
Labels:
Bell Jars,
eXpandIT,
Mixed Media.,
Pebeo paints,
wooden model
Sunday, 22 October 2017
Christmas Village and Bell Jars - WIP 3
| completed items |
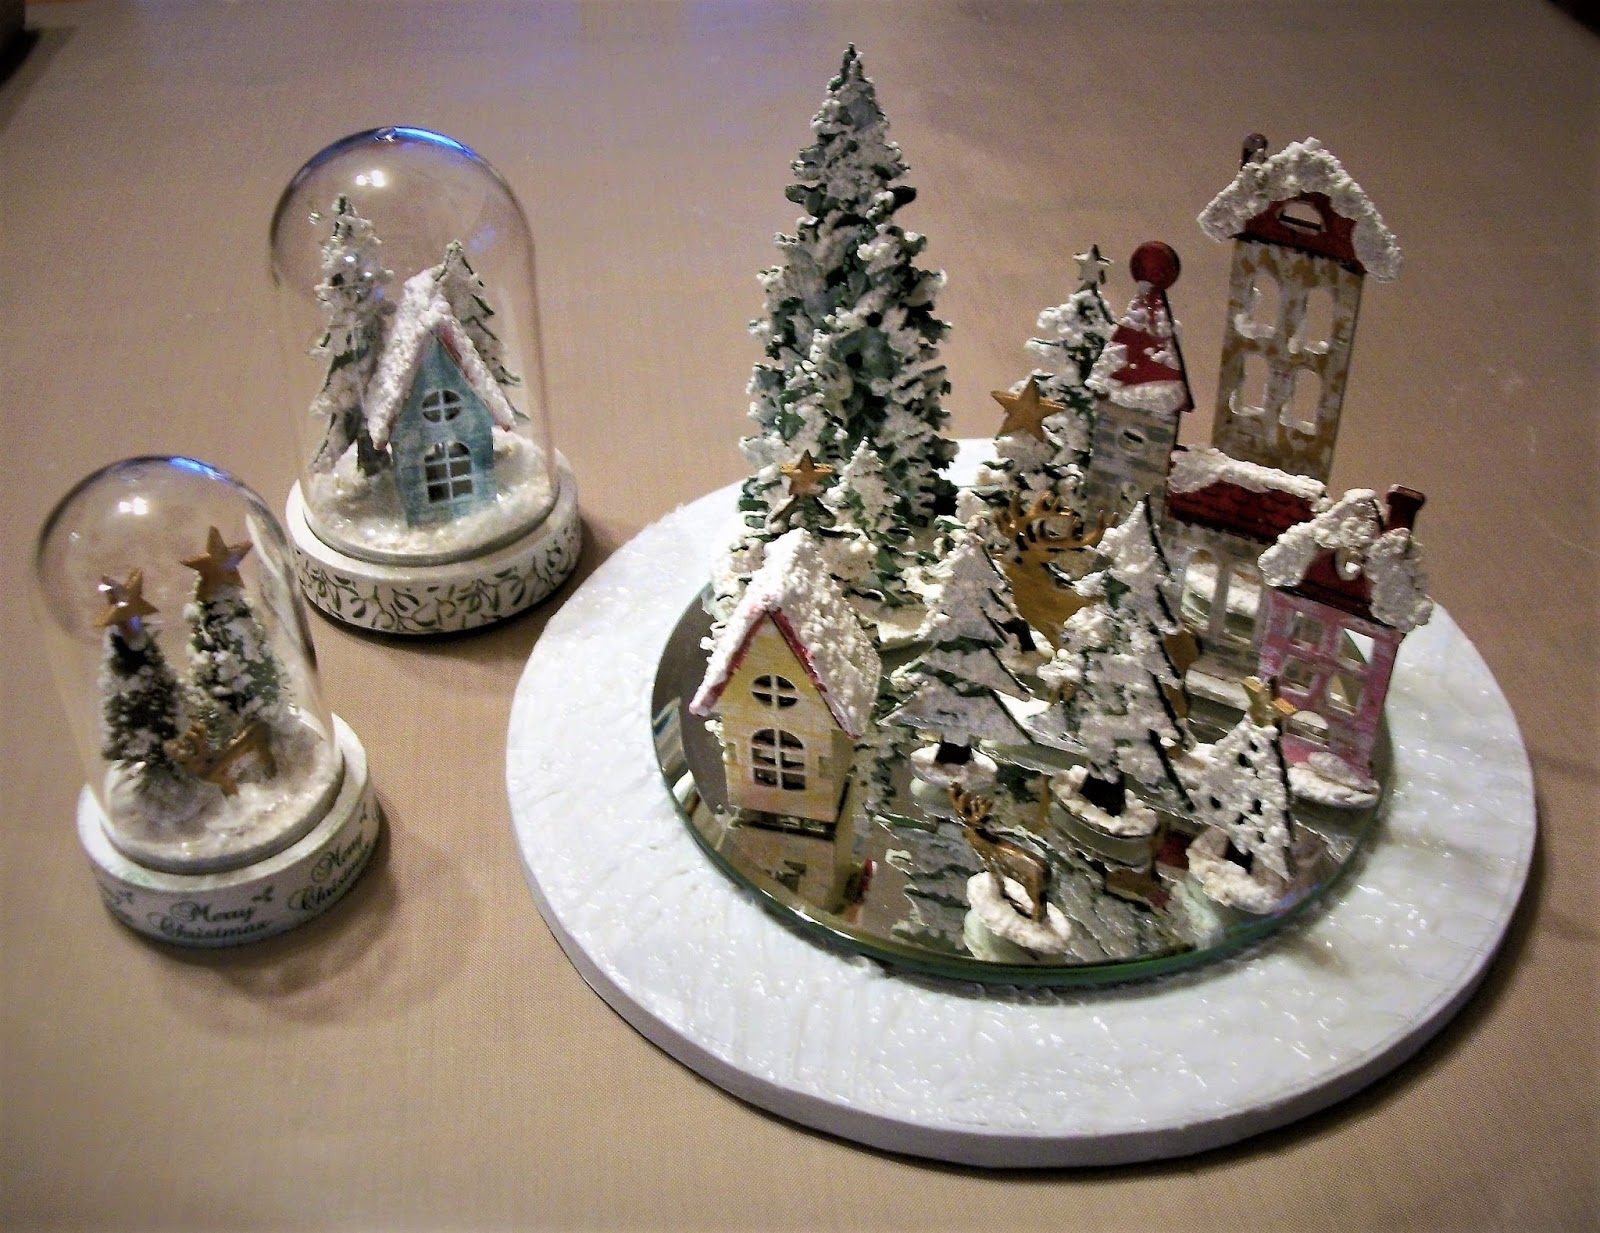
As you can see I have now finished the bell jars and the village scene.
I coated the cake board with white gesso and then applied clear gesso with a palette knife. Wow the effect was fantastic, just like glistening snow. I had thought I might have to apply some glitter or fake snow, but it didn't need it!
I also completed the bell jars. These had white gesso and white paint applied to the bases and then washi tape applied around the bases. The inserts had snow effect applied with eXpandIt mixed with white gesso and when dry some glue and artificial snow was applied.
And there follows various view, with and without domes. lights.
I also completed the bell jars. These had white gesso and white paint applied to the bases and then washi tape applied around the bases. The inserts had snow effect applied with eXpandIt mixed with white gesso and when dry some glue and artificial snow was applied.
| Hope you can see the snow effect on this |
Labels:
Bell Jars,
eXpandIT,
Mixed Media.,
Pebeo paints,
wooden model
Wednesday, 2 August 2017
Mixed Media Canvas
I have been playing with some metal items from Chocolate Baroque today. I started with a black canvas.
I then added some black texture paste to it through a stencil with my finger. This smudged slightly in one corner, but as it was just a random texture that I wanted it didn't matter. I also added some dots of texture paste around the canvas, using what was left on my finger!
Whilst this was drying, a applied black gesso to the metal elements, and also applied a coat of black gesso to the canvas.
The metal items were then coloured - either with pebeo DYNA paints or some metallic lustres, (blue, greens and white frost). The canvas then had a coat of Pearl Black Pebeo Creme paint applied to it. Then it was the fun part sticking on the embelishments using a hot glue gun, and then adding some little diamantes to the centre of the flowers
I designed the canvas as in the top picture, but it could be turned to view this way:
Friday, 28 April 2017
Unicorn
| on black canvas |
Playing about with some new goodies - Creative Expressions Glitter Kiss.
I applied the Sea Green Kiss first of all, and then went over the top with Silver Chrome Kiss. I also added a few random bits of Cosmic Shimmer Texture Paste in Gold Pearl.
I then took some twine and some of the Costmic Shimmer Clear Texture paste and made the mane and fringe (In hindsight I should have done the tail too). The twine was coloured with various shades of DecoArt Metallic Lustre and some Luscious Poweders. The horn had twine wrapped around it and painted with Luscious Powders, and some jewels added. The tail and hooves were decorated with paper effects and puffy paint. Finally more jewels stuck on the body.
Not quite the effect I had envisaged, but I don't mind sharing failures (although it does look better in real life)
I couldn't decide how to mount the unicorn, so tried it on a white canvas as well as the black. I prefer the white canvas, and when it finally gets stuck on to it, I shall probably edge the canvas with silver.
| on the white canvas |
Thursday, 27 October 2016
Owl comes to visit
You may recall seeing a sneaky peek of this fairy door on the table in the work in progress photo I shared of some of my clay work the other day.
I have been gradually working on it over the past week or so. The door was painted with Pebeo paints and crackled using DecoArt Weathered Wood and Crackle paste, and then more distress inks were rubbed into the finished crackle.
I painted the owl using Pebeo paints and distress inks. Using a random layer of ultra thick embossing powder over his body for some texture, and then triple embossing his eyes. and nose.
Originally I had intended making the flowers and leaves from card, but then decided to use cloud clay and some of my old plunge cutters. I experimented painting the Christmas roses, winter jasmine, holly and ivy with Memento inks with an overlay of clear sparkle.
I used some white puffy paint for the snow, which I heated with my heat gun to make it more interesting, and then applied some glue and sprinkled Eiskristall over it as well as treating the fir cones (real ones) in the same way.
| The cloud clay leaves, flowers and berries before painting |
Labels:
Cloud Clay,
Decoart Media paints,
MDF,
Mixed Media.,
Pebeo paints
Thursday, 29 September 2016
Family tree
This is really work in progress. I bought the mdf shape at the Sandown Craft Show - unfortunately I can't remember the name of the stall - such a shame as they had some lovely stuff.
To start with I used distress inks on the trunk and branches, and then swapped to to the MediaArt paints. I added lots of water over the top when I had finished getting the shading effect I wanted and sprinkled some Cosmic Shimmer clear Ultra Thick Embossing Crystals over it - making it wetter in some places. I then heated the crystals with my heat gun, so that I got a random raised finish. More distress ink was then applied.
I painted the leaves and the birds with more mediaart products.
However, I can'd decide what colour to paint the hearts - thus the work in progress! I also have some tiny mdf owls that I might use instead - decisions, decisions. Suggestions for the colour of the hearts welcome. So far I have had suggestions of bronze, red and green.
Thursday, 22 September 2016
Mixed Media Fairy Door
This is a little mixed media Fairy Door that I made using a Fairy Door from the Works, which has an opening door, Cute isn't it. I knew as soon as my daughter picked it up for me whilst shopping, that I wanted to do something with it.
I delayed working on it until my new DecoArt paints arrived following the demo on Hochanda by Andy Skinner.
Learning from previous experience of trying to do the salt technique on wood, I sealed the door first with decoupage glue. The door was first painted with paynes grey and the salt sprinkled on it. When dry and the salt was brushed off, I used various blues, umber and finally a coat of quin gold. I added a door knocker with the greyboard bits from Andy's kit that I painted with gold and quin gold.
The outside was painted with pains grey and burnt umber, and then sprinkled with ultra thick embossing powder and heated to give it a rough texture, a bit more paynes grey and qui gold was added and the salt technique used. (you can just about see the effect of the texture on the bit above the door.
I wanted to add some more texture and fancied using some lace somehow to make it "prettier". This was a bit hit and miss and a learning curve so to speak. I dipped the lace in ivory powertex, and stuck it on to the surround, I didn't really like the effect so proceeded to paint it with various colours of paint to match the background.
| work in progress - with lace added |
I had planned to make some flowers and leaves using air dry clay,, but couldn't quite get the effect I wanted. I spied the flowers I had made the other day with Sheena's anemone die and stamps, and decided that was the way I wanted to go.
I used all the elements of the dies to create the various flowers (i.e. the calyx for the star flowers). They were cut out of black card and then painted with DYNA iridescent paints. Over-stamped with black stazon, and then brush embroidered using mixtion paste and silver mirror foil added to the flowers, and gold foil to the leaves, and then curved to desired shapes I needed something else to finish the surround so painted up some small shells from my stash (the tub of shells came from The Works too).
I took a couple more photos in daylight;
| with the door slightly ajar |
Tuesday, 30 August 2016
Shells and Mixed Media ... and Pebeo of course!
I have just had a few days away with the family, and whilst on the beach we collected a few shells, so when it came to child-minding them today, I decided to set them a mixed media challenge and use some of the shells, and some from a tub of mixed shells that I bought some time ago. They also discovered my stash of buttons, and glitters! Of course glitter and little girls are a MUST! lol!
They were allowed to choose what they wanted to do, and I gave them a quick lesson in dry brushing with my effort.
Here are the results of their efforts.
The door hanger is even better in real life - and for four years old she did an excellent job - must confess I was amazed how she comprehended what to do!
The 7 year old's Teddy covered with texture paste and then black gesso and gold DYNA iridescent. Then decorated with buttons He looks really "furry". |
I do love the idea of mounting a smaller canvas onto a larger one (Thank you Barbara Gray for the idea) - .http://barbaragrayblog.blogspot.co.uk/ It turns it into a piece of art. I might get the 7 year old to mount her teddy onto a canvas too!
Wednesday, 18 May 2016
Steam Punk Book Box
Some time ago - like last year, before my husband died - I started this steam punk inspired book box.
| Front |
I had done the front, sides and inside, but confess when I finally got up into the Den this year to continue the project, I had forgotten what I had done and what I had used! duh! Anyway undeterred I started on completing the spine and the back, which I had at least applied black gesso to!
Fortunately I sort of remembered that I was using the Pebeo Dyna irridescent paints and sponges. (What I didn't realise until I finished painting the back, that I had applied a layer of serviette to the front first and coated it with pva glue. Hey ho, I could always start again if I so desire!
| Back |
The back looks a slightly different colour, as the sun was shining and reflecting off the paints slightly differently to the front. Also it looks as if I left more black showing on the front!
| Front and side |
The "leaves" of the book were created using Pebeo texture paste with a cream coloured paint applied to them, and then with my finger I rubbed gold gilding wax over the textured surface.
| Another view |
You can just about make out the texture of the pages in this picture. The edge of the cover of the book also had gilding wax applied over the black gesso, which was easier than trying to replicate the paint effects on such a thin edge!
Not perfect by any means - as I said I can always redo it as the mood takes me!
Subscribe to:
Posts (Atom)