Going Green Blog Background

Friday 30 August 2019

Heat Transfer Paint Printing Day 3


The images for today are from the day my daughter and eldest granddaughter got to play with the machine, using other parts of the machine as well as the mug printer.   So more experimentation.

The first two were printed on MDF coasters - they were both gessoed and one of them had the pre-fix applied as well 


This bauble was printed straight on to the MDF with no gesso


 This mug was done with the stencil cut from a rainbow painted piece of paper:


 Another MDF coaster


 My granddaughter's attempt at a mug, I believe this was created from the paper shown.


This was printed on to a canvas bag


The complete day's selection:


and finally a selection of some of the papers created with with shaving foam and inks, prior to printing:


We have had so much fun - and load of backgrounds etc ready to play with.   My granddaughter is going to set up an Etsy shop so that she can do orders or personalised mugs etc.

Thursday 29 August 2019

Heat Transfer Printing Day 2

Another day of playing

using an Andy Skinner Stencil


an experiment to see if we could overprint a name on
and already printed mug

a die cut out and used as a stencil and stuck to background
before printing


This time a Clarity die cut out of prepainted paapter in two colours
to create a drop shadow


We also tried overprinting one of our first mugs with a darker colour
Here is a selection of our "messy play" papers, that we created with cheap shaving foam and the inks.


Wednesday 28 August 2019

Heat Transfer Paint Printing Day 1


We have had so much fun recently (My daughter and I and later on my eldest granddaughter)  I showed my daughter an idea on a Nick Roberts show on Hochanda, and she fell in love with the idea just like me.     As neither of us have had a holiday this year - we decided to invest in a machine to do the printing.  (We ended up with one that not only prints mugs, but also T-shirts, plates, coasters and baseball type caps !)


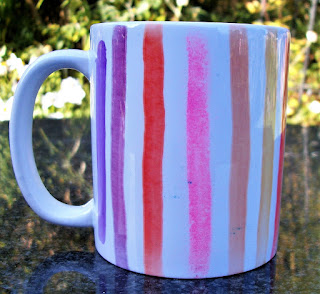
These were the first two mugs we tried  Amazingly the one above came out much darker than we expected, and the one below came out much lighter.   You will note that the initials on the one below were barely visible.


This was the original colours of the first mug on the paper

It was obviously a learning curve - we then printed out a sheet of the all the colours we had and then printed that onto a mug.

colours on the paper

 and below how the colours turned out on the mug:


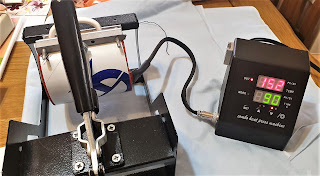
This is the mug printing part of the machine:


Come back tomorrow and the day after for more of what we have played with.

Wednesday 21 August 2019

Watercolour Birthday Card


A simple watercolour birthday card today.   I stamped the boat (from crafts-too) which comes with two parts the background and the detail.  I then masked it, and did a quick watercolour , and then mounted it on a card.  (The actual painting is 5" x 5").

Tuesday 20 August 2019

The Eyes/Ayes have it!


My Jane Davenport stamps were still on my desk , and I had an idea in my head to use them.

The background was created with Daler Rowney pearlescent paints in pink, yellow and blue and then sprayed with water.   I then stamped the eyes, and added a bit of colour to the eyes and gave some some "eyeshadow"

Finally I created the sentiment in Craft Artist with a play on the word "Eyes".    Just a simple page, but hopefully effective.  At least I achieved the idea I had in my head.

Monday 19 August 2019

3D Printing - Fun Day


My daughter and eldest granddaughter called round this afternoon to use the 3D printer. 

My daughter wanted to create some cookie cutters.   The first two pictures show the sloth cutter and the Pi cutter in progress.


and here are the finished results:


Well we had to make some cookies didn't we to try the cutters out:


My daughter then made an Escher style cutter, and again we had to try them out.   I also cut out some shapes from air dry clay.

Escher cookies , vanilla and chocolate.


Escher air dry clay shapes, coloured with inks.


Finally my daughter attempted a Lithophane of one of her photos of Tim Peake with Crochet Tim.


 I think the Lithophane is fab.   she is going to try it again using a negative print.

We had a great afternoon.   Whilst the printer was working (it takes a while sometimes) I played with an idea in my art journal and I will share that tomorrow.

Sunday 18 August 2019

Just messing about in the Art Journal


This first image was a clear up page from the Bee picture I did the other day - i.e. cleaning up the brayer and the stamp.

A chance remark about journals by Lou Withers made me look at it again.  She commented that if you look at a journal in portrait, it often looks like a school book, but turn it landscape and it becomes an art journal

So I turned it round:


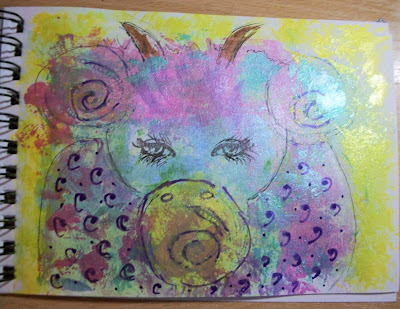
and what did I see some sort of animal - possible a cow or pig or ram.


I played about with it and added more paint and drew some lines.   (Unfortunately I because of the time of day and the light I couldn't see the yellow pearlescent paint at the bottom of the page - so add a bit more - made move).  I hadn't realised until I looked at the photos I took before I added the extra paints and lines that it was there - I will learned - take a photo before proceeding!

I can't draw eyes - so I used a stamp and added a few more lashes to it!


I continued to mess about with it - probably not a good move, and added some doodling.  OK so not a brilliant outcome, but it certainly bore out the theory of turning the orientation of the page around, and discovering what you could see!   So here is my pig/cow picture - you decide!

Wednesday 14 August 2019

Bee Happy


A little page from my Art Journal that I created a couple of days ago playing with my new Daler Rowney paints, Mama Makes stamps and IndigoBlu large Bee stamp.

I applied a thin coat of white gesso to the page, and then with my finger applied blue, pink and yellow paint randomly over the page.

I then used some of the paint and also Artistry ink pads with the Mama Makes stamps.  I stamped the bee on the page and embossed it with silver, and then on a separate piece of card I stamped it with a black ink pad and embossed it with clear powder.   This was then painted and fussy cut and decoupage on top of the stamped image.  Finally a few more background bits added with a Mama Makes stamp and white gesso and the "Happy" sentiment added in black, and highlighted with a white Posca pen to make it stand out.