Going Green Blog Background

Showing posts with label Pebeo Modelling Paste. Show all posts

Saturday, 1 August 2015

Owl & Heart and Owlerflies/Owlieflies!


Blue, purple and pink


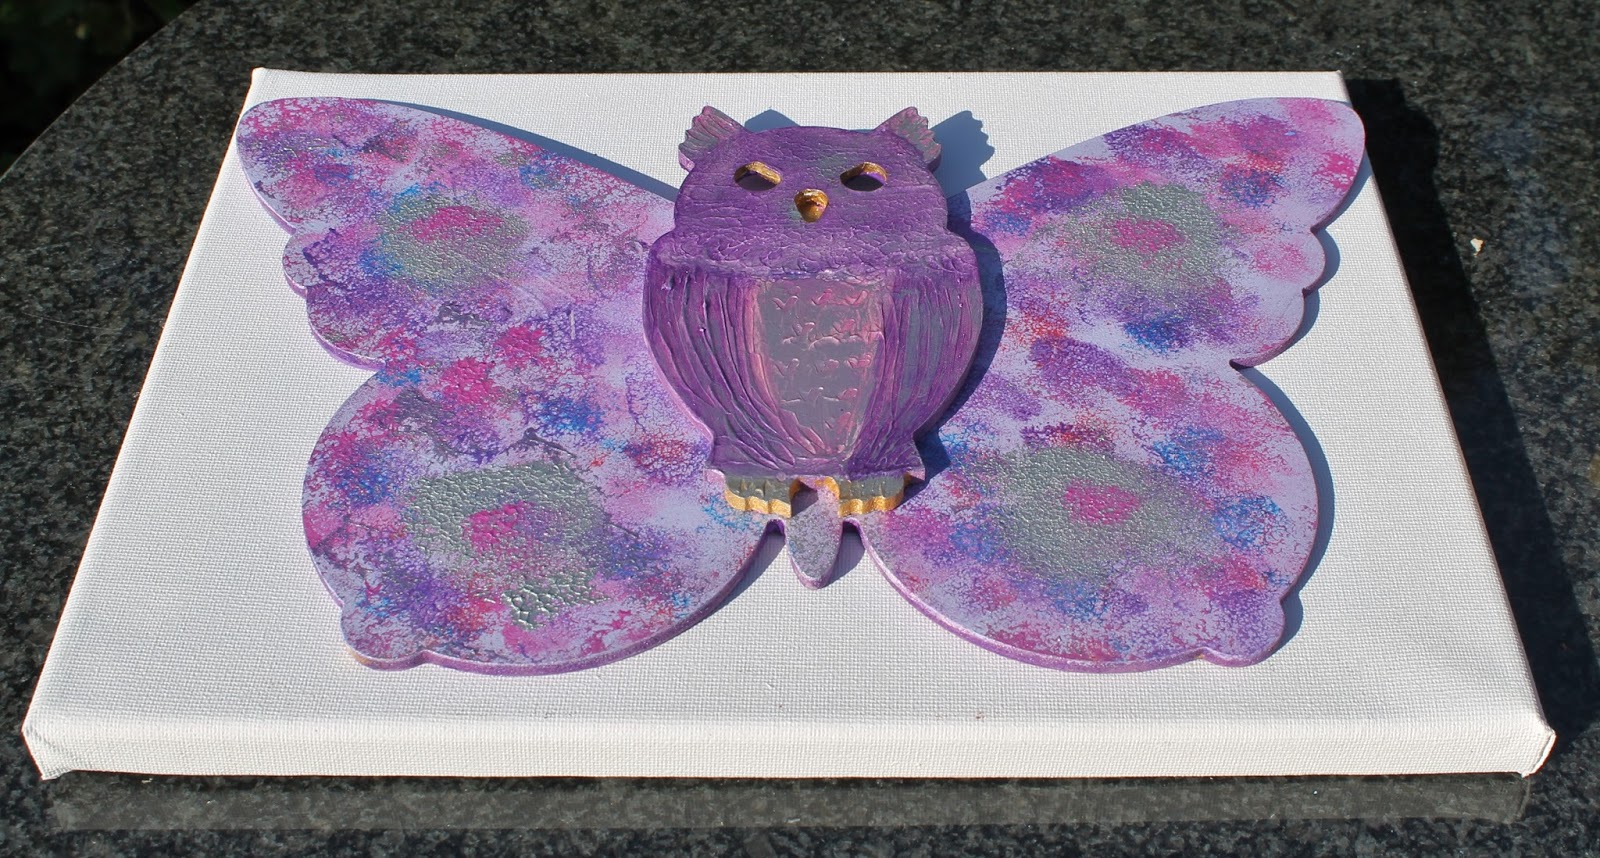
It started some months ago - my son's daughter's were raiding my stash in the Den, and discovered the owl in my stash.  Needless to say they all wanted the Owl!  I only had one cut out owl, but I offered them some other owls, and the second eldest decided that she wanted her owl on a butterfly background - and decided to call it an Owlerfly!  I eventually managed to get some more of the owls, but needless to say they then didn't want them!  So eldest granddaughter having had first "bagsy" on the owl and heart originally got to keep her choice.   The second eldest stuck with her larger owl, and the three-year old also decided she wanted the plain owl and butterfly as well!

However, I was given instructions as to the colours they wanted!


Purple and pink (the original Owlerfly!

Youngest's Owlerfly - Blue and Pink

Everything had white Gesso applied to them.  The Owls then had some Pebeo Texture paste added to them, and then sponged and textured with one of my rubber modelling tools to give the effect of wings and some markings on the front.  

They were then painted with the requested colours, using a mixture of metallic acrylics and Pebeo iridescent paints,  The cut-out Owl also had a pink- red vitrail mixed with lightening medium and and a lilac fantasy paint for its breast. When dry I applied some Pebeo gilding wax - gold for the cut-out Owl and Silver for the other two.  Liquid gold leaf was applied to the insides of the eyes of the two Owlerflies. 

I then sponged the butterflies and heart with various metallic and iridescent paints to compliment the owls in the colours the girls chose.

I am nor sure whether the girls want these to hang by ribbon etc in their room, or whether they would like them mounted on a canvas to create a piece of artwork for the walls of their bedrooms.

This is what they look mounted on a canvas:


Hope you like the Owlerflies/Owlieflies (chose your own version of the name)  as designed by a six-year old  Thanks for popping by.


Thursday, 30 July 2015

That Halloween canvas again


You may remember that I wasn't quite "happy" with this canvas two days ago, and thought I might add some Pebeo Ceramic paint to the cat.  Well I did, BUT I also added some Fantasy paints to the eyes of the owl and the cat, and then added resin to the Owl and also the Cat, but wasn't paying attention because I hadn't allowed the black ceramic paint to dry, and the finish was a bit "weird".  

However, I like the textured finish to the cat - so not even going to try and remedy it - it's what we call a happy accident!


Thanks for popping by.

Mags

Tuesday, 28 July 2015

Halloween Canvas


sneaky peek

I don't "DO" Halloween as a rule, but I was set a little challenge to come up with something,


I started with an 8 x 8 Pebeo canvas board to which I had alrady applied black Pebeo Gesso.  (as you can see it has been lurking in the Den for a while and had got a bit tatty)

applying the sencil

I then attached a mask from my stash (I won a set from Splodge Away) and with a palette knife applied Pebeo Modelling Paste over it.  (It is not really a cobweb, more the grain of a slice of wood)


Oops some of the paste went under the mask but no matter - I wanted it to look a bit like a cobweb!


Painting and adding letters

Once the modelling paste had dried, I painted the whole canvas with a mix of Pebeo Black and Pebeo DYNA Blue/Black

Next I applied Pebeo Silver Gilding Wax to the "web" with my finger, and gave it a polish,  Again with a finger I applied Pebeo Phosphorescent Gel (gree) to the web.

In my stash I had some Hessian stick on letters so I used those for the wording, and painted them with Pebeo iridescent gold DYNA paint, and then over-painted it with the phosphorescent gel.

I then used some wooden cutouts from my stash - and owl and a cat, and painted the Owl wit a mixture of DYNA paints - Bronze, Red/Blue, Gold, and Precious Gold, sponging on the colours to try and get some shading.  I also put some texture into the paint with some rubber "paintbrushes/modelling tools" that I have in my stash (see picture below).  The Cat was paint with the same colours as the background Black and Blue/Black.   Eyes were painted with DYNA yellow/green and then both pieces had more of the phosphorescent gel.

Products used

My Rubber paint brushes/modelling tools  (from The Works)


Finished Canvas


I am now waiting to see if the fluorescent effect shows up in the dark!

I am not completely happy with the cat - I might do something to him and paint him with some Pebeo black ceramic or Pebeo vitrail, and some Pebeo Fantasy paint for eyes to make him stand out more.  I might even try another owl with Fantasy paints!    Watch this space!