Going Green Blog Background

Showing posts with label Pink Ink Designs. Show all posts

Tuesday, 25 February 2020

Fabric Painting


My daughter and I had a "play" day last week - rare occurrence these days  We decided to do some fabric painting with some of the kits I had from Pink Ink Designs.

These are my efforts.   First picture shows the mouse fairy in progress, and the next picture is the decoupaged section which is to be added.  It looks a mess in the photo, but when cut out looks entirely different.   The decoupage elements, were also painted with fabric decoupage glue, which when dry stiffens them.


decoupage elements

and here is the finished piece.  I confess I cheated and glued the tiny tiny beads on to the flowers, as I really couldn't see to sew them on!    I may add a bit of embroidery on her dress as some point in the future.  She will then be mounted either in a picture frame or an embroidery hoop.


I also painted this one.  Eventually she too will have some embroidery added, and will be mounted - either in a white frame or an embroidery hoop.


Saturday, 27 July 2019


I tweaked the painting on this image that I shared the other day.   I wanted to make a card from it, but the handmade rag paper was A5 size and I didn't want to trim the natural edge to it, so I had to create an A4 card.   Thank goodness for washi tape!.  It worked to join the two bits of cardstock and I used some more to create a frame around the front of the card.

(In hindsight, I think I have some A3 card somewhere, but I will blame it on the heat this week that I didn't even think of that!  Added to which I have been suffering from a very painful back following a collision with a wall in the house, where the wall won!)

I didn't add any sentiment to the card, so it could be mounted in a frame later.

Sunday, 21 July 2019

Watercolured Goblin


I haven't done much  crafting this week, due to having a slight argument with a wall!  My own fault, I slipped thinking I had reached the bottom of the stairs, and I hadn't - ended up head butting the wall (fortunately a hard head and didn't hurt that), but the abrupt coming to a stop whilst falling has given me a sort of whiplash in my back, and to say I am in agony would be an understatement.  I am finding it hard to bend over my work, or even sit for any length of time.  I hope it gets better soon, but we all know these things take time!  I also have a birthday cake to ice and decorate for my upcoming birthday!

Anyway I did manage to sit quietly in the sun the other day and paint this Pink Ink designed I stamped onto handmade cotton paper.   (The paper is beautiful to work on).   I want to try and stamp this on to fabric, so this was a little experiment on the paper first.


Wednesday, 8 May 2019

You're having a firaffe.


It is my son's birthday next week, and I couldn't resist making this tongue in cheek card for him, using a stamp from Pink Ink, on watercolour paper.

The photo doesn't do it justice as I painted it with Royal Talens Van Gogh metallic and interference paints.  The giraffe is actually mostly interference blue, with highlights in gold, brown, purple/grey and pink, and leaves on his neck are actually green.  The giraffe was stamped with brown Nuvo Ink and embossed with clear detail embossing powder.  The sentiment was stamped in black and clear embossed.  The glasses were stamped in grey and embossed, and glossy accents applied after painting.   The leaves were stamped with Nujo green, and like the sentiment were art of the giraffe stamp set.

The background was done with IndigoBlu luscious powders and then sprayed with water.  A large cold 40 peel off was added.

Tuesday, 22 January 2019

Embroidered Butterfly ... or is it a Moth on Wood?


Whenever you buy a Pink Ink design, you get one of these butterflies as a freebie to play with.  I decided to play with one of mine.  I painted the butterfly a couple of weeks ago, and confess I made a booboo - I put it on the radiator to dry, and of course it made the canvas that touched the ridges of the radiator dry much darker as it set the colour!   duh  I thought.

A couple of days ago I decided what the heck,  I will try some embroidery stitches on it that I had seen demonstrated.   The outline was done with a running stitch and then I wove another colour through the stitches..  I then embroidered the body, with a mixture of satin stitch and chain stitch, alternating the way the threads went in the different sections.  I then embroidered part of the head with button stitch and stuck a clear gem in the centre.  The antennae were done with back stitch and then a stretched french knot.  I added a couple more gems on the wings, and coloured all the gems with alcohol pens.

Finally what to do to get rid of the lines across the middle ?  Inspiration struck make it look like wood - phew think I have got away with it and I am now calling it a Moth on Wood rather than a butterfly!

Thursday, 17 January 2019

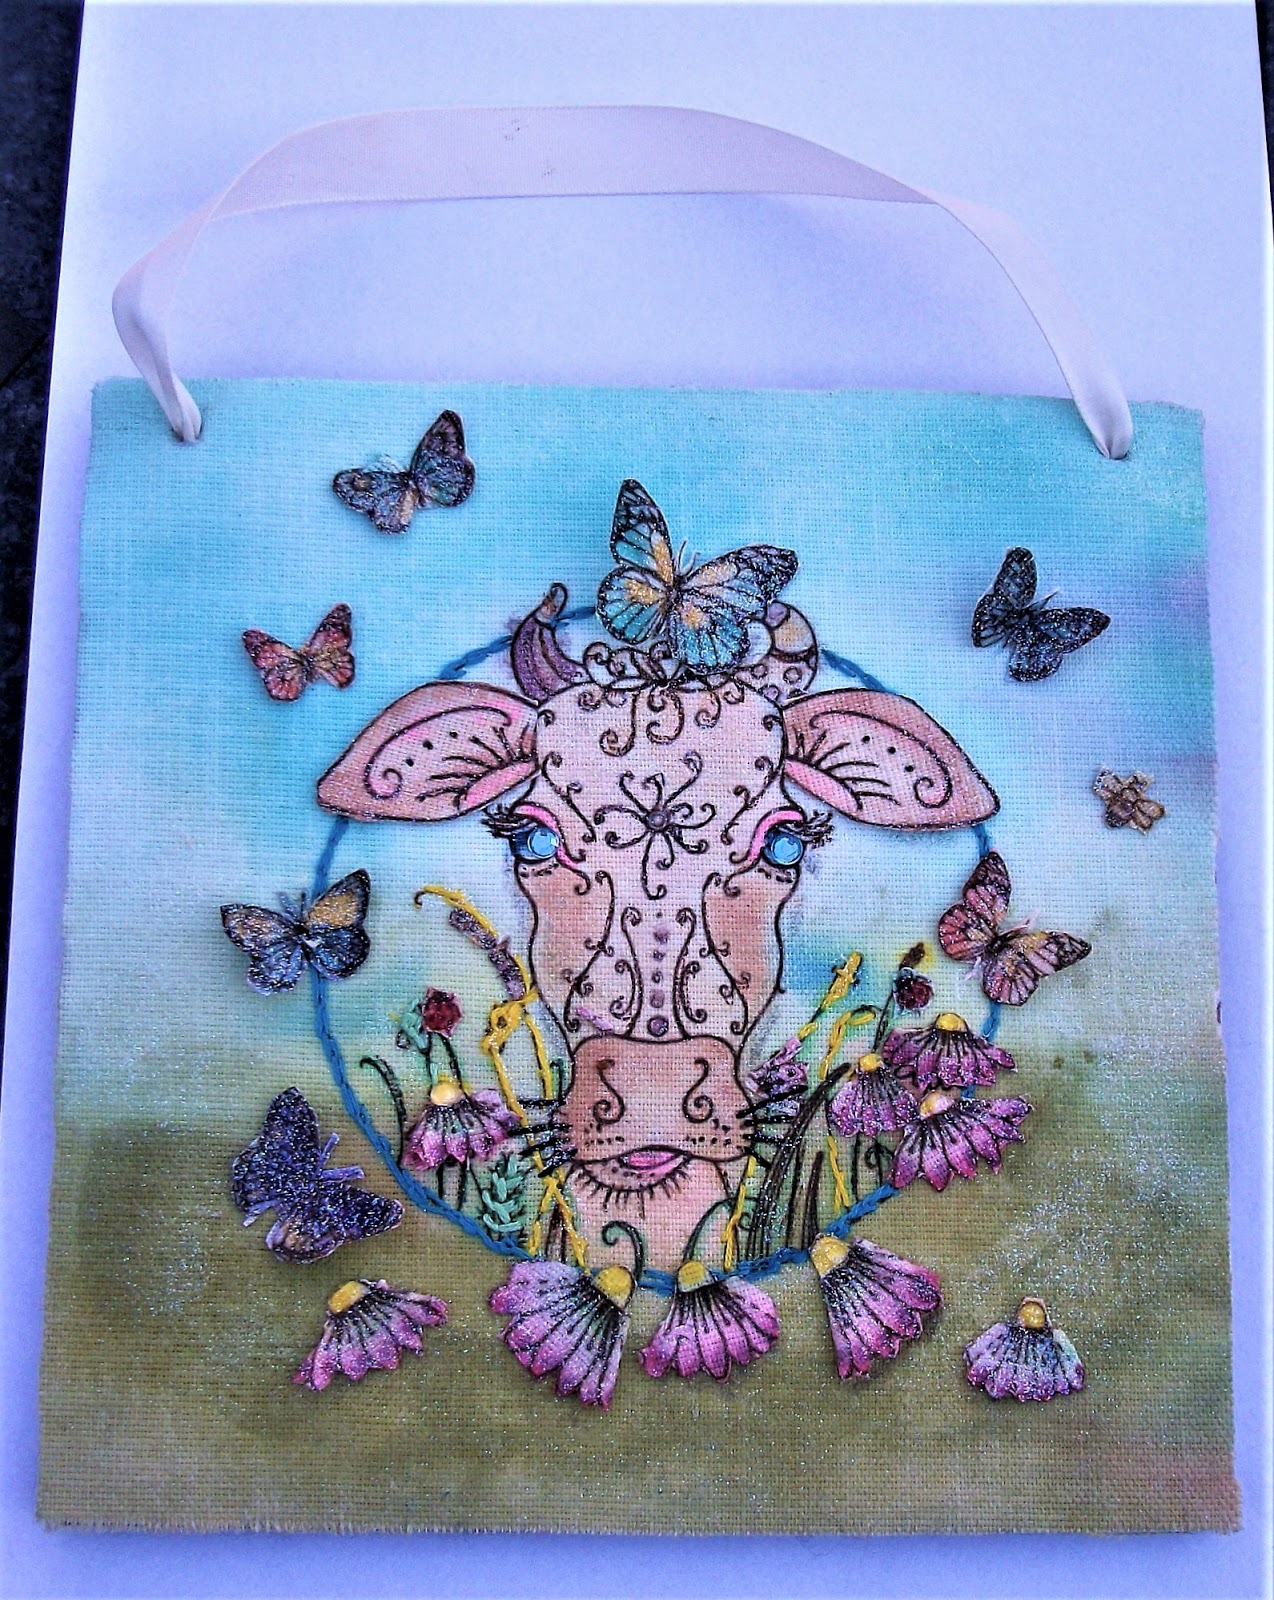
Moo Cow Canvas


Finished plaque


Another Pink Ink Design.  I must admit I am enjoying doing these.   I painted the canvas and the elements (see picture below),  I used various paints - some translucent ones from IndoBlu and some from Cosmic Shimmer, with a few elements highlighted using Posca pens.

I then did some embroidery on the main canvas - outlining the circle with chain stitch and then picking out some of the grasses etc.

The elements and the canvas were ironed to set the colours and then had IndigoBlu Slap it On (Fabric) applied to seal it.

I couldn't decide how I wanted to display the canvas - pondering on whether to use another embroidery hoop, but then I decided to use a square MDF plaque.  I used some  lining material from The Mill Shop online, which was adhered to the canvas with their special bonding material.  (Confess I have forgotten its proper name).I then glued the padded canvas on to the MDF board, and created holes in the canvas with a screw punch to align with the holes on the MDF, and added some ribbon to create a hanger.

I then glued on the various elements - I found heavy gel medium excellent for this.