Going Green Blog Background

Showing posts with label Pebeo Gilding Wax. Show all posts

Sunday, 11 July 2021

Transformation


So today I applied a little gilding wax to the little candle holder/trinket pot.   It has completely transformed it.   Here's a reminder of what it looked like yesterday:  


Thursday, 6 February 2020

MDF Trunk

Front

Hi all.  Thanks for popping in.  Today's make is a trunk (or large box) that I have been working on.  The MDF box was from Madhatters Crafts.  I have a lot of magazines piled on a table and I thought this was ideal for storing them in a tidy fashion.

Rather than paint it I decided to use some paper/card. I needed some A3 to cover the largest section of the box - so it was raid my craft stash.    20 years ago we used this green leather effect card for my daughter's wedding invitations, and I loved it so much, that I bought some extra card when we visited the Paper Mill on year at the Clark's Village.  It was perfect what I had in mind.


Back showing hinges

The trims. hinges and clasp all just had gilding Pebeo gilding wax applied in a deep gold that looked like brass.  I applied it fairly randomly so that it looked a bit "worn/aged" in places.

I must add that the hinge mechanism is brilliant.

Side view showing faux handles


Although I think I actually built the handles the wrong way (I believe there should actually be a gap between the "strap" and the box - but hey ho it doesn't matter I wouldn't have used them as handles as such anyway when it was full.   I created a leather strap with Hearty Clay.  The strap mould I had wasn't wide enough so I used the dragon skin mould to create a "croc skin" finish, which I then painted with brown acrylic paint.   The whole thing was then sprayed with Crafters Companion Spray and Shine.  This made the card shine, and although it was a bit "patchy" in places, it added to the "aged" look.

I have just to to finish the lining of it now - with some more A3 paper from my stash which is a sort of pale green marble effect.


Sunday, 13 October 2019

Grandchildren's Art Journals


7 yr old

I had a couple of the grandchildren for a sleepover, and they wanted to craft - so I let them have a couple of my art journals, and they created these covers for them.    Didn't they do well.

10 yr old
They gessoed the covers and then added Pebeo Violet/Blue DYNA paint.   The created the embellishments with Hearty Air dry clay and Katy Sue Mould;  which one painted with Posca pens, and they both applied Pebeo gilding wax to them.   They then created dots using the Royal Talens Effect Liners/

Friday, 5 July 2019

Celtic Tree


I got this Celtic Tree from Button-It and Craftwood Creations (oh they do have some lovely designs - do check them out).  It was great to catch up with them at Farnborough back in the Spring as there was no show last year and I do love their designs.

I have kept this very simple and just did a background with various green and brown acrylic paints, applied with a sponge.

I painted the decoration with black gesso and then rubbed Pebeo gilding wax, and to try and give some shading I used silver and gold.

I am not quite sure what colour to paint the canvas yet - possibly a light blue or a light grey.   I did think of watercolour painting it with blues and greens, but am not sure - I think it needs a plain background.  Decisions, decisions!

The kit in its "raw" state

Thursday, 4 July 2019

A little fun plaque


A little piece of mixed media for this one.  Once again I can't remember where all the bits came from, apart from the fact that I bought them at Farnborough, I do know the sentiment was a SamanthaK one.   The coffee cup was a die from my stash (at this point in time I can't remember who that was from either, and the packaging has gone missing - how do things suddenly disappear off your desk when you have just been using them ?)

The roses were made freehand from Hearty Clay, coloured with a smidgen of food colouring and then brushed with cake decorating dust.  The leaves were done with a cutter, and again coloured and dusted as before.  

The sentiment was glued on the plaque, then the whole thing painted with black gesso, and then overpainted with Pebeo blue/black iridescent paint and finally Pebeo gilding wax in  silver and gold was applied, and the coffee cup, which was cut from Kratt card, had the same applied

Monday, 24 June 2019

Another journal cover 2)


As before but using part of the dragon mould


showing the two matching journal covers side by side


Sunday, 23 June 2019

Another journal cover 1)


Another journal made the sane was as the one shown yesterday 0 slightly different colours, although still using my favourite blue/black for the background,   I also used a little fairy mould  from my stash on the shield..

Monday, 17 June 2019

My First Journal Cover


I had fun doing this.  Using the new moulds from the Katy sue Fantasy range.  - Dragon scales, Dragon, Swords, Shield and Iron Alphabet and Hearty Air Dry Clay.

The cover was painted with Pebeo Blue/Black.  The Dragon scale panel , dragon's head, the swords (shortened to become daggers) and the initials were also painted with blue/black.   The shield and wings were painted with bronze.

When dry the items were all highlighted with Dailyart Patina waxes in Emerald, Black Pearl and Amethyst, and I also used Pebeo Gold and Silver gilding wax.

Below is another view in a different light.


Monday, 22 April 2019

Tiz Done ... Gramap;hone


I had a busy Easter weekend out gallivanting, but I did sit in the sunshine on Saturday and painted by old fashioned gramophone.  I am really pleased with it.  I tried to keep it authentic and vintage looking.

Another view with the "needle" on the record

The Base was painted with a varied mix of Pebeo and Amsterdam browns, creams and even purple "splodged" on to a painting mat and randomly mixed and then painted on to create a wood effect.. Decoration done with gold posca pen.

Trumpet painted with black gesso and then a Pebeo iridescent gold and overpainted with Golden's gold. The arm was black gessoed, then painted with gold, then changed my mind and painted silver, and then pebeo gold gilding wax. the record was black gessoed and then painted with black acrylic, and the label was created in craft artist. 

Finally a coat of spray and shine


The label on the "record"

Monday, 18 March 2019

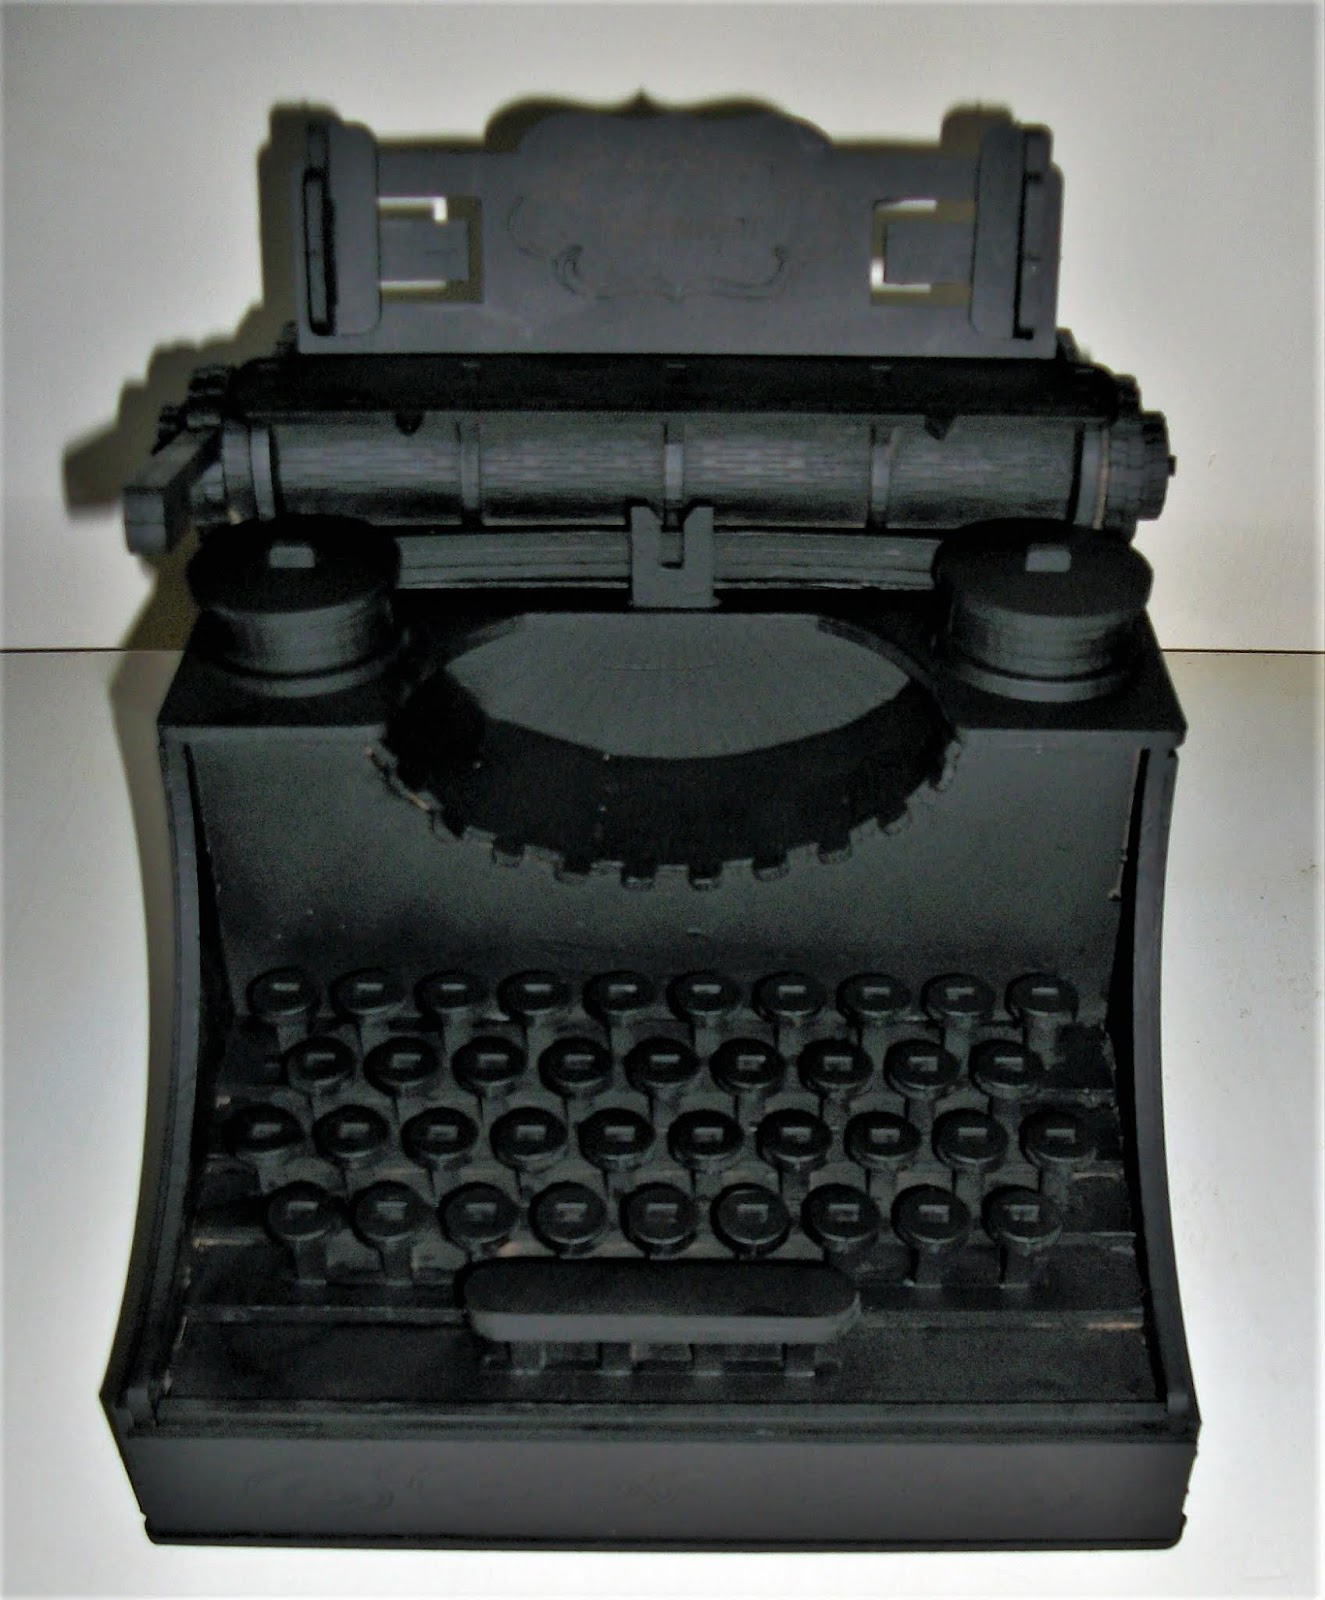
MDF Typewriter


Firstly to recap ... it started off like this - am MDF kit from Bizarreology, which I built:


Then I sprayed it wit black gesso:


The typewriter keys weren't added until later.  I out-lined the letters with black Posca pen, and then painted the surrounds with various shade of cream,and browns.   I then applied triple thick embossing powder to them to give them enamelled look.  When dry gilding wax was applied around the edge.
(I did make one boo boo - I embossed them whilst still in their board -erm - which of course had embossing powder on as well and they got stuck!   I thought it would be easier than chasing the individual ones around the desk!  Fortunately applying a little solved the problem and I was able to push them out.  Some of the "enamelling" did crack slightly - but that added to the "aged" look)


So here it is the finished item.   Gilding wax was applied over various parts, some red acrylic paint applied to the "ribbon", and various brown acrylics to the roller.   I also paint the detail on the sides and front with gold Posca pen.   The ke mechansim in the middle was done with gilding wax and black Posca pen, and rubbed in with my finger.


Two more views:


Wednesday, 6 March 2019

"Wicker" Trug/Basket

I wasn't quite sure how I wanted to decorate this little basket shape.  I then had the idea of trying to make it look like  wicker basket.   I decided to use a technique used in cake decorating of a basket weave.  Now in cake decorating this is done with icing and a nozzle.  Erm maybe not a good idea to use a nozzle and ruin it - so I experimented with Golden Fiber Paste and a fork. (I think it has worked!)

It was then painted with Pebeo Yellow Ochre and when dry overbrushed with Pebeo Dyna Irredescent Precious Gold.

The centre handle and the insides were painted with  various shades of brown, yellow and cream colours to create a wood effect.

I was originally going to decorate it with some flowers, but had the idea of making some straps as "hinges" for the lids.  I created these from Hearty Soft air dry clay and used the Katy Sue strap mould  painted in various browns and the metal parts highlighted with Pebeo Guiding Wax  


The top


a couple more views


Thursday, 7 February 2019


I had my youngest granddaughter (6) to stay overnight the other day, and having seen my new moulds she wanted to play!

She wanted to make a fairy door (and wanted it to be partially open so she could put notes behind the door (no pressure then!).     This was all her own work (with a little help from me in cutting the shape of the door).   Using Hearty Soft Air dry clay, she put bark effect on the circular mdf plaque and painted it with various shades of brown and cream acrylics, and I taught her how to dry brush. She then painted the door which was created using the dragons skin mould, using Amethyst Starlight paint and dry brushed with gold - she got the hang of dry brushing very quickly.  She then made some hinges from another Katy Sue mould and created a door knob - these had Pebeo gilding wax applied, and she soon learned the technique of applying the wax with her ring finger.

We couldn't find my Katy Sue moulds for the leaves, so we found some cutters for to create the rose and ivy leaves, which she dusted with cake decorating dusts.

Finally she discovered y stash of feathers and created a flower with them and a piece of clay, painting the centre yellow and adding a crystal gem to the middle as well a adding a gem to the door for a "peep hole".

We had a little trouble adding string to the plaque, so we compromised and she chose some matching embroidery thread for the hanger.

I know I am biased, but I think this was excellent.    She was thrilled with it, and she is certainly a quick learner and a promising little crafter - she knows what she wants and as an "artistic eye".

Wednesday, 6 February 2019

Dragon's Eye


I had to play with the new Katy Sue Fantasy design moulds.    I just love the dragon's eye, dragon's skin and claw moulds.   I also used the belt and buckle moulds, and elements from the hinges mould.

I used an MDF cheese board blank for the background, which I painted with black gesso and then my favourite Pebeo Blue/black paint.  All the elements were created using Hearty Air Dry clay.

The dragon's skin, eye and claws were painted with Starlight paints.  The belt and buckle elements were painted with Amsterdam and Pebeo acrylics and then a touch of Pebeo gilding wax was applied.   The little screw heads were painted with gold Starlight paints and then gilding wax applied.

The leaves were painted with a mixture of Amsterdam, Pebeo and Starlight paints and then a few bits of IndigoBlu copper kettle mega flakes adhered to them and a smidgen of gilding wax again.

Finally a strip of card was stamped with the word Imagination and a touch of gilding wax applied around the edge, and gilding wax applied to the edge of the board, and the whole thing sprayed with Spray and Shine to seal it.

Monday, 15 October 2018

Robbie Robot


At least he can kneel!
Well I have finished painting the robot, albeit things didn't quite go to plan.  I got interrupted when painting him, and although I had freed up all his joints as I went - I seemed to have overlooked his hip joints.    When I went to pose him and take his photo I managed to break his hip joints.

I tried to remove his hip pin, but it was beyond repair, and knowing how difficult it was to assemble his legs, I abandoned the idea, and just took the hacksaw to the spindle and stuck his hips on.   As you can see  he can kneel, (and he can stand up straight - he just can't sit any more!)


A picture of what he looked like standing before I had finished painting him


a posed picture of him sitting before  I operated on his hips
(they aren't actually attached in this photo!)
Such a shame I messed it up.  I was a tad disappointed as he had been clear gessoed before painting to prevent paint leaking into his joints (and they all moved at this stage).     Hey ho worse things happen at sea as they say - and I did manage to remedy the situation, although not as perfectly as I would have liked.

For info he was painted with Indigoblu translucent paints (I wanted some of the detail on the MDF to show through, particularly on his body).  I then overpainted with Starlights paints - sort of dry brushing the colour on, and then added some Pebeo gilding wax on the elements that appear metallic.
His eyes were painted with Pebeo Ceramic and Fantasy paints.  (Really pleased with the effect).

Saturday, 14 July 2018

Lantern ornament


I had this lantern set as a thank you.    I am going to give it to my son for his christmas decorations.   I was going to paint it all gold to go with his decor, but he said he would like a turquoise blue.

However, when it came to paint it although I was sort of going down the turquoise and blue route, I decided I wanted a sort of distressed oriental feel to them, with some patina and ruse effects, as they reminded me of pagodas.


close uptrying to show the patina effect on the top
 I suppose if he doesn't like them - I can always repaint them!   This is what it looked like before I started.


Friday, 25 May 2018

Freesias

                   
A pal's mother is 90 at the end of the month, and she asked if I could create something for her, as when they called in with some rhubarb for me the other week her Mum was admiring my fairy houses and other creations.  My mind went completely blank "what could I do for a 90 year old who suffers with dementia?"

I discovered that she loves the colour yellow and roses and freesias.   I knew I had a freesia stamp somewhere in my stash, but couldn't find it - so looking online I found this Clarity one, and knew it would be perfect.

I painted the mdf plaque from my stash with white gesso, then applied crackle paste and overpainted with a pale green/blue.   When the paint was dry I stamped the two images with black archival ink and added clear embossing powder.   The freesias were then painted with Pebeo acrylics.

I then applied two shades of blue distress oxides mixed with glycerine around the edges and in odd places.  A coat of spray varnish was added to seal the images.  The back was painted using the same colours as the front with highlights of distress oxides.  Finally pebeo gilding wax applied to the edge, and the string hanger added.

Saturday, 13 May 2017

Birthday Card


You all know I hate men's cards, and I just didn't know what to do for my son's card.  I know he isn't really into steam punk, but I love it, so I am hoping he likes it.   At least it is masculine!

I used the Time Traveller dies from Sheena Douglass, and his name was from Leonie Pujol's alphabet dies.  Not sure whose dies the hash tag and numbers were from, as I seem to have file them without the packaging - oops!

Apart from the hourglass, he elements were all cut from black card.   I used sparkle pens on the balloon, but didn't like the effect so went over it again with Glitter Kiss, and then highlighted the embossing with Pebeo Gilding Wax.   The clock, propeller, fob and numbers just had gold and silver gilding wax applied.  The hour glass was cut from white card, and painted, and the compass insert was stamped on white card, and had distress inks applied.   The hourglass and the compass had glossy accents applied to give the appearance of glass.  The card was cream pearlescent card.

It was difficult to work out how to place the name, so I just stuck them down in a random fashion.

Wednesday, 5 April 2017

Fairy Door for a Train Enthusiast


I had great fun painting this (bought from craftwoodcreations.co.uk)  I saw this at the Farnborough Craft Show and fell in love with it (I must confess I have bought some of their fairy doors before).

My granddaughter was going to buy one, but I had already beaten her to it, so it was agreed that I would paint it and she would give it to her Dad for Father's Day.

I used some pebeo sand paste to create some texture on the outer stone work, and then painted it in various shades of grey and cream, finally going over it with some green memento ink to make it look a bit mossy.  I really love how it turned out!

The door comes in various sections.  The stone work a backing piece, the door and the clock, sign and door knob.
I painted the back arch (with grays, and other colours to create an old wood effect, and then stuck the stone arch on top.

The door was painted with decoart paints and memento inks, as I needed the wording to show through.  I confess I have forgotten what I painted the top windows with - I think it was the pebeo silver glitter paint, and then it had glossy accents applied.  The door knob had gold pebeo gilding wax applied and then stuck on to the door.

The clock and sign were painted with decoart paints, and a little gold pebeo for the arrow, and the rest had Pebeo gilding wax applied. I then highlighted the letters with a micron pen, and also added some detail to create a curved look to the posts.   The clock had glossy accents applied to it.


I am not sure whether my granddaughter will mount the door on a canvas or not, so I haven't stuck the door and surround together not added the clock and sign.  I am leaving these for her to decide what she wants to do with it. It may be that he door will go on the door of his train shed, but it if mounted it could be a "picture" on the wall of the shed.  On the website, the door is shown as in the first picture.

Shame we have got to wait until June to see if he likes it - lol!

Friday, 10 March 2017

It's that time again!


Yes it's time for a male friend's birthday!   I know he likes antiques (being one like me - lol!)  - so for this card I used Sheena's Die and Stamps.    Most of the items were cut from black cardstock, and mainly coloured with various gold and silver pebeo gilding waxes.  The hour glass was stamped onto white card, and coloured with alchohol markers and then had glossy accents applied.   The compass was also stamped onto white card and coloured and glossy accents applied.

The background was created using a complimentary stencil from Andy Skinner and one of his little board nuts had gilding wax applied to it for the centre of the propeller blades.

Quite pleased with how this turned out.

Sunday, 13 November 2016

Another Fairy House

With battery tealights inside

I have been playing with Powertex again, and have made this fairy house.   This time I used clear Powertex, and then painted with acrylic paints, and gilding wax

another view
 As you can see it is just made from t-shirt material, and old dishcloth, some rick-rack and some lace, with a few gems added.

Before painting ....

...... and what it started out like
This started life as a pickle jar and lid.   the lid had scrunched up foil taped to it with masking tape