Going Green Blog Background

Showing posts with label acrylic paint.. Show all posts

Wednesday, 28 July 2021

Casting Compound Experiment


I tried a little play and an  experiment with the casting compound yesterday.  I created the mold shape by forming Hearty clay around a geode shaped mold, and "stamped" into it using various flower and leaf cutters.

I then coloured the casting compound to produce a pale olive green colour and poured it into the mold I had created.

When dry I painted it with acrylic paint (attempting to do a paint fusion technique).   It wasn't a complete success like the one I did pressing flowers into the clay) - but it was an experiment!   Also not helped by the fact that my dodgy eyes didn't want to play properly when I came to paint it.

Never mind you have to experiment to see what works and what doesn't.    I think it would be quite successful doing smaller pieces that could be turned into pendants, with just perhaps using one cutter, and then pouring resin over the top to finish them off.   I may attempt a thin resin topcoat over this as well.

Sunday, 28 June 2020

Playing with more stash


Found this cheeky little fellow in my stash, and thought it would be a fun thing to paint on a hot summer's day.    As everything is etched into the MDF, it didn't require a lot of mental effort to colour him.

The decoart neon paints came out again for most of him, together with a little snow effect paste, and some glitter on top of that!

Can't remember the maker of the shape, I just know I bought it through Hochanda some time last year.

Thursday, 31 October 2019

The Finished Robots


Well, I have finished the Robots (excuse the pictures, not brilliant, and couldn't take a photo of them all in one go!) - but hopefully you will get the idea  .)

As you may recall there were a lot of little pieces, so as the items are for a small boy - I decided to "build" most of the figures and divide them into "head" and bodies".  He can mix and match them as he likes.


It has taken a while to paint and decorate them (both sides) and give them a coat of varnish.   the next job will be to make or preferably find a wooden box to put them in and paint that, so watch this space.


Thursday, 11 July 2019

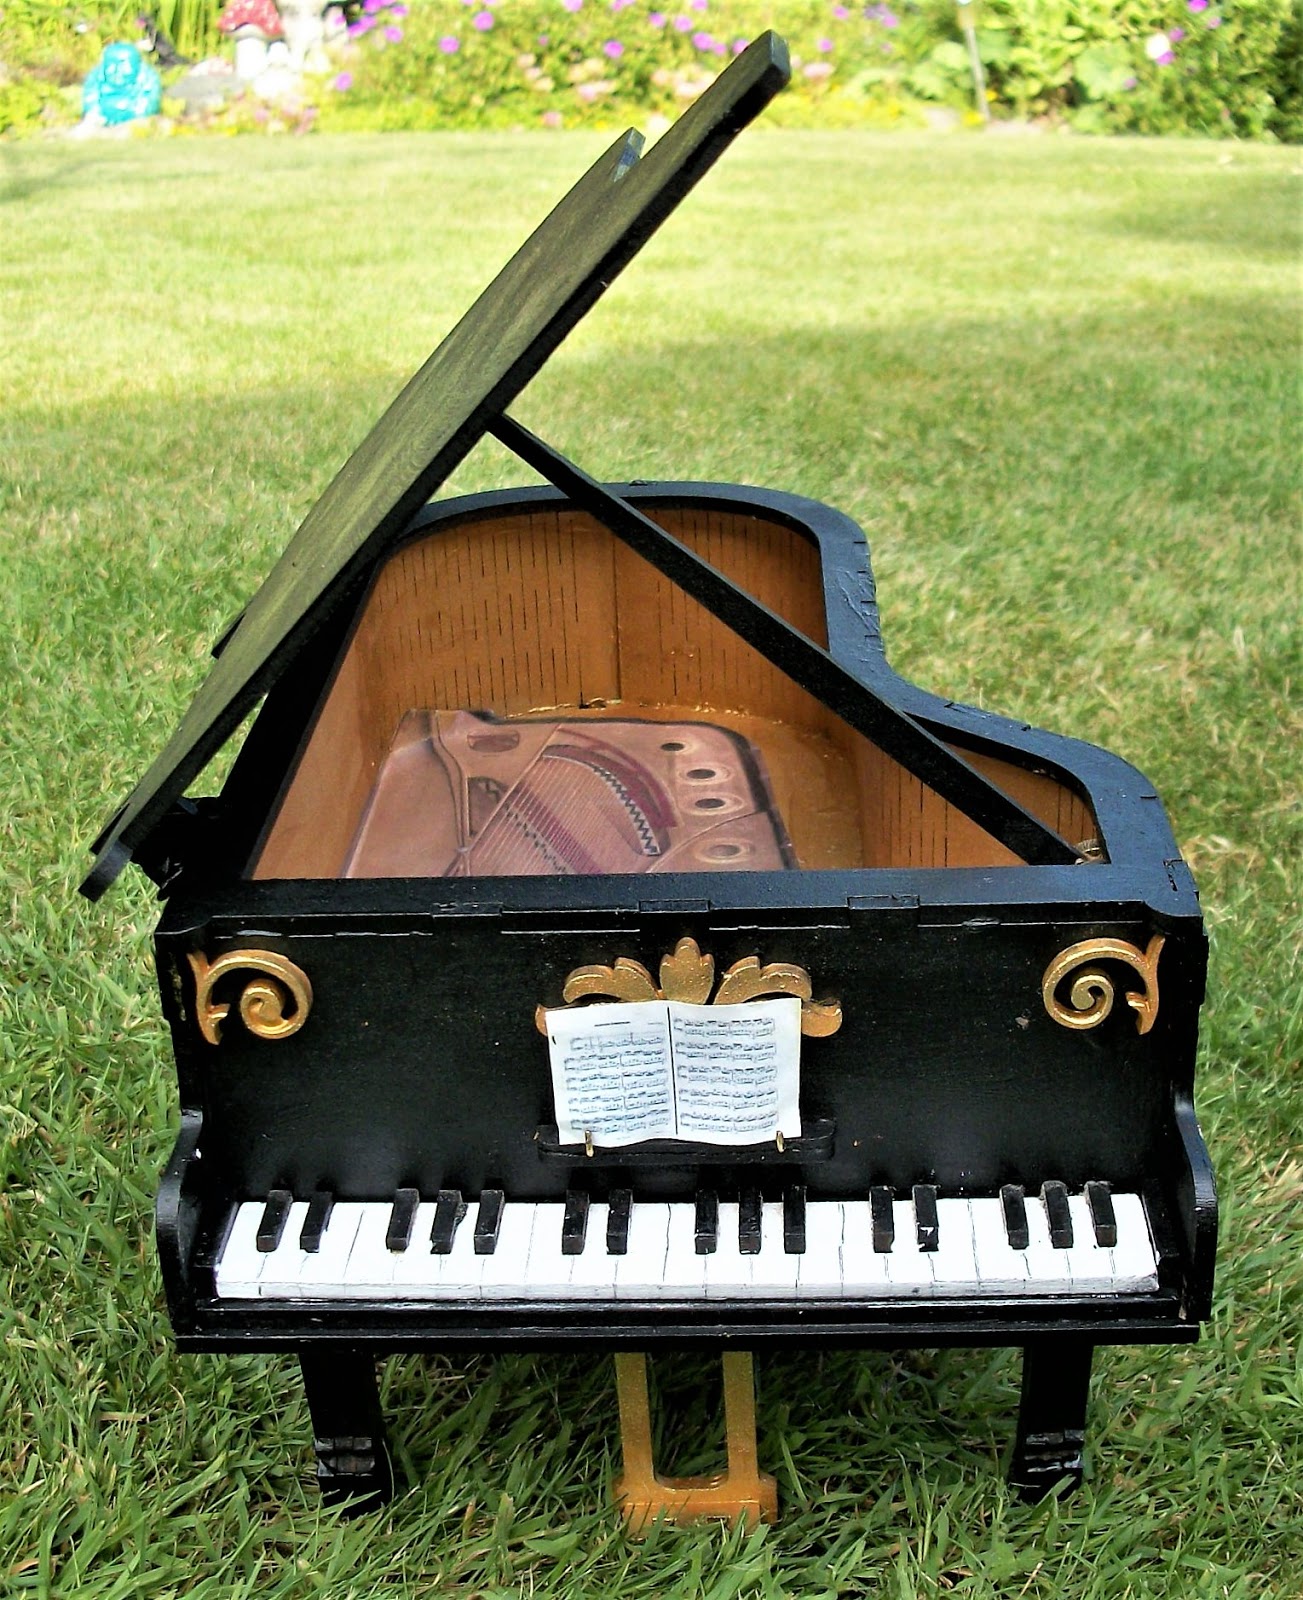
MDF Piano


I have fallen in love with the littler piano.   I didn't know what colour to paint it - but ended up doing it in a classical style.  I shall make some flowers to go in it and I thought he black would set off the flowers well.


I gave the MDF a coat f of black gesso on the outside and gold gesso on the inside.   I also used the gold gesso on the gold sections and embellishments, with a smidgen of gold gilding wax to give shadows.highlights.

I found an image of the inside frame of a grand piano and printed that off and stuck it to the bottom of the inside - it wasn't quite the right shape, but it was difficult to get it just right.  However, it won't notice when the flowers are inside.

I wanted a music ledge, so I used one of the embellishments and cut it in half lengthwise with a hacksaw, and with a pokey tool (aka a crafter's bradawl) I made a couple of holes and fashioned some retainers with jewellery wire.   I then found an image of a piece of music and reduced it in size, slightly colouring it by brushing some Old Paper Distress Oxide over it.  I then coated it with gel to stiffen it.

another view

The kit is made by Olifantjie.

a glimpse of the inside
I will post another photo when I have made the flowers.   I am thinking at the moment roses and sweet peas.    In fact I could probably make a lot of different flowers and change the arrangement according to the season.