I had fun with some paint techniques and shading on this project. Am still trying to decide if it needs something in the space on the top left though. I feel it needs some wording or a picture.
Showing posts with label Distress Inks. Show all posts
Thursday, 20 February 2020
Thursday, 30 May 2019
Keeping it simple
A simple card today for a man. Stamped with a freebie stamp from a craft magazine that was designed by Sheena Douglass, using Distress inks on watercolour card and then shaded with the add of a little water. The card was then edged with the same distress ink, some nuvo drops added to create a faux brad effect; and a bit of sparkle pen highlights.
The sentiment was from the same set of stamps and given the same treatment as the main image.
All mounted on cream pearlescent card.
The sentiment was from the same set of stamps and given the same treatment as the main image.
All mounted on cream pearlescent card.
Monday, 8 April 2019
"Hat-shaped" Box
I have been meaning to tackle this for a while, but couldn't decide exactly how I wanted to decorate it. I decided to go with a faux leather effect (Kraft card treated with glycerine and water and screwed up, and when dry I applied distress inks and distress oxides). The faux leather was cut up into small pieces and applied to the box with heavy duty gel both under and over it. When this was dry I highlighted all the "seams" with gold Nuvo drops.
I then applied random bits of screwed up tissue to the base with watered-down pva, to create a different "leather" effect. This was then painted with various shades of oxides, and distress inks and acrylic paint.
I then created a buckled hat band from Hearty clay and a Katy sue mould, which I then painted in various shades of brown and highlighted the buckle with gilding wax (but decided it didn't show up enough so made it more 3D with more gold Nuvo drops.
I painted a selection of MDF cogs and a "star" embellishment with Pentart Rusty Effect and Patina paints.
Finally the whole thing was sprayed with Spray and Shine.
| The faux leather effect |
| How it started off |
Sunday, 16 July 2017
Starting on the Christmas Cards
I know, I know it is only July, but you have to start somewhere. Have been awol from the blog for a week it seems - mainly due to a very dodgy arm, that has prevented me from doing much! In fact I have done nothing most of the week - no crafting .... and definitely none of that dreadful thing called housework!
I confess I sat and watched a lot of crafting shows - I do love all the tips, techniques and ideas you pick up from them. One of the shows was a Card-Io show, and I just fell in love with the ideas for Christmas. My granddaughters will love this new addition to my little stamps, which are just right size for them. OK so I have rambled on enough, no doubt you would like to see what I got up to yesterday.
| First attempt - blue wreath |
second attempt - black wreath, but got a bit heavy handed with the blue shading
at least the glitter on the lake shows up in this photo
|
The first two were my first attempt using the stamps. I wasn't quite happy with the wreath. I watched the demos again and realised where I was going wrong with the second generation stamping - I wasn't turning the stamp around completely ! I used the smaller stamp and got it right!
| Wreath using smaller stamp and black ink again |
I then decided to add the scene to the wreath above - definitely an improvement - thinking I am getting the hang of it now and quite like this one. I love that little cable car! I also took on board Wendy's trick for creating a shadow - love it!
Looks like another quiet day today - so I think I shall try some more variations, perhaps with a different stamp again for the wreath - perhaps in green. Hopefully, I will create a few more toppers for Christmas cards.
Friday, 30 June 2017
Another Fairy Door
You may recall back in September last year I made a fairy door. Well my youngest granddaughter really fell in love with it, and wanted to take it home. I promised to make her one, and at last I have got around to finishing it.
This is the door bought from the Works (see further down for the actual product). I removed the hinges and latch. I then used a stencil for the surround and applied Pebeo concrete paste. This was then painted with a light grey and then various shades of grey, cream and green was applied with a sponge to create the stone effect.
The door had various brown distress inks applied to it with a little water, and then I sprinkled some UTE powder on it (Ultra Thick Embossing powder), which I heated to create the worn look. Finally some more distress ink was applied over the embossing powder - actually I used Violet! I then re-attached the hinges and latch. (It remained in this state for a while - I think I actually posted a work in progress some weeks ago!)
| Another View |
Today I made the flowers and foliage. I confess I had to look back at my original post last year to remember how I did them - oops! The Flowers and larger leaves were die cut from Sheena's anemone set; the fern and smaller leaves were Sizzix dies.
I stamped the leaves with versamark and then embossed them (didn't do this last time - shame I didn't realise could have saved time!) I then painted everything with various Pebeo Dyna paints. Then having read last year's post, I applied a little Pebeo Mixtion Relief on the petals and leaves and drag it in to the centre with a paint brush. When dry I applied silver and gold mirror foil.
I painted a few shells from my stash (they either came from The Works or The Range - I forget). Finally the flowers etc were assembled and some little gems applied to the Centres (Crafty Crocodiles).
Hopefully I have a happy granddaughter now and there will be no nagging (at least for a while until she sees something else I have created and want the same!)
| the original door from The Works |
Saturday, 29 April 2017
Away with the Fairies !
so yesterday it was Unicorns, today I am away with the Fairies! lol!
I bought a couple of Tando Fiary Door kits and this is one of them. All the elements came in the kit, it was just a case of painting them and putting them together.
| another view |
The kits comprise mdf and greyboard.
I coloured the door sections with distress inks, and applied a little UT embossing powder to get the blistered look.
The "stonework" was created by using Pebeo sand gel on the different sections before they were stuck on the base shape. They were then painted with various shades of Pebeo Deco Creme to get the weathered look.
The hinges were painted with various shades of Decoart Media paints to get a slightly rusted metal look, and the door knocker had Pebeo guilding wax applied to it.
Finally the ferns and toadstool were painted with Pebeo paints, and the toadstool had UT embossing powder applied to give it dimension.
I have another fairy door as work in progress - this door was purchased from the works. I used a stencil for the stone work. More details when I get around to posting the finished item.
| work in progress |
| w.i.p another view |
Labels:
Decoart Media paints,
Distress Inks,
Pebeo Deco paints,
Tanda
Monday, 6 March 2017
Henna Butterfly
Another birthday card using a Dali Art Henna Butterfly. A different one this time. I also decided to make it a "henna" butterfly, buy stamping with a brown distress ink and then pulling the colour out with a damp brush. I stamped the image on the card, and also on a spare piece of card, which I just cut the wing part from (having had the "accident" with the other one I shared with you). This was then added to the image on the card to create a "double winged butterfly.
To be truthful the photo doesn't do it justice - it really looks great in the flesh, and I am really pleased with the effect.
Sunday, 5 March 2017
Another Toadstool Card
A single "house" this time, with an extra embellishment for the door - a "witchy" button from Craftwood Creations - Button-It range.
Background painted with Spectrum Noir glitter pens as a wash, and the grass was stamped and painted using distress ink (bundled sage off the top of my head) The fence was also stamped in a brown distress ink (walnut stain) and then "brushed out" with water.
The house was coloured with alcohol pens.
Labels:
alcohol pens,
Birthday Cards,
Die cutting,
Distress Inks,
Stamps
Tuesday, 10 January 2017
Painted Wooden Village
You may remember I painted some little tree scenes from The Works before Christmas, well whilst in ton after Christmas I discovered some little houses and a church, which I hadn't seen before. They were in the sale - well it would have been rude not to buy them!
I painted them with Brushos and distress inks. Snow was created with Puffy paint and some unicorn sparkles added.
| The two houses |
| All lit up |
| All lit up in the dark |
My son rather took a fancy to them - so if there is no room in my house next Christmas - you know where you will find them!
Thursday, 7 July 2016
Card for a Friend
A card for a male forum friend
The topper was created using a stencil for Clarity Stamp and one of Leonie Pujol's masks for "friend".
The background was inked with a brush in shades of green and brown distress inks Then the word was outlined using Leonie's little stamps and one of the shades of distress ink from the background. When dry the image was highlighted with the Spectrum Noir Overlay clear sparkle pen.
Image was then matted and layer on to pearl cardstock and then on to a pearlescent green card.
Thursday, 23 June 2016
Retro Rustic Wedding Card
| Card front |
It's my Great Niece's wedding shortly, and I made this card for her. I like to personalise a card as much as I can, Her invites were quite rustic and involved a camper van, which I gather will feature at some point in the wedding. I haven't put anything about "wedding" on the front of the card, as I have made it an 8 x 8 and am going to get a deep frame to go with it so that it can be put on the wall as a picture, should they so wish. I also made a box for the card.
The background was created in Craft Artist. I then placed a Clarity stencil over the top and brushed various distress inks over it in shades of green and blue. It was then mounted on craft card (her wedding invites were craft card). I then used a Spectrum Noir Overlay sparkle pen across the image.
I used distress inks in shade of brown to tone down the heart, and added some bought butterflies. The card stock is a pearlised one.
The insert was created in Craft Artist and printed on Conqueror Effects paper in metallic champagne.
| Insert |
I then made a matching box from the pearlised paper with an acetate window, finished off with another butterfly, and some garden twine (to reflect the twine on her invites). Thank goodness for my Hougie Board!
| Card in presentation box |
Just need to get a picture frame now to go with the card. Hope she likes it.
Monday, 7 December 2015
Distress Ink Christmas Card
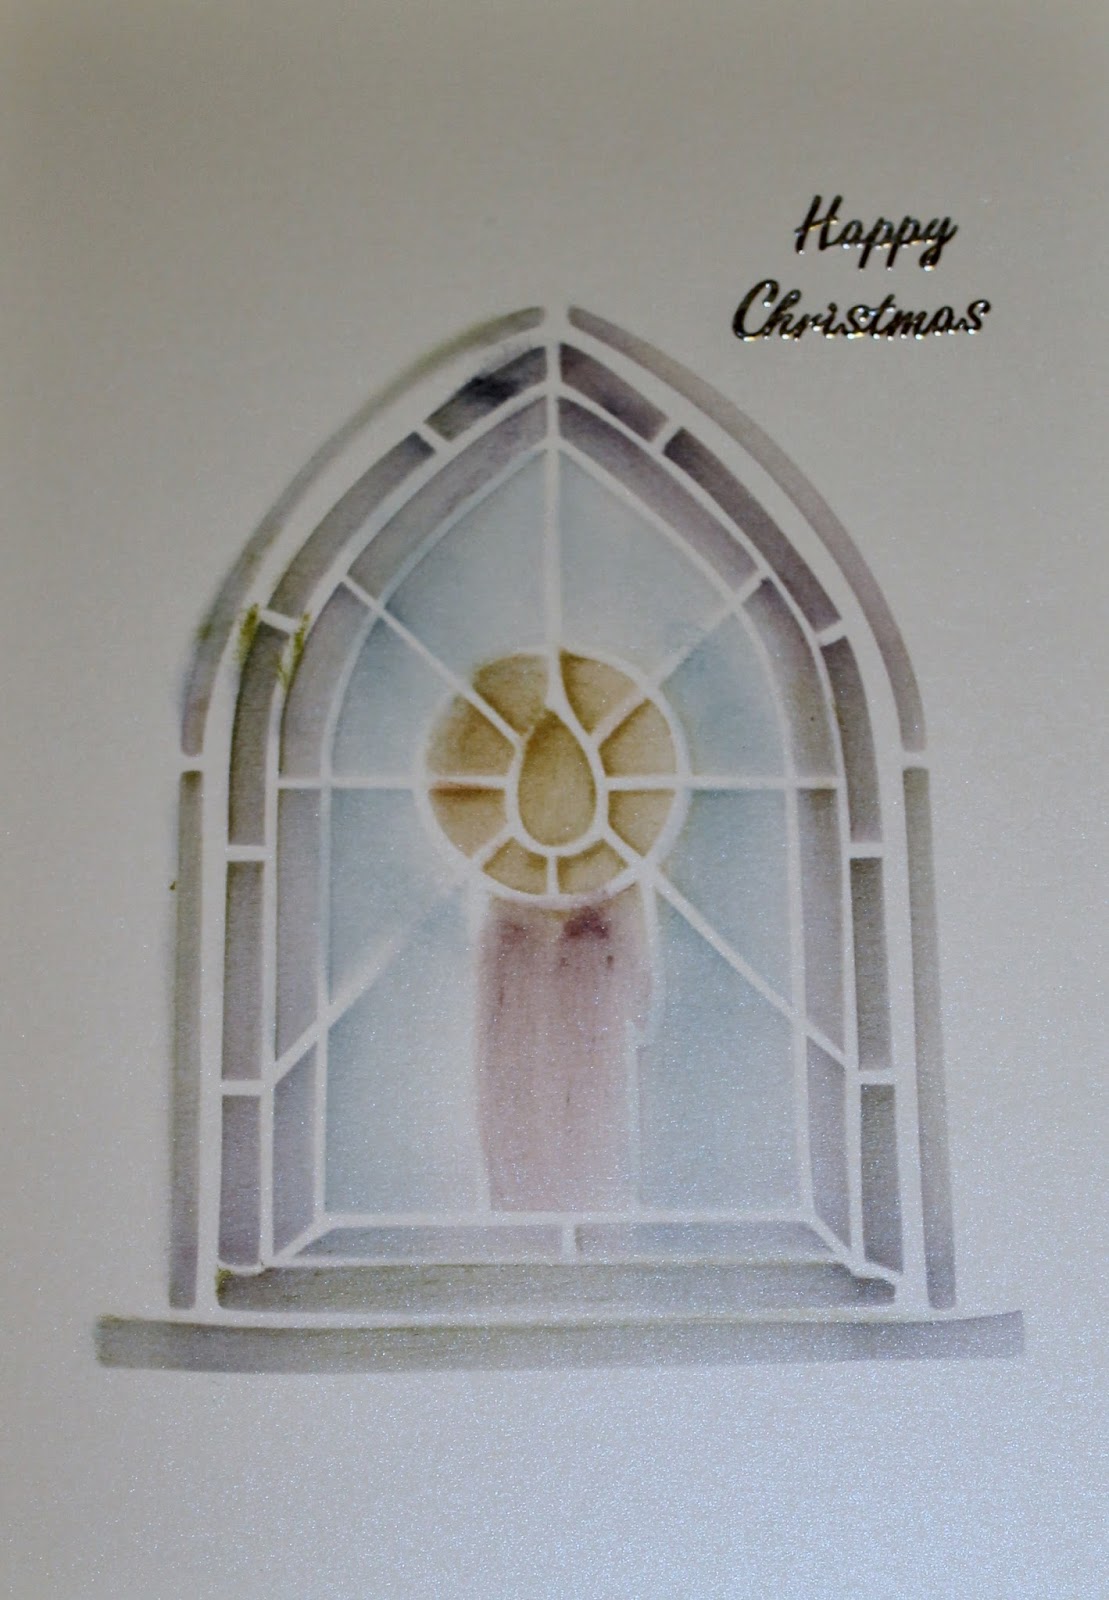
I treated myself to some new stencils from Clarity Stamps, and used them with some distress inks, and the Clarity brushes This is the first time I have done something like this, so quite pleased with my first attempts. I used various shades of brown distress inks for the stag to try and get so dimension to him.
The candle window required a bit more of a play, as so many different coloured areas required.
Next time I want to try embossing the card first. I did try using my newly purchased TODO machine, but I think I was using the wrong card, and I had problems getting the settings right. However, I shall persevere
Subscribe to:
Posts (Atom)