Going Green Blog Background

Showing posts with label wooden model. Show all posts

Friday, 30 October 2020

Paint Fusioned Tool Carousel


I treated myself to this lovely rotating tool carousel.   It is made my Studio Light, and it comes flat packed and you have to put it together yourself.

The design was basically very good and relatively easy to put together, though I came unstuck when it came to fitting the top piece on ..... Seems to be a slight manufacturing fault in the fact that the slot os the side dividers are too narrow to take the dividers.    I had to take a file to it, but it still didn't fit that well, and the top piece was beginning to crack.   (I have since discovered that I am not the only person to have had trouble, and mine is actually less cracked than some other peoples).     This was a bit of a shame.   However, I shall add a bit of "filler" of texture paste to cover up the "iffy" bits.

It comes painted white.   I was going to decorate it with stamps or papers, but I rather liked the white finish - so out came the acrylic paints and I did a bit of Paint Fusion or as it is also known - One stroke painting.

Thursday, 7 June 2018

Fairy House


A little play with textures on a little Fairy House from The Works,  (I went in to buy something else, which wasn't in stock, and came out with this - lol!)

I used texture medium on the "green" edging, which I then painted.   The walls were done with pearl medium mixed with acrylic paint.  I also made a few tiny air dry clay flowers.  (When I was teaching cake decorating, we used to call these "stamp-plonker" flowers, as they were made with a little spring loaded cutter, and it was a case of stamp, then plonk to create them!)


Friday, 4 May 2018

Gypsy Caarvan (Vardo)

How could I have forgotten to share this.   It took up enough time to do, and the reason why I missed a lot of blogging.
Front
All painted with Pebeo acrylics with a little detail on the wheels done with pen.   Finally a coat of spray and shine to seal it. I think it is self explanatory of what I have done painting it - so pictures following are work in progress finishing with the start,

Perhaps the only thing I should add was that rather than have empty windows I painted some rice paper and stuck it behind the windows,

Side and Front

Side

Back
Work in progress - top painted and wheels etc added.


Wheels decorated

Close up of wheel decoration

The original start of the build
I had originally wanted the decoration on the front and back to be a bit smaller, but it was virtually impossible - so just went with the roses theme.

I hope you like it.

Monday, 30 October 2017

More Christmas Bell Jars


Following on from an earlier posting, I made these two jars for my son.   Very similar to the earlier ones, but a gold base with ribbon, and some Nuvo drops on the trees.

I was also very pleased that my daughter discovered some tealights that fitted the jars in Robert Dyas, so now little jar has a light in it, as so does the earlier one I made.

Sunday, 22 October 2017

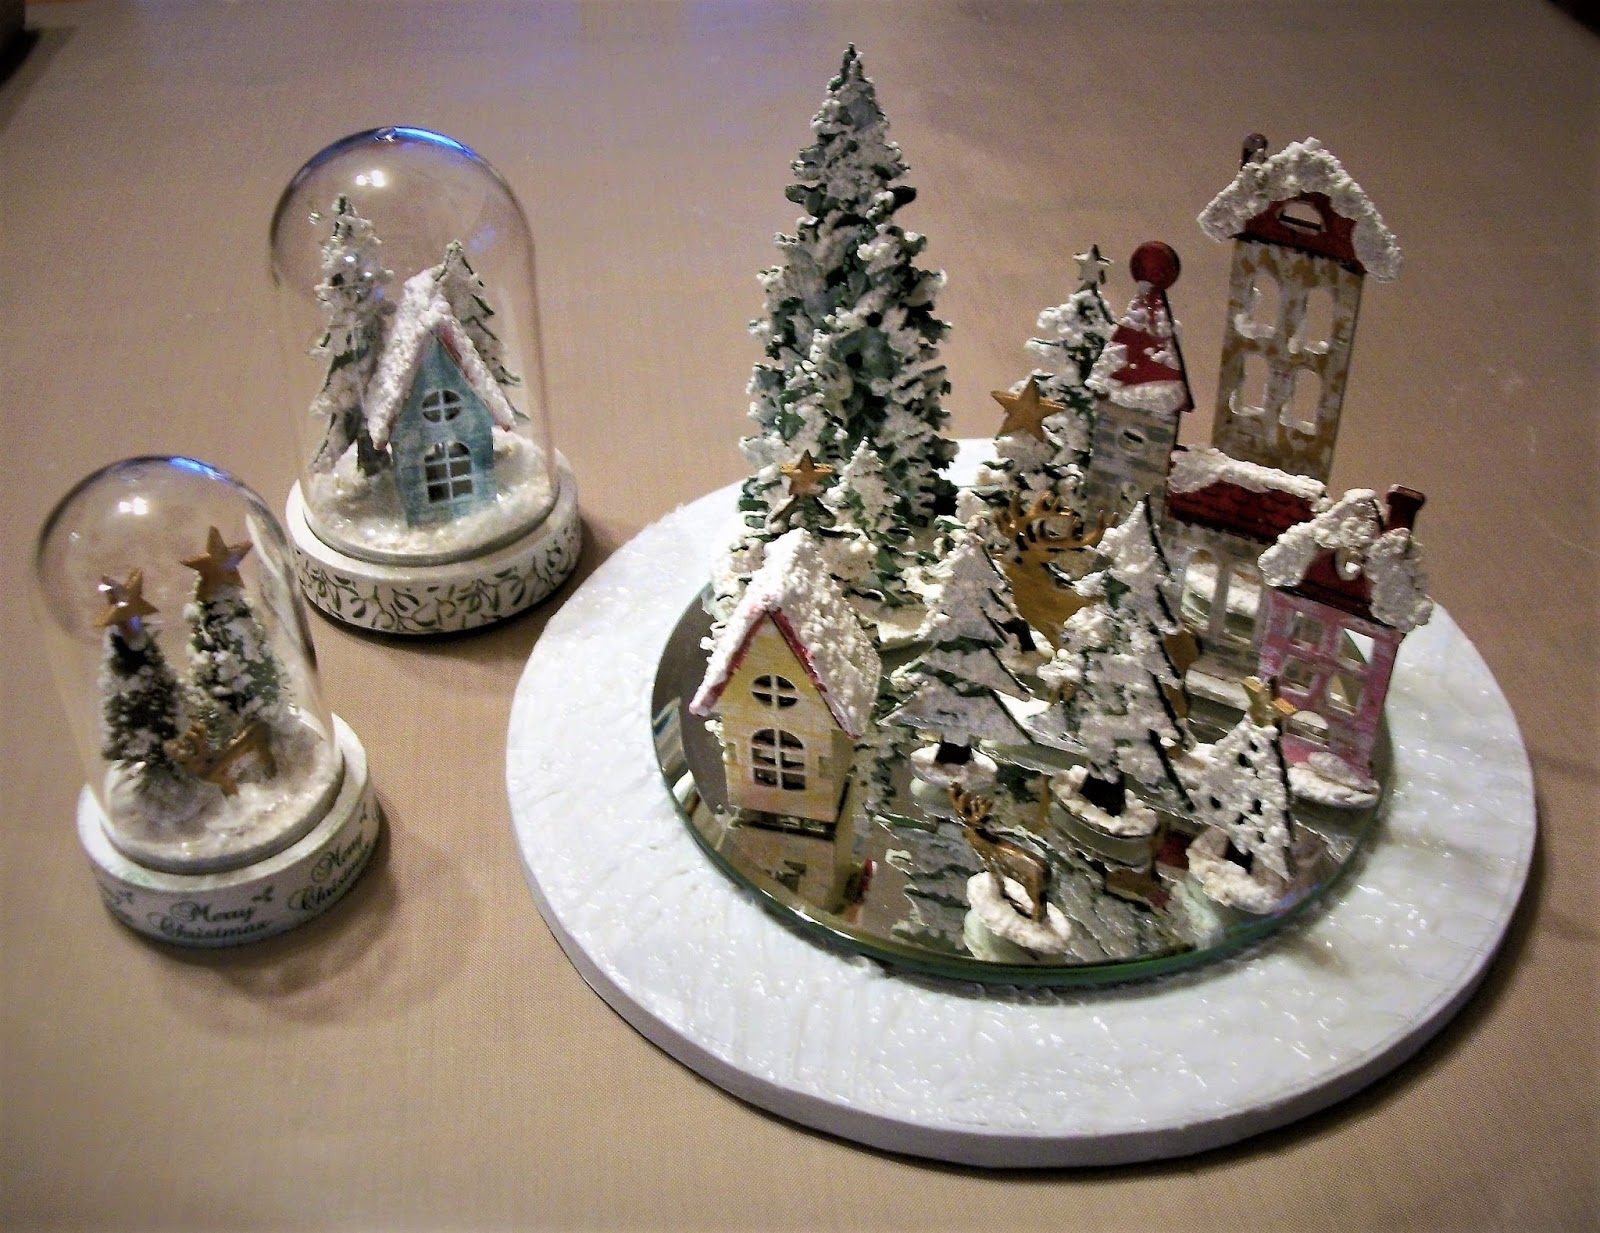
Christmas Village and Bell Jars - WIP 3

completed items


As you can see I have now finished the bell jars and the village scene.

I coated the cake board with white gesso and then applied clear gesso with a palette knife.  Wow the effect was fantastic, just like glistening snow.   I had thought I might have to apply some glitter or  fake snow, but it didn't need it!

I also completed the bell jars.  These had white gesso and white paint applied to the bases and then washi tape applied around the bases.   The inserts had snow effect applied with eXpandIt mixed with white gesso and when dry some glue and artificial snow was applied.

Hope you can see the snow effect on this
And there follows various view, with and without domes. lights.


Saturday, 21 October 2017

Christmas Village and Bell Jars - WIP 2


A bit more of the WIP today.   I happened to see this mirror candle plate in John Lewis and it was perfect for the village.  I also bought a cake board, which I intended to paint in a "snow" effect.  As you can see I have also started to paint the houses, using some mini stencils for the brick effect.

Having put the ornaments on the glass plate, I realised I need to paint the underside of the ornaments white!  Still a way to go to finish the painting as I want.


I also have these two bell jars, which were another kit, and you can see I have also started painting these.  (I applied glitter gel to the little brush trees, but will add white texture past as on the wooden ones, but then apply the gel over that.)   The larger one will have a small string of fairy lights added. (The lights came with the kit and have a tealight candle base,

You can see the brickwork effect on the houses, and I have since outlined the windows with white pen.

To be continued ...........

Thursday, 19 October 2017

Christmas Village and Bell Jars - Work in progress 1.


The start of the painting progress.

I am working on a village scene and some bell jars.   So for the next few days I will share my WIP (Work In Progress).

To start with a coated all the wooden pieces with clear gesso, and then built the houses and trees and started on the painting progress, using Pebeo decoCreme paints.

I then mixed some white gesso with some EXpandit paste and applied it randomly to the trees, the bases and roof of the houses.  This was then heated to create the snow effect.

Watch this space for the next step!

Monday, 7 August 2017

Christmas "tree" boxes/shelves - Work in progress


My daughter and I fell in love with these little display boxes/shelves, and bought a set each.  They are made from pine.  I have decided to paint mine with a Christmas theme, but you could paint/decorate them any color for any time of year.

you can arrange the boxes anyway you want.
  
I decided to paint mine rather than use paper.  I knew I wanted an "icy" blue and snowflakes on them.
I applied white gesso all over to start, and then I mixed some blue Pebeo deco creme with more white gesso to make it paler,

When dry I applied Pebeo modelling past through a snowflake stencil.  Loving me new stencil from Daisy Designs.  (It came with a holly stencil and a lovely random brickwork stencil)


Today I decided I would add some snowflake/winter papers to the inside.  (That was a bit of an interesting exercise cutting them to fit!)  I am also hoping that the wrinkles that occurred when I stuck them with modgepodge will disappear when fully dried.  The papers were some freebie ones from Anntaurus.


I then applied some Creative Expressions Frosty Sparkle Glitter Kiss over the sides, which highlighted the snowflakes and I also applied it to the front edges.

With the Glitter Kiss applied, although it doesn't show up well in photo

Now to decide how to finish them off - I am wanted some sort of a scene inside the shelves - so will have to get thinking cap on.  I do have some little mdf shapes, and a tub of eXpand-iT and some glitter, which would give me a nice snow finish on the shelves which hopefully I can then stand some shapes in it.

So ........ more to fully when inspiration strikes.

Wednesday, 11 November 2015

Wooden Watermill

Work in Progress
 I had watch Paul church demo these kits on Create and Craft and was very tempted.  However, there was a chap selling them on a market stall in town ther week before last, right next to where my son was taking part in a "Hack Horsham" demonstration.   Well it would have been really rude not to buy something wouldn't it?

I could have bought loads.   Anyway I fell in love with the Watermill.  Goodness knows what I will do with it or where I will display it.   Perhaps I will get some yacht varnish and coat it when I have painted it - and it can go in the garden by my bridge and imitation stream!

Nearly completed - one piece of wood to go on after I hace removed wheel and painted
Just needs painting now - can't wait.  Watch this space for the finished result.