Going Green Blog Background

Showing posts with label Sewing. Show all posts

Thursday, 5 November 2015

Crazy Quilted Cushion

My pal Sassie has been staying with me for most of the past few weeks.  She came up from Devon for our Sapphire Wedding Anniversary celebrations.  Went home for a few days and then came back up for the funeral.

During her first visit she got me to buy some calico to make a crazy cushion, and finally yesterday I got to attempt to make the cushion, under her supervision.   The first time I have done any quilting!

Work in Progress


Finished Cusion

I wasn't all that happy with the finished result.  Mainly, due to the fact that I didn't like some of the results of the top stitching, but it is the first time I have used this new machine in earnest!   Fortunately in my stash I had a flower I had made some time ago with some of the fabric I used, so I was able to strategically sew that on to cover one particular bit I didn't like when the machine threw a "wobbly".

I used to be very good at sewing in my younger days and made all my own clothes.  Quite often when my husband I were courting, I would meet him for lunch on a Saturday, nip and buy some material and catch the three o'clock train home and by the time he picked me up to go out in the evening, I would have made a new dress!.  ( Mind you with the cost of patterns and material these days, don't think I could do that now, wouldn't be able to afford the pattern let alone the material!)

Wednesday, 1 April 2015

Easter Egg Tree

 A little arrangement for Easter.   Would have preferred pussy willow, but had to make do with hazel twigs from the garden,  albeit there is only one catkin !    I may add some forsythia later in the week.


Painted with pebeo black ceramic paint and gilding flakes added whilst wet.  and a little flower
added with pebeo relief and Fantasy paint.

Felted Egg (last year's make)

Felted Egg ( also last year's make)

Fabric covered egg

and another

and another.

This is first time I have tried to do an Easter Egg tree - Can see I shall have to make/buy something bigger next year, if I keep adding to the eggs.


Thursday, 13 March 2014

Ribbon Camellia


I bought a ribbon camellia kit at the Make It Show at Farnborough, and this week I got around to making it up.  The outer petals of the flower are made with wired silk ribbon, and the inner ones with wire organza.  

I was thinking of putting a brooch back on it  and turning it into a sort of corsage, but having taken the photo with it sitting on some of the faux leather I made, I and a friend thought it would look good on a box. Decisions, decisions!

close up

Monday, 3 March 2014

Dolls Bed Accessories

It is my youngest granddaughter's 2nd birthday tomorrow, and I have bought her some dolls bunk beds. They came with a mattress and a pillow, but I thought I would be nice to make some more bedding.  Well I didn't leave myself much time to make them.  The beds only arrived on Friday, and I was out all day Saturday, and all this afternoon!  and of course I hadn't even thought about the fact that being bunk beds, I would need to make two of everything - duh!

I set to on Friday and made a couple of  of little blankets.  Now you all know I am not a great knitter, so I thought as time was short I would use large needles and make them a bit lacy.
blanket
Yesterday I set about making some quilts/duvets.  I used a couple of fat quarters from my stash and made reversible ones, with a little appliqued heart on them, to compliment the heart on the bunk beds.   Gosh it is ages since I have done any sewing in earnest, even though I had a new machine last year.  Of course I had forgotten how it worked (things are in a different place to my old 50 yr old one!).

As you will see I also made a couple of sheets - using an old sheet that I no longer use, adding a little lace and ribbon on the top edge.
one side of duvets

reverse side of duvets
Finally, here are a couple of pictures of the finished bedding in the bunk beds.  I have shown them as being different quilts, but as I mentioned they are reversible, so she can have them matching if she wants.  At least it gives her a bit of choice.  When I have more time, I will try and make some more bits - perhaps a proper patchwork quilt, and perhaps some matching covers for the mattresses and pillows.


As you will see the heart applique, matches the hearts on the end of the bunk beds.


Considering how little time I had, together with learning how to use the sewing machine again, am quite pleased with how they turned out.  Fingers crossed she likes her present and has fun playing with them.  No doubt her big sisters will have as much fun too.

Update: She loved her present! and so did her big sisters!

Friday, 22 November 2013

Wire Frangel (Fairy/Angel)

Finished Angel
 
At the beginning of the week I went on a Wire Fairy/Angel Course with my daughter and daughter-in-law,  run locally by MakeHorsham  (http://makehorsham.wordpress.com/).  Apparently on last year's workshop they decided to call them Frangels!  Therefore I have name my Angel Fran!
 
We had a lovely evening, even though for some reason I wasn't in the mood for being creative.  Non of us finished our angel that evening, and as I wasn't really happy with what I had done, I started her again almost from scratch.
 
Originally we wound masking tape over the wires and the fleece that formed the body.   When I got home, I would some micropore tape over the top of the masking tape, and then using a dusting brush, gave it a bit of flesh colour with some pink chalks, as well as her face.
 
My original angel didn't have a very long dress, and the sleeves were made separately, so I redrew the pattern, incorporating some sleeves.  Being at home I had the use of my sewing machine, instead of hand-sewing everything, so before sewing up the dress I applied some gold ribbon.  However, I did hand-gather her net underskirt!
 
Her coat was made from some net curtain tie backs.
 
Her hair was shaped but needle-felting it to the cotton ball head, and some diamante and an ornate jewellery finding glued on to create a tiara.  I then glued on some daisy ribbon to her dress, and attached a chiffon ribbon bow.  Her shoes were created  with a gold promarker pen and a small diamante added.
 
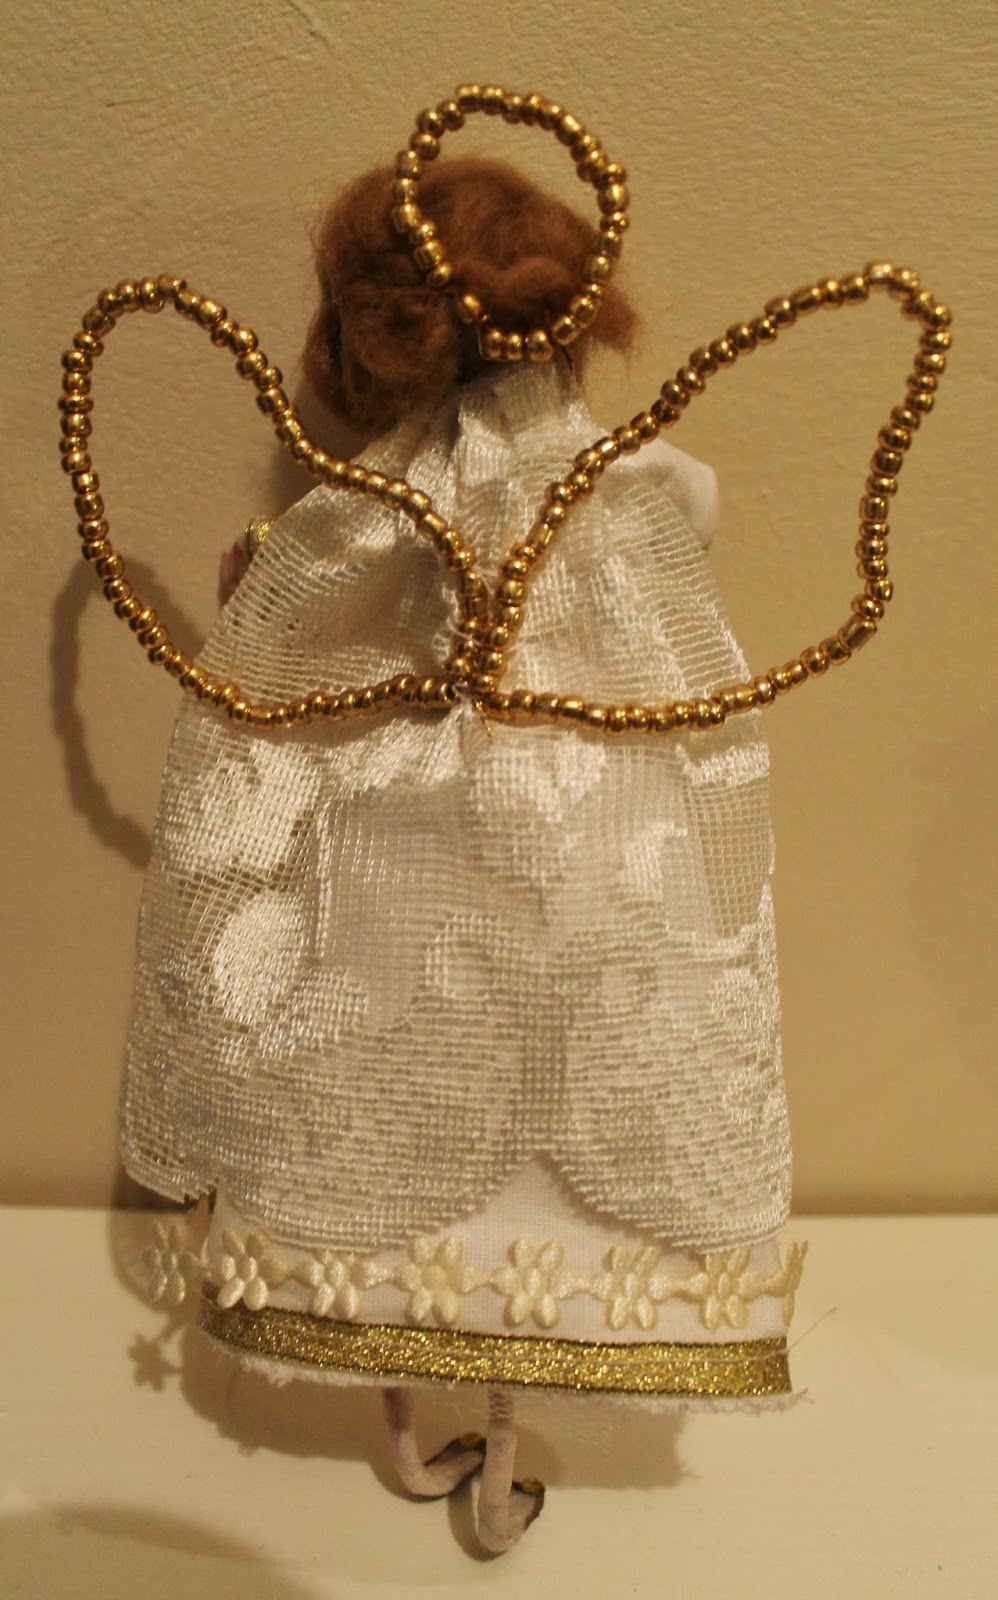
Finally I took some jewellery wire and some large seed beads, and created a halo and some wings.  (I would have used smaller seed beads, but it was such a nightmare trying to thread them on the wire, that I swopped to the large ones!)
 
Hope you like her!


Back of Angel

 
I am half tempted to make some little choirboys to go with her - my mum and I used to make them many moons ago with table tennis ball heads and a cone of cardboard covered with felt  (it was probably a Blue Peter idea originally, but I can't remember!).

Finally - I created a Christmas Card from the top photo using CAP2.  I took her into cut-out studio and took out the background.  I then put her into a bauble, using a free snow globe kit from:
http://lowcountryscrapper.com/blog/
and the other elements were from a kit by:
 http://waterloproject.blogspot.co.uk/search/label/Advent%20Factory.  Do check them out.


Thanks for dropping by.

Saturday, 29 June 2013

Slate Heart and playing with my new toy!


I saw this slate heart in The Works yesterday whilst stocking up on some canvasses - well it would be rude not to buy it wouldn't it.  So whilst my daughter was painting her Paverpol owl canvas, and my eldest granddaughter was painting a door hanger and a pencil container, I managed to get this painted whilst we played in My Den.
 
I used Sheena's paint fusion daisy stamp, and then did some freehand leaves and the roses.  When finished it had a quick coat of Crafter's Companion spray and shine.
 
I think I need to nip to town tomorrow and see if they have any left and buy them up!
 
............
 
 
AND to show how varied my day has been, I got to play with my new toy - a new computerised sewing machine.  I haven't used one in earnest for some years - gone are the days before I was married when I made all my own clothes.  In those days would meet friends and my husband on a Saturday lunchtime - (although obviously he was only my boyfriend then) - and we would decide where we were going to go in the evening, and I would nip across to the local material shop, buy some material and catch the 3 pm train home, and by 8pm I would have a new dress made, ready to go out on the town!  Those were the days!  
 
I have only bought a new machine, as my old machine - a 21st Birthday present has failed to proceed - such a shame as it did a lot of the fancy stitches this one did and was top of the range in its day - and probably cost a lot more than this one at the time!
 
I didn't actually make anything, but played about with learning how to use it and tried a few of the fancy stitches:
 
practising!
 
now comes the decision ....... what to make!

Sunday, 2 June 2013

Material Flowers - Work in Progress.

First Attempt
 
I wanted to make some little brooches/hair clips and made my first purchase of some fat quarters yesterday!  A couple of hours later I had made my first flower.  I wasn't too sure about my first effort.
 
I then made another one with slightly smaller petals, and made 6 this time (although the instructions said five.)  Not sure which one I prefer - five petals is more natural, but six makes more sense using two colours.  So it is work in progress - I shall try the smaller petals again, but five all the same colour!


Second Attempt on right