Going Green Blog Background

Tuesday, 25 February 2020

Fabric Painting


My daughter and I had a "play" day last week - rare occurrence these days  We decided to do some fabric painting with some of the kits I had from Pink Ink Designs.

These are my efforts.   First picture shows the mouse fairy in progress, and the next picture is the decoupaged section which is to be added.  It looks a mess in the photo, but when cut out looks entirely different.   The decoupage elements, were also painted with fabric decoupage glue, which when dry stiffens them.


decoupage elements

and here is the finished piece.  I confess I cheated and glued the tiny tiny beads on to the flowers, as I really couldn't see to sew them on!    I may add a bit of embroidery on her dress as some point in the future.  She will then be mounted either in a picture frame or an embroidery hoop.


I also painted this one.  Eventually she too will have some embroidery added, and will be mounted - either in a white frame or an embroidery hoop.


Monday, 24 February 2020

Handpainted Card


 A A5 hand painted card from me today.   Painted in folk art style with acrylics, and IndigoBlu Luscious Powders added to create the background.   Watercolour card was then edged with an ink pad, and mounted on pearlised cardstock.

Friday, 21 February 2020

Gold and White Card


A quick little card using up some of my stash.   (Not a good photograph as the corner peel-offs caught the light a tad.)

Thursday, 20 February 2020

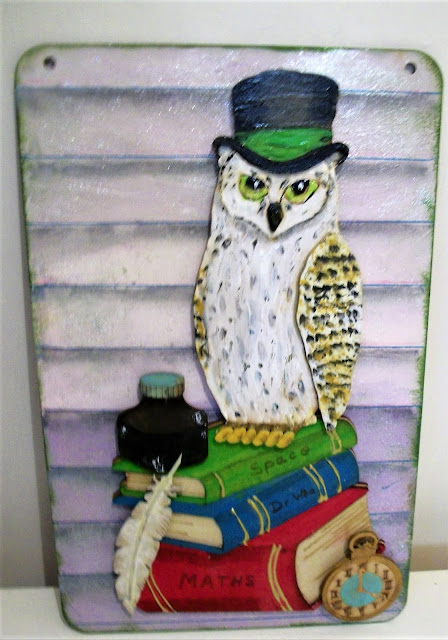
Owl Plaque


I had fun with some paint techniques and shading on this project.    Am still trying to decide if it needs something in the space on the top left though.  I feel it needs some wording or a picture.

Friday, 14 February 2020


A card today for one of my granddaughters.    The bottle and glass images and part of the background (fizz, pop bubbly and bubbles from glass and bottle) were created with John Next Door dies. The background part being die-cut into the white card so that the gold matting paper could be seen through it.  The wine glass was cut from acetate.   I then added the sentiment using a Clarity die, and finished off with some  peel-offs and butterflies from my stash.  The topper was then mounted on a cream pearlised card blank.

Thursday, 13 February 2020


A card for an old school friend today.   Stamped on water-colour card using Craftascope stamps and painted with Nuvo inks.   Background created with Artistry Inks.   I chose this stamp as it reminded me of forget-me-nots, which I though was very apt for a friend of some 65 years!

Thursday, 6 February 2020

MDF Trunk

Front

Hi all.  Thanks for popping in.  Today's make is a trunk (or large box) that I have been working on.  The MDF box was from Madhatters Crafts.  I have a lot of magazines piled on a table and I thought this was ideal for storing them in a tidy fashion.

Rather than paint it I decided to use some paper/card. I needed some A3 to cover the largest section of the box - so it was raid my craft stash.    20 years ago we used this green leather effect card for my daughter's wedding invitations, and I loved it so much, that I bought some extra card when we visited the Paper Mill on year at the Clark's Village.  It was perfect what I had in mind.


Back showing hinges

The trims. hinges and clasp all just had gilding Pebeo gilding wax applied in a deep gold that looked like brass.  I applied it fairly randomly so that it looked a bit "worn/aged" in places.

I must add that the hinge mechanism is brilliant.

Side view showing faux handles


Although I think I actually built the handles the wrong way (I believe there should actually be a gap between the "strap" and the box - but hey ho it doesn't matter I wouldn't have used them as handles as such anyway when it was full.   I created a leather strap with Hearty Clay.  The strap mould I had wasn't wide enough so I used the dragon skin mould to create a "croc skin" finish, which I then painted with brown acrylic paint.   The whole thing was then sprayed with Crafters Companion Spray and Shine.  This made the card shine, and although it was a bit "patchy" in places, it added to the "aged" look.

I have just to to finish the lining of it now - with some more A3 paper from my stash which is a sort of pale green marble effect.


Monday, 3 February 2020

Die cut Birthday Card


Birthday card today using the January member's club die from Clarity Stamps.  Cut into the card and backed with Clarity Designer parchment in pink and blue shades.   The sentiment was also cut from the same parchment.