Going Green Blog Background

Thursday, 31 October 2019

The Finished Robots


Well, I have finished the Robots (excuse the pictures, not brilliant, and couldn't take a photo of them all in one go!) - but hopefully you will get the idea  .)

As you may recall there were a lot of little pieces, so as the items are for a small boy - I decided to "build" most of the figures and divide them into "head" and bodies".  He can mix and match them as he likes.


It has taken a while to paint and decorate them (both sides) and give them a coat of varnish.   the next job will be to make or preferably find a wooden box to put them in and paint that, so watch this space.


Wednesday, 30 October 2019

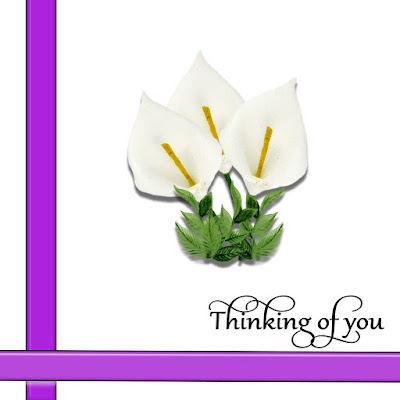
Sympathy Card


Just a simple card today - one of those that we don't like to do.   Thank goodness for Craft Artist.  this was the topper, and I added a little glitter glaze to the flowers on the actual card.

Tuesday, 22 October 2019

Work in Progress - Robots


 I thought I would share a little glimpse of work in progress on a little project I am working on.  Did I say little - erm well maybe strike that.   I started this a couple of weeks ago and sort of lost my mojo, and the items have been sat on the table for a couple of weeks.

It does take a while, as I needed to paint the back and the fronts, and I began to lose the will to live!  (Crafters will relate to this as we are an impatient lot and want everything to dry immediately)?

I finally found some mojo yesterday and finished painting the reverse sides (well most of them - I have found a few I missed, which will be rectified in due course).   I then started to add some decoration - the fun part.   I used Posca pens, Craft Artist Glitter Touch, and some Nuvo drops.


Since taking these photos I found my stash of googly eyes - the heads are now coming to life.   The next job will be to add the arms and legs to the bodies.   The aim is to create a sort of game for a little lad, so that he can mix and match bodies and the heads.

As you can see this is going to be a longish project, and once I have finished all the fronts, I will really need to attempt some sort of decoration to the back, and then varnish the whole lot.    So watch this space!


Monday, 21 October 2019

A Quick Anniversary Card


I had a mad panic this morning, when I realised it was the wedding anniversary of two very old friends.  Me bad, as it was on the calendar!  (Fortunately they live just down the road, so I was able to personally deliver the card.)

I quickly made a vellum flower with my Clarity dies and matching Groovi board.    The white work could have done with a bit more work on it, but time and my eyes were not on my side.    I found some peel-offs in my stash that were just right.    I think we tend to forget those these days, as the have gone out of fashion a bit.    However, I do occasionally use peel-offs  what is the point of them sitting in a box unused?

Sunday, 20 October 2019

An Idea Works!


I repainted one of the earlier paintings, and changed it slightly, adding a gate and some birds as well.  I then wanted to change it to fit a circular aperture on some card blanks I had.  I created a custom-sized page in Craft Artist to be slightly bigger than the aperture. 

 I scanned the painting and having imported it into Craft Artist, I resized it to fit, and then used the punch tool in the programme to punch out an image to the size of the aperture.


I got the "punching" slightly wrong for this card, although it is perfectly fine as it is.    I had another little play with adjusting the size of the "page" I was working on, and this time I got a better "punched" image:

Punched image


That was better, I have the tree in on this one; although in both cases, I managed to cut my signature off - I shall rectify that and scan it in again.   The card below was the result of this second attempt.   Now to decide whether to add a sentiment to the actual picture, or just stamp one onto the card.  I might even die-cut a frame for the aperture, but the main thing is the idea worked, and I can change it as I wish.

 . 


Saturday, 19 October 2019

A watercolour Christmas Card


I had an idea.   Could I turn one of my paintings into a Christmas Card using Craft Artist ...... Well the answer is yes.

I scanned the painting, imported it into Craft Artist, having created a page the just slightly larger than the aperture on a card blank I had.  I re-sized it to fit.  I then added a sentiment.   Ta da printed and trimmed to fit the aperture.

I shall be trying some more of these.

Friday, 18 October 2019

Two more Watercolour Paintings


Not quite as good as my very first attempt, but I know I where I went wrong, and can paint them again.  Practise makes perfect as they say ....... well as perfect as I can get.


 I definitely need more practise on fir trees, but at least the barn looks like a barn.   The sky could do with a bit more blending too, but hey ho it is only a piece of watercolour paper.   My excuse was that I wasn't feeling up to par, the weather and the light to paint was awful.

However, watch this space in a couple of days - I have had a brainwave (as well as repainting one of the earlier paintings).

Thursday, 17 October 2019

Anniversary Card

 
A card for a mathematician and her husband.    The card blank was masked off and the background created with an AALL & Create stamp (stamped a couple of times).  I then drew around the stamped images with a Sakura glitter pen.   I created the sentiments in Craft Artist, and glazed them. 

The flower was made with coloured parchment and the new Clarity picot flower dies and matching Groovi plate and affixed to the card with a little gem brad. 

I fell in love with the picot flower dies and marching Groovi plates, and treated myself to a couple.   I know my eyes aren't good enough these days to cope with parchment work on a large scale, but as I have some Groovi products, I thought I could probably cope with doing something on a small scale like the flowers.   I was pleased that I managed it.

Wednesday, 16 October 2019

More Watercolour Snow Scenes


I have attempted another couple of watercoloured snow scenes.   Not completely happy with them - mainly because the drawing pen was set a little wide for the masking fluid on the trees, but hey ho it's only paper so I can do them again.  Apart from the little booboo, I am quite pleased with them.

They were also much smaller this time, as I did them on a postcard-sized piece of watercolour paper, which is actually more difficult than painting something a bit larger.


I have two more demos to watch - so will share the results when I have done that - if I get some good results, I will sign my paintings, and possibly photocopy them and use some for Christmas card toppers.  If I can improve on the top one, I think it would make a good Christmas card, with a sentiment added.

Monday, 14 October 2019

A Watercoloured Snow Scene


Although the weather was awful this afternoon and the light wasn't good I decided to rewatch the Matthew Palmer shows on Hochanda and try and create one of the paintings he demonstrated.

So here it is my first attempt at painting a watercoloured snow scene.   I confess I am pretty pleased with the result.  I am also in love with the new Schminke aqua-shine.   It might not show up that well in the photo but in real life the snow and sky have a glisten to them.

The picture is created using just three colours, natural yellow, natural brown and natural violet.   I can't wait to try the next four demos.

Sunday, 13 October 2019

Grandchildren's Art Journals


7 yr old

I had a couple of the grandchildren for a sleepover, and they wanted to craft - so I let them have a couple of my art journals, and they created these covers for them.    Didn't they do well.

10 yr old
They gessoed the covers and then added Pebeo Violet/Blue DYNA paint.   The created the embellishments with Hearty Air dry clay and Katy Sue Mould;  which one painted with Posca pens, and they both applied Pebeo gilding wax to them.   They then created dots using the Royal Talens Effect Liners/

Tuesday, 8 October 2019

Messing about in my Art Journal


I seemed to have lost my crafting mojo recently, but having watched Lou Withers yesterday on Hochanda, and decided to get our my Art Journal and play.   A bit rubbish (although loads of people on the group I belong to on Facebook loved it - what's that all about?)

One of the group mentioned her art journal, which she calls her "I don't care" journal.  Love that idea - so that's what mine will become!

Anyway - how did I create this "mess"?    The background was created with Brushos and a spritz of water.   I then picked out various shapes in the colours and doodled around them with fine liner pens and Posca pens.   The white swirl at the top was created using a glue pen and white embossing powder.   I also added a few bits of gold leaf and some odd doodling with the new Craft Artist Glitter Touch . (I love these - my new favourites).

Friday, 4 October 2019

Mens Birthday Cards

Have you missed me regular followers?  So sorry if you have - life has been a bit fraught of late with personal stuff , and losing my crafting mojo!     I am also coming to terms with not being able to drive anymore' so had to say goodbye to my beloved car.  After 58 years of driving a new lifestyle is taking a little while to get used to.  Crafty stuff has been in abeyance for a while, although I have some work in progress.  Hopefully I will get back to it soon - at least the weather is preventing me from sorting the garden, although it also means that I can't craft outside for a while!  At least I have no excuse not to make a start on Christmas Cards.  (sorry about the "C" word).

Anyway, I managed to make a couple of quick cards today for a couple of male relatives.   Thank goodness for Craft Artist as inspiration was definitely missing today.   (I did personalise the inserts slightly though).


and I did a quick variation on a theme for the second one!